
How to Make a Solar Oven for S’mores: The Sweetest Backyard Science Project
No campfire? No problem. This DIY solar oven turns sunshine into gooey, chocolatey s’mores magic.
When summer shows up hot enough to make the driveway shimmer, it is officially time to put that sunshine to work. This easy DIY solar oven for s’mores is part backyard science experiment, part summer dessert recipe, and part “look what we made with a pizza box” family bragging rights.
Learning how to make a solar oven is one of those simple summer activities that feels bigger than the supplies on the table. A cardboard box, aluminum foil, plastic wrap, black construction paper, and a little patience turn into a homemade solar cooker that can warm marshmallows, melt chocolate, and create the kind of sticky-finger memories kids talk about long after the graham cracker crumbs disappear.
This homemade solar oven is especially perfect for days when a real campfire is not practical. Maybe it is too hot. Maybe the backyard fire pit is not an option. Maybe it is a high-burn day and open flames are off the table. Either way, solar oven s’mores let the family enjoy the classic campfire treat without matches, smoke, or hunting for roasting sticks in the yard.
It also makes a fun addition to a summer activity day, backyard party, homeschool science lesson, scout activity, camping weekend, or Father’s Day cookout. For more cookout-friendly ideas, browse the Father’s Day Ideas hub for recipes, backyard fun, and family-friendly ways to celebrate Dad.


Why You’ll Love This DIY Solar Oven for S’mores
This solar oven s’mores activity checks all the best summer boxes: easy supplies, hands-on learning, minimal cleanup, and dessert at the end. That is the kind of science project everyone can get behind.
It is also wonderfully low-pressure. The oven does not have to be perfect. The foil may wrinkle. The plastic wrap may need an extra strip of tape. Someone will probably ask every thirty seconds if the marshmallows are ready. That is all part of the charm.
Here is why this homemade solar oven deserves a spot on the summer bucket list:
- It uses simple supplies. A pizza box, foil, plastic wrap, black paper, tape, and glue are the stars of the show.
- It is a screen-free family activity. Kids can build, observe, predict, check, and taste.
- It teaches basic science naturally. Sunshine, reflection, heat absorption, insulation, and patience all show up without feeling like homework.
- It makes s’mores without a campfire. Perfect for backyards, patios, high-burn days, or afternoons when building a fire is not happening.
- It is party-friendly. Set up a few solar ovens and let kids make their own solar oven s’mores at a summer gathering.
- It creates memory-making mess. The good kind. The chocolate-on-smiling-faces kind.
If the family loves marshmallow desserts, this activity pairs beautifully with Ooey-Gooey Brownie S’mores for a no-campfire dessert spread or a chilly Toasted Marshmallow Milkshake Recipe when the day calls for something frosty.
What Is a Solar Oven?
A solar oven is a simple cooker that uses sunlight as its heat source. In this version, the foil reflects sunlight into the box, the black paper helps absorb heat, and the clear plastic wrap helps trap warmth inside. The result is a kid-friendly homemade solar oven that can gently warm marshmallows and melt chocolate for s’mores.
This is not meant to replace a kitchen oven, and it will not behave exactly like one. Think of it as a sunny-day science activity with a delicious payoff. The temperature inside the box depends on the weather, the angle of the sun, the seal around the plastic wrap, and how well the oven is positioned.
Bright, direct sunlight works best. Cloudy days are not ideal for this project, but they do provide a handy lesson in why solar energy needs strong sun exposure to work well.
Solar Oven Materials
These are the basic supplies needed to build a simple pizza box solar oven. Repurposed materials work beautifully, which makes this a budget-friendly summer activity.
- 1 large box, such as a clean pizza box
- Pencil
- Ruler
- Craft knife, for adult use only
- Aluminum foil
- Scissors
- Glue stick
- Black construction paper
- Clear packing tape
- Clear plastic wrap, pulled tightly
- Stick, skewer, ruler, or dowel to prop open the flap
Best Box to Use for a Homemade Solar Oven
A pizza box is the classic choice for a DIY solar oven because it already has a hinged lid, a shallow base, and enough surface area to hold several s’mores. A clean pizza box works best, but any shallow cardboard box with a lid can work.
If using a deeper box, the solar oven may take longer to warm because the sunlight has farther to travel and the heat has more space to fill. For younger kids, a pizza box is usually the easiest to cut, tape, and manage.
How to Make a Solar Oven
Building a solar oven is simple, but an adult should handle the cutting. Once the flap is cut, kids can help with foil, tape, paper, and assembling the s’mores.
Step 1: Draw the Solar Oven Flap
On the top of the box, use a ruler and pencil to draw a square that is about one inch smaller than the lid on all sides. This creates the reflective flap that will direct sunlight into the oven.
Step 2: Cut Three Sides of the Flap
Using a craft knife, carefully cut along three sides of the square. Do not cut the fourth side. That uncut edge becomes the hinge. Fold the cardboard flap upward along the uncut line.
Safety note: The craft knife step should be done by an adult. Kids can help decorate, tape, glue, and assemble once the cutting is complete.
Step 3: Add Aluminum Foil to the Flap
Glue aluminum foil to the underside of the cardboard flap with the shiny side facing out. Try to keep the foil as smooth as possible so it reflects sunlight into the box more effectively.
Step 4: Line the Bottom of the Box
Glue another piece of foil to the inside bottom of the box. Then place black construction paper on top of the foil and tape it in place. The black paper helps absorb heat, which helps warm the s’mores.
Step 5: Cover the Opening with Clear Plastic
Tape clear plastic wrap to the underside of the lid, sealing the opening created by the flap. Pull the plastic wrap as tightly as possible and tape all edges securely. A tighter seal helps trap heat inside the solar oven.
Step 6: Place the Solar Oven in Direct Sunlight
Set the solar oven outdoors in bright, direct sunlight. Open the foil-covered flap and angle it toward the sun. Use a stick, skewer, ruler, or dowel to prop the flap open.
The goal is to reflect sunlight through the plastic-covered opening and into the box. If the sun shifts, adjust the oven every so often to keep the light shining into the cooking area.
Ingredients for Solar Oven S’mores
Once the solar oven is built, it is time for the sweet part. These solar oven s’mores use the classic trio: graham crackers, chocolate, and marshmallows.
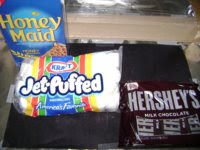
- Graham crackers
- Milk chocolate bars
- Large marshmallows
HERSHEY’S Milk Chocolate bars are the nostalgic choice here, but any favorite chocolate bar can work. Thin chocolate melts faster, which is helpful because a solar oven warms more gently than a campfire or kitchen oven.
How to Make S’mores in a Solar Oven
Making s’mores in a solar oven is part recipe, part observation game. The timing depends on the strength of the sun, outdoor temperature, wind, and how tightly the oven is sealed.
Step 1: Build the Bottom Layer
Place one graham cracker square flat side up on the black construction paper inside the solar oven. Top it with one or two marshmallows.
If making several s’mores at once, leave a little space between each one so the warm air can circulate. A pizza box solar oven can often fit several graham crackers at a time, depending on the size of the box.

Step 2: Close the Lid and Aim the Flap
Close the lid so the plastic wrap covers the opening. Prop the foil flap open and angle it toward the sun. The sunlight should bounce off the foil and into the box.
Step 3: Let the Marshmallows Warm
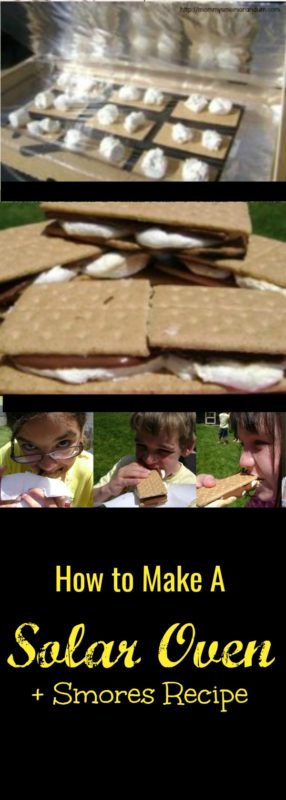
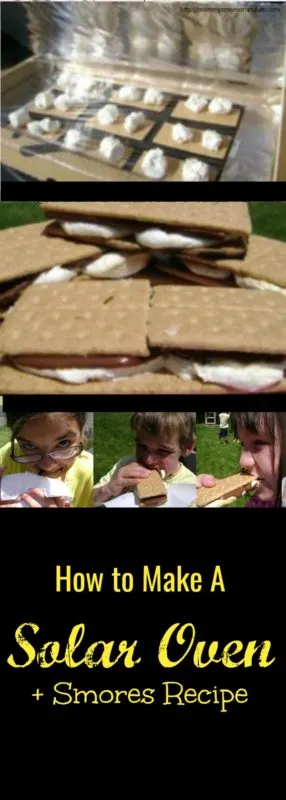
Let the marshmallows sit in the solar oven until they soften. They may not brown like campfire-roasted marshmallows, but they should become warm, puffy, and gooey.
This can take several minutes or longer depending on the weather. On very hot, sunny days, the process moves faster. On mild days, patience becomes part of the recipe.
Step 4: Add the Chocolate
Once the marshmallows are gooey, add chocolate to another graham cracker square and place it in the solar oven to soften. Thin pieces of chocolate can melt quickly in a warm solar oven.
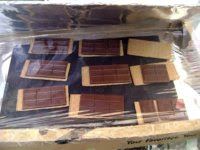
Step 5: Assemble the Solar Oven S’mores
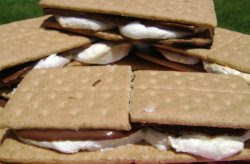
Carefully remove the graham crackers from the solar oven. Press the gooey marshmallow graham cracker onto the chocolate-topped graham cracker and gently smoosh together.
This is the moment when the science lesson becomes dessert. It is also the moment when napkins become very important.
Expert Tips for the Best Solar Oven S’mores
A homemade solar oven is simple, but a few small tricks make a big difference.
Use Bright, Direct Sunlight
Solar ovens need strong sun. Midday or early afternoon usually works better than morning or evening because the sun is higher and stronger.
Keep the Foil Smooth
Smoother foil reflects light better. It does not have to be perfect, but fewer wrinkles can help direct more sunlight into the box.
Seal the Plastic Wrap Tightly
The plastic wrap acts like a window. A tight seal helps trap heat inside the box. Use extra tape around the edges if needed.
Use Black Paper on the Bottom
Black construction paper helps absorb heat. This is one of the most important parts of the homemade solar oven setup.
Cut Chocolate into Smaller Pieces
Smaller or thinner pieces of chocolate melt faster, which is helpful when using solar heat.
Rotate the Oven as the Sun Moves
The sun shifts throughout the day. Check the oven occasionally and adjust the angle so the foil flap keeps reflecting light into the box.
Be Patient
A solar oven is slower than a microwave, oven, or campfire. That is part of the fun. Kids can observe changes, make predictions, and check progress along the way.
Variations and Creative Ideas for Solar Oven S’mores
Classic s’mores are always a win, but once the solar oven is built, it is easy to turn this into a full dessert experiment.
Peanut Butter Cup Solar Oven S’mores
Swap the chocolate bar for a peanut butter cup. It melts into a sweet, salty, gooey center that tastes like summer camp got fancy.
Caramel Chocolate S’mores
Add a small piece of caramel-filled chocolate or a thin drizzle of caramel sauce after the chocolate softens. For a homemade touch, pair the s’mores with A&W Root Beer Float Recipe night and set up a full backyard dessert bar.
Strawberry S’mores
Add thin strawberry slices after the s’mores come out of the solar oven. The berries add freshness and make the dessert feel a little more picnic-perfect.
Cookies and Cream S’mores
Use cookies and cream chocolate or add crushed chocolate sandwich cookies before sandwiching the s’mores together.
Brownie Solar Oven S’mores
Add a small brownie square between the graham cracker and marshmallow for an extra-rich treat. For a full-sized dessert version, try Ooey-Gooey Brownie S’mores.
Marshmallow Lover’s S’mores
Use extra marshmallows or pair this activity with The Easiest Marshmallow Frosting Ever for a marshmallow-themed dessert day.
Serving Suggestions
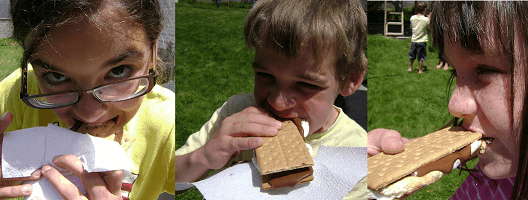
Solar oven s’mores are best served immediately while the chocolate is melty and the marshmallows are warm. They are casual, messy, nostalgic, and absolutely meant to be eaten outside.
Serve them as part of:
- A backyard summer science day
- A Father’s Day cookout
- A camping-themed birthday party
- A family picnic
- A homeschool solar energy lesson
- A scout activity
- A screen-free summer afternoon
- A backyard movie night
For a full summer dessert spread, serve solar oven s’mores with Toasted Marshmallow Milkshake Recipe, A&W Root Beer Float Recipe, or Root Beer Cupcakes Recipe.
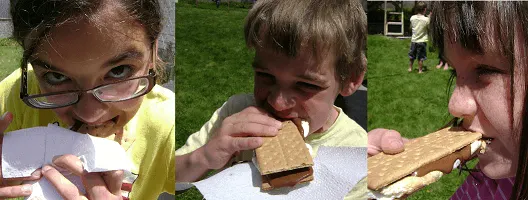
Solar Oven Science for Kids
This project is a fun way to talk about solar energy without turning the afternoon into a lecture. Kids can see how sunlight becomes heat and how different materials help that process.
The foil reflects sunlight into the box. The black paper absorbs heat. The plastic wrap helps trap the heat inside. Together, those simple materials create a warm space that can soften marshmallows and melt chocolate.
Try asking simple observation questions while the s’mores warm:
- What happens when the foil flap points directly at the sun?
- What happens if a cloud covers the sun?
- Does the chocolate melt faster in large pieces or small pieces?
- Does the oven feel warmer when the plastic wrap is sealed tightly?
- How does the black paper feel compared with plain cardboard?
That is the beauty of this activity. It gives kids a reason to notice, wonder, test, wait, and then eat dessert. Not a bad lesson plan.
How Long Does It Take to Make S’mores in a Solar Oven?
Solar oven timing varies. On a very hot, sunny day, chocolate may soften in just a few minutes, while marshmallows may take longer to become warm and gooey. On cooler or partly cloudy days, the process can take significantly longer.
For best results, start checking after about 5 minutes, then continue checking every few minutes until the marshmallows are soft and the chocolate is melty. If the s’mores are not warming well, reposition the oven so the foil flap reflects stronger sunlight into the box.
Can a Solar Oven Toast Marshmallows?
A pizza box solar oven usually softens marshmallows more than it toasts them. The marshmallows become warm, puffy, and gooey, but they may not get the browned, blistered edges that come from an open flame.
That does not make them any less delicious. It simply means solar oven s’mores are more melty than charred. For families with kids who prefer lightly warmed marshmallows over smoky, flame-kissed ones, this can actually be a bonus.
Make It a Father’s Day Backyard Activity
This DIY solar oven makes a fun Father’s Day activity because it gives everyone something to do before dessert. Kids can build the oven, Dad can help aim the foil flap, and the whole family can check the progress between lawn games, burgers, and cold drinks.
Pair this activity with a backyard cookout and make it part of a full day of memory-making. For more Dad-friendly food, desserts, games, and celebration inspiration, head back to the Father’s Day Ideas hub.


FAQs About Making a Solar Oven for S’mores
Can a homemade solar oven really make s’mores?
Yes, a homemade solar oven can warm marshmallows and melt chocolate enough to make s’mores, especially on a hot, sunny day. It works more slowly than a campfire or kitchen oven, but that slower pace is part of the activity.
What is the best day to make solar oven s’mores?
A clear, sunny day with strong direct sunlight works best. Warm summer afternoons are ideal because the sun is bright and the outdoor temperature helps the oven heat more effectively.
Can this solar oven be used on a cloudy day?
A solar oven does not work well on cloudy days because it depends on direct sunlight. If clouds move in, the s’mores may take much longer or may not warm enough to melt the chocolate.
Do marshmallows brown in a solar oven?
Usually, marshmallows soften and puff rather than brown. A pizza box solar oven does not create the same direct flame or high heat as a campfire, so expect gooey marshmallows instead of toasted ones.
How can the solar oven get hotter?
Use smooth foil, seal the plastic wrap tightly, place black paper on the bottom, and keep the oven aimed toward direct sunlight. Adjust the angle as the sun moves.
Can kids make this solar oven by themselves?
Kids can help with most of the project, but an adult should cut the cardboard flap with the craft knife. Once the cutting is done, children can help glue foil, tape plastic wrap, place the black paper, and assemble the s’mores.
What kind of chocolate works best for solar oven s’mores?
Thin milk chocolate bars melt well and give the classic s’mores flavor. Smaller pieces soften faster than thick chunks, which helps when using solar heat.
Can this be made ahead of time?
The solar oven can be built ahead of time and stored flat until ready to use. Assemble the s’mores right before warming so the graham crackers stay crisp.
Is this a recipe or a science project?
It is both. This homemade solar oven teaches basic solar energy concepts while ending with a classic summer dessert. That is exactly the kind of multitasking summer deserves.
More Summer Dessert Ideas
If this solar oven s’mores activity has everyone craving more chocolate-marshmallow fun, try these reader-friendly treats next:
- Ooey-Gooey Brownie S’mores
- Toasted Marshmallow Milkshake Recipe
- A&W Root Beer Float Recipe
- Root Beer Cupcakes Recipe
- The Easiest Marshmallow Frosting Ever
Final Thoughts: Sunshine, S’mores, and Sticky-Finger Memories
Learning how to make a solar oven is one of those simple summer activities that proves family fun does not need to be complicated. A cardboard box becomes an oven. Sunshine becomes the heat source. Graham crackers, chocolate, and marshmallows become dessert. Somehow, the whole thing feels like a tiny backyard adventure.
These solar oven s’mores are perfect for summer afternoons, camping-themed parties, Father’s Day backyard fun, scout projects, homeschool science lessons, or any day when the family wants something sweet without building a fire.
It is easy, affordable, memorable, and just messy enough to count as a proper childhood experience.
Disclosure of Material Connection: This post was part of my participation in the HERSHEY’S CAMP BONDFIRE campaign. I received one or more of the products or services mentioned above for free in the hope that I would mention it on my blog. Regardless, I only recommend products or services I use personally and believe will be good for my readers. I am disclosing this in accordance with the Federal Trade Commission’s 16 CFR, Part 255: Guides Concerning the Use of Endorsements and Testimonials in Advertising.
This recipe was originally published Jun 4, 2012, and updated June 12, 2026, with improved instructions, updates, and new photos.