
4.7 from 89 votes
How to Do a Stem Stitch: Easy Step-by-Step Embroidery Tutorial
A stem stitch is a beginner-friendly embroidery stitch made by overlapping small stitches to form a smooth, slightly twisted line that works beautifully for flower stems, vines, curves, lettering, and decorative outlines.
This easy stem stitch tutorial walks you through the process step by step, including how to position the needle, keep the stitches even, follow curves, turn corners, and avoid the common mistakes that can make the finished line look uneven.
You only need fabric, embroidery floss, a needle, scissors, and an embroidery hoop to begin. Once you understand where the needle should come up through the previous stitch, the motion becomes rhythmic and surprisingly relaxing.
Jump to the Stem Stitch Tutorial
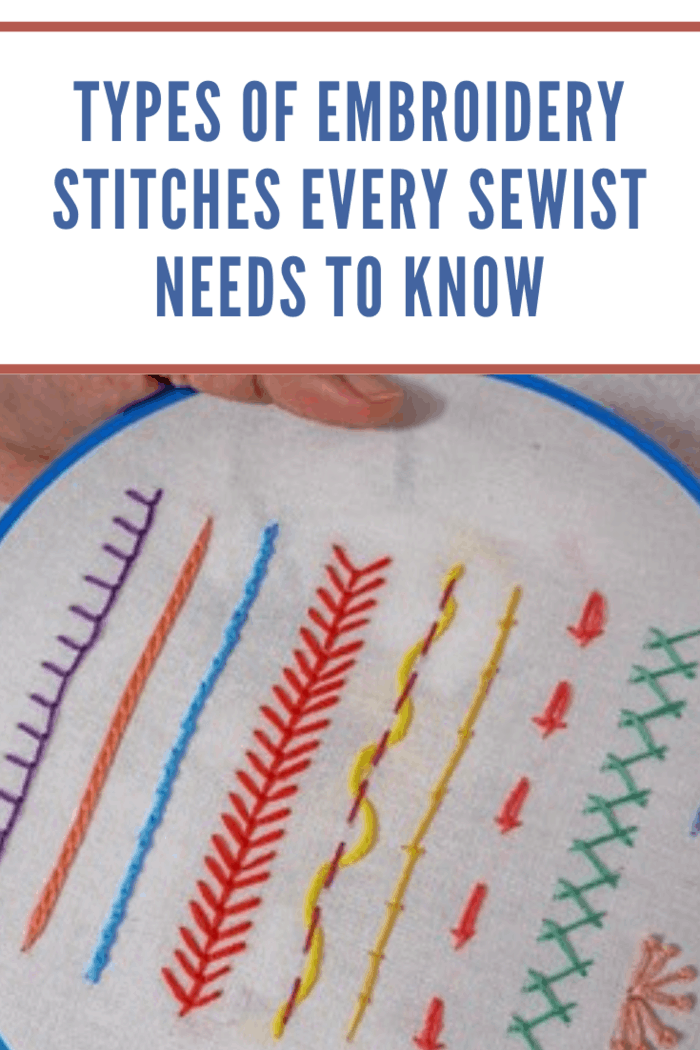
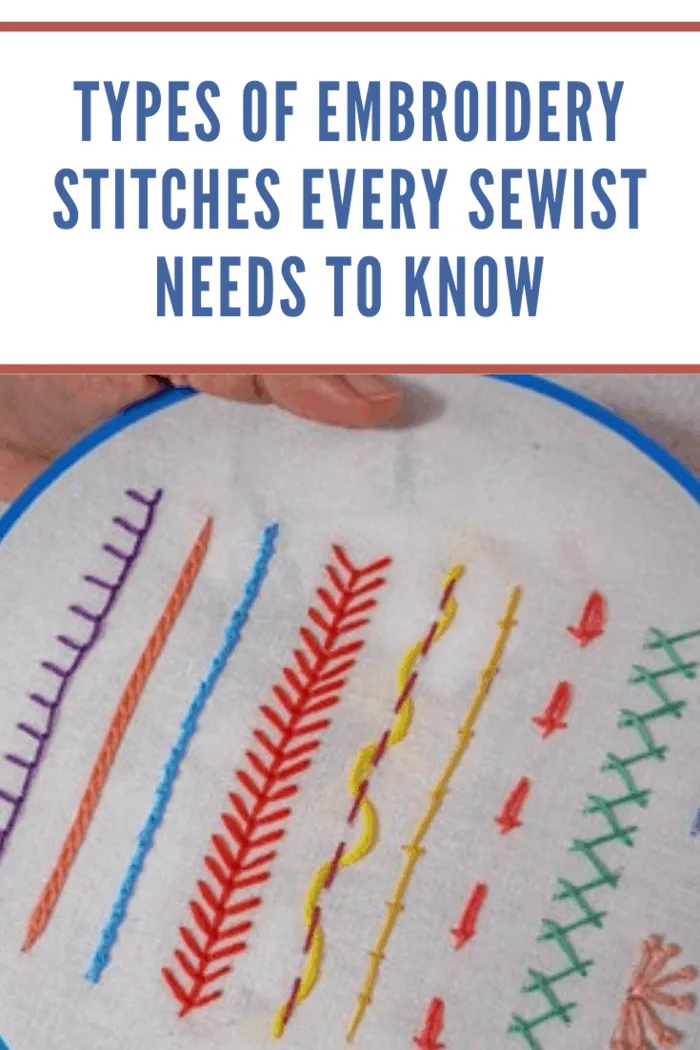
How to Do a Stem Stitch by Hand
To make a stem stitch, bring the needle up through the fabric at the beginning of your marked line. Insert the needle one stitch-length ahead, then bring it back up approximately halfway along the stitch while keeping the working thread on the same side of the needle.
Repeat that movement along the line. Each new stitch overlaps part of the previous stitch, creating the twisted, rope-like appearance that makes the embroidery stem stitch so recognizable.
The secret is consistency: keep the thread on the same side, use similar stitch lengths, and avoid pulling the floss so tightly that the fabric puckers.
Readers Also Make These Beginner Embroidery Stitches
Building your hand-embroidery skills one stitch at a time? Practice the running stitch by hand for simple dashed lines, learn how to do a backstitch for solid outlines, or explore these essential types of embroidery stitches.
Why You’ll Love the Stem Stitch
- It is beginner-friendly: The repeating motion is easy to learn once you understand the stitch placement.
- It creates smooth curves: Short, slightly overlapping stitches follow rounded shapes more naturally than many straight-line stitches.
- It adds subtle texture: The finished line has a delicate twisted appearance rather than looking completely flat.
- It works for many designs: Use it for stems, vines, borders, lettering, branches, tendrils, and decorative outlines.
- It is easy to customize: Change the number of floss strands, stitch length, or thread color to create different effects.
Stem Stitch Supplies
You do not need an overflowing sewing basket to try this basic embroidery stitch. A few simple supplies will get you started.
- Embroidery hoop
- Embroidery or crewel needle
- Embroidery floss in your chosen color
- Cotton, linen, muslin, or another embroidery-friendly fabric
- Small, sharp embroidery scissors
- Water-soluble fabric marker or erasable transfer pen, optional
How Many Strands of Embroidery Floss Should You Use?
Embroidery floss usually separates into six individual strands. For a fine, delicate stem stitch, use one or two strands. For a thicker vine, bold outline, or more visible lettering, try three or four strands.
Beginners may find two or three strands easiest to see and control while practicing.
How to Do a Stem Stitch Step by Step
- Prepare the fabric.
Place your fabric in an embroidery hoop and tighten it until the surface is smooth and comfortably taut. The fabric should feel secure without being stretched out of shape. - Mark your stitching line.
Draw a straight line, gentle curve, flower stem, or simple letter with a water-soluble fabric marker. A visible guide makes it easier to concentrate on stitch placement. - Thread the needle.
Cut approximately 18 inches of embroidery floss and separate the number of strands you want to use. Thread the needle and secure the end using your preferred starting method. - Bring the needle to the front.
Push the needle from the back of the fabric to the front at the beginning of your marked line. Pull the floss through gently. - Make the first stitch.
Insert the needle one stitch-length ahead on the marked line. Before pulling it all the way through, bring the needle point back up halfway between the starting and ending points. - Keep the working thread to one side.
Hold the loose working thread below the marked line as you pull the needle through. You may keep it above the line instead, but it must remain on the same side throughout the entire row. - Make the next overlapping stitch.
Insert the needle one stitch-length ahead of the point where the thread emerged. Bring the needle back up through the same opening where the previous stitch ended, or immediately beside it. - Continue along the design.
Repeat the forward-and-back motion, keeping the stitch lengths and tension as consistent as possible. The overlapping stitches will form a smooth, twisted line. - Finish the thread.
When you reach the end of the design, take the needle to the back of the fabric. Secure the floss beneath several existing stitches or use a small finishing knot, then trim the excess thread.
How the Stem Stitch Should Look
A properly worked stem stitch looks like a slim, gently twisted cord resting on top of the fabric. The stitches should overlap without obvious gaps, and the fabric should remain smooth rather than puckered.
The finished line may lean slightly to one side. That is part of the stitch’s charm and gives flower stems and vines a soft, natural appearance.
How to Keep Stem Stitch Length Even
Uneven stitch length is one of the most common challenges for beginners. Before stitching a finished project, draw a short practice line and add tiny dots at evenly spaced intervals.
Use each dot as an insertion point until your hands become familiar with the distance. For most beginner projects, stitches approximately 1/8 to 1/4 inch long are manageable.
Consistency matters more than choosing one exact measurement. Smaller stitches produce a tighter, smoother line, while longer stitches create a looser and more pronounced twist.
How to Stem Stitch Curves and Flower Stems
The stem stitch is especially useful for curved embroidery because the overlapping stitches flow naturally around bends.
Use shorter stitches as the curve becomes tighter. Long stitches may appear angular or leave small gaps along a rounded line. Turn the embroidery hoop as you work so the section you are stitching remains in a comfortable position.
For a flower stem, begin at the base and follow the marked line toward the bloom. Keep the working thread on the same side as you move around every bend.
How to Turn Corners With a Stem Stitch
For a gentle corner, shorten the stitches as you approach the turn and rotate the hoop gradually.
For a sharp corner, finish the current line at the corner point. Bring the needle back up through that same point, reposition the working thread, and begin the next line in the new direction. This creates a cleaner angle than trying to stretch one long stitch around the corner.
How to Start and Finish Stem Stitch Without Knots
Knots are convenient for a practice sample, but they may leave a bump on the back of a finished embroidery project.
To begin without a knot, leave a short tail of thread on the back of the fabric. Hold the tail in place and cover it with the backs of your first several stitches.
To finish, weave the needle beneath three or four completed stitches on the back of the fabric. Change direction once and pass beneath another stitch before trimming the floss. This keeps the thread secure without adding a bulky knot.
Expert Tips for a Smooth Stem Stitch
- Keep the working thread on the same side of the needle for the entire stitched line.
- Use shorter stitches on curves, circles, corners, and small letters.
- Turn the hoop as you work instead of twisting your wrist into an uncomfortable position.
- Pull the floss until it lies flat, but stop before the fabric begins to pucker.
- Use a blunt-tipped tapestry needle to reopen an existing hole if the embroidery floss becomes crowded.
- Practice on muslin or scrap cotton before beginning a keepsake project.
- Work in good lighting so you can see the previous stitch opening clearly.
Common Stem-Stitch Mistakes and How to Fix Them
The Stem Stitch Looks Uneven
Uneven lines usually happen when the stitch length changes from one stitch to the next. Mark evenly spaced practice points or slow down until the motion becomes more familiar.
The Stitch Is Twisting in Different Directions
The working thread probably changed sides. Keep it consistently above or consistently below the stitching line. Switching sides changes the direction of the twist and interrupts the smooth appearance.
There Are Gaps Between the Stitches
Bring the needle back up at the end of the previous stitch or very close to it. The stitches need to overlap slightly to create a continuous line.
The Fabric Is Puckering
Your thread tension may be too tight, or the fabric may not be secured evenly in the hoop. Loosen the most recent stitch gently and pull the floss only until it rests against the fabric.
The Curves Look Jagged
Shorten the stitch length around each bend. The tighter the curve, the shorter the stitches should be.
The Thread Keeps Tangling
Use a shorter piece of embroidery floss and allow the needle to hang occasionally so the thread can untwist. An 18-inch length is usually easier to manage than a very long strand.
Stem Stitch vs. Outline Stitch
Stem stitch and outline stitch use nearly the same needle movement. The primary difference is where you hold the working thread.
In stem stitch, the working thread is traditionally held below the stitching line. In outline stitch, it is held above the line. This changes the direction of the twist and can slightly change the appearance of the finished line.
The terminology is sometimes used interchangeably, so the most important rule is to keep the thread on one consistent side from beginning to end.
Stem Stitch vs. Backstitch
A stem stitch creates a textured, slightly twisted line that works especially well for natural curves, vines, and flower stems.
A backstitch creates a flatter, solid line with stitches that meet end to end. It is often the better choice for crisp outlines, detailed shapes, and small lettering.
Stem Stitch vs. Running Stitch
A running stitch produces a simple dashed line with visible spaces between the stitches. It is quick and useful for outlines, gathering, quilting, and decorative details.
The stem stitch overlaps, producing a continuous textured line without the regular gaps associated with running stitch.
Stem Stitch Variations and Creative Ideas
- Whipped stem stitch: Wrap a contrasting thread around the completed line for added color and texture.
- Two-color stem stitch: Alternate floss colors to create playful vines or decorative borders.
- Thick stem stitch: Use more strands of embroidery floss for bold lettering and prominent outlines.
- Fine stem stitch: Use one strand and tiny stitches for miniature flowers or delicate details.
- Layered stems: Stitch two lines side by side to create wider branches or dimensional borders.
- Variegated floss: Let the changing thread color add shading to vines, stems, and script lettering.
Projects That Use Stem Stitch Embroidery
Once you know how to stem stitch, you can use it in all sorts of charming handmade projects:
- Flower stems and leafy vines
- Botanical embroidery patterns
- Cursive names and monograms
- Decorative tea towels
- Embroidered napkins
- Handmade ornaments
- Quilt labels
- Hoop-art gifts
- Clothing embellishments
- Handkerchiefs and keepsakes
- Decorative borders
- Nature-inspired wall art
A small hoop filled with embroidered wildflowers makes a lovely handmade gift. The stem stitch gives each vine and flower stem just enough texture to stand out without overwhelming the design.
Perfect With a Seasonal Hand-Embroidery Project
Use the stem stitch for spring wildflowers, summer garden vines, autumn branches, Christmas greenery, personalized gift tags, embroidered napkins, or a handmade monogram. You can find more inspiration in the Sewing and Crafts collection.
Beginner Stem-Stitch Practice Pattern
Before starting a detailed design, draw these four simple practice lines on scrap fabric:
- A straight horizontal line
- A gentle S-shaped curve
- A small spiral
- A flower stem with one leaf
Stitch each line slowly, paying attention to thread placement and stitch length. The straight line helps with spacing, the S-curve builds control, the spiral teaches tight turns, and the flower stem gives you a small finished motif.
Frequently Asked Questions About Stem Stitch
What is a stem stitch?
A stem stitch is a decorative hand-embroidery stitch formed by overlapping stitches along a marked line. It creates a smooth, slightly twisted line commonly used for flower stems, vines, curves, borders, and lettering.
How do you do a stem stitch?
Bring the needle up at the starting point, insert it one stitch-length ahead, and bring it back up halfway along the stitch. Keep the working thread on the same side and repeat the overlapping motion along the design.
Is stem stitch easy for beginners?
Yes. Stem stitch is considered a beginner-friendly embroidery stitch. Practicing on a marked straight line first makes it easier to learn the overlapping needle placement and consistent thread tension.
Where should the thread sit when making stem stitch?
Keep the working thread on the same side of the needle throughout the row. It is traditionally held below the stitching line for stem stitch, but consistency is more important than the side you choose.
Why does my stem stitch look like a split stitch?
Your needle may be passing through the embroidery floss instead of coming up beside it. Bring the needle through the fabric at the previous stitch opening without splitting the thread strands.
How long should stem stitches be?
Most beginner stem stitches are approximately 1/8 to 1/4 inch long. Use shorter stitches for tight curves, small letters, and detailed designs.
Can stem stitch be used for lettering?
Yes. Stem stitch is especially attractive for cursive lettering, names, monograms, and flowing script. Short stitches make tight curves and small letters easier to shape.
What is the difference between stem stitch and outline stitch?
The stitches use nearly the same motion. The traditional difference is the side on which the working thread is held, which changes the direction of the finished twist.
Can I use stem stitch without an embroidery hoop?
You can, but a hoop keeps the fabric stable and makes consistent stitch tension easier. Beginners will usually have better results when practicing with a hoop.
How do I keep stem stitch from puckering?
Keep the fabric comfortably taut in the hoop and avoid pulling the floss too tightly. The thread should rest smoothly on the surface without drawing the fabric inward.
Final Thoughts
The stem stitch is one of those lovely hand-embroidery techniques that looks more complicated than it really is. Once you learn to move forward, bring the needle back up through the previous stitch, and keep the working thread on one side, the line begins to take shape almost naturally.
Do not worry if your first practice row is not perfectly even. Handmade stitches are allowed to have personality. With each flower stem, vine, curve, and letter, your spacing and tension will become more consistent.
Keep a scrap of fabric nearby for practice, try shorter stitches around curves, and enjoy the slow rhythm of watching a plain line turn into something beautifully textured.