
This easy yeast bread recipe makes two soft, fluffy homemade loaves with active dry yeast and six basic pantry ingredients. If you’re looking for an easy bread recipe with yeast that still gives you a classic homemade loaf, this is a comfortable place to start. The dough is simple enough for a first-time bread baker, requires about 20 minutes of hands-on preparation, and can be kneaded by hand or with a stand mixer.
Allow time for two rises before baking the bread at 375°F. The result is a tender homemade bread with a lightly golden crust that works for sandwiches, toast, French toast, soup night, holiday dinners, or warm slices spread with butter.
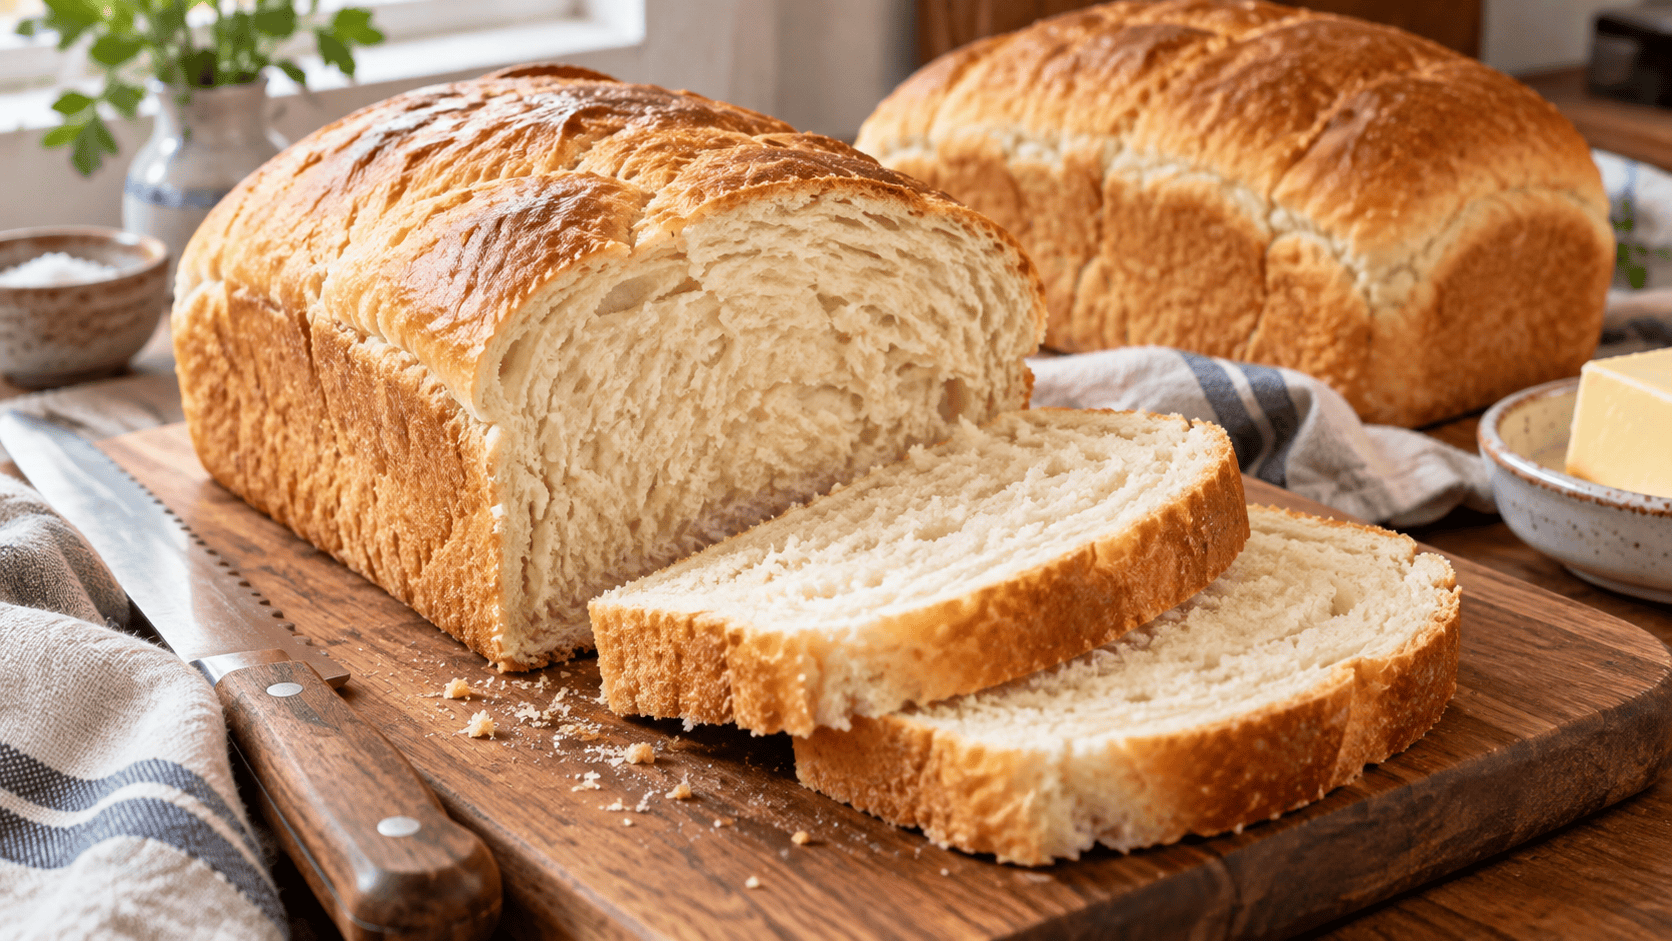
This easy yeast bread recipe makes two soft, fluffy homemade loaves with a tender crumb and golden crust.
Easy Homemade Yeast Bread for Beginners
If you have never made bread with yeast, this is a comfortable place to begin. There are no complicated shaping techniques, specialty ingredients, or culinary-school maneuvers hiding between you and a warm loaf of homemade bread.
The dough should feel soft and slightly sticky rather than dry or stiff. That moisture helps produce a tender crumb, so resist the temptation to keep adding flour until the dough stops sticking completely.
This recipe has been passed down through generations in my family—the kind of butter-smudged recipe that belongs tucked inside a well-loved recipe box. It is the bread we made on snow days, sliced for sandwiches, and served warm when the kitchen needed to smell a little more like home.
Yeast Bread at a Glance
- Yield: 2 small loaves
- Hands-on preparation: Approximately 20 minutes
- First rise: Approximately 45 minutes
- Second rise: Approximately 45 to 60 minutes
- Baking temperature: 375°F
- Baking time: Approximately 30 to 45 minutes
- Skill level: Beginner-friendly
Why You’ll Love This Easy Yeast Bread Recipe
- Made for beginners: The instructions explain what the yeast and dough should look and feel like at each stage.
- Six basic ingredients: You need water, yeast, sugar, butter, flour, and salt.
- No required mixer: Knead the dough by hand or use a stand mixer fitted with a dough hook.
- Soft and versatile: Slice the bread for toast, sandwiches, French toast, or a comforting dinner-table side.
- Easy to shape: Make two small loaves, rustic rounds, dinner rolls, or one simple braid.
- Mostly hands-off: Most of the total time is spent waiting for the dough to rise or bake.
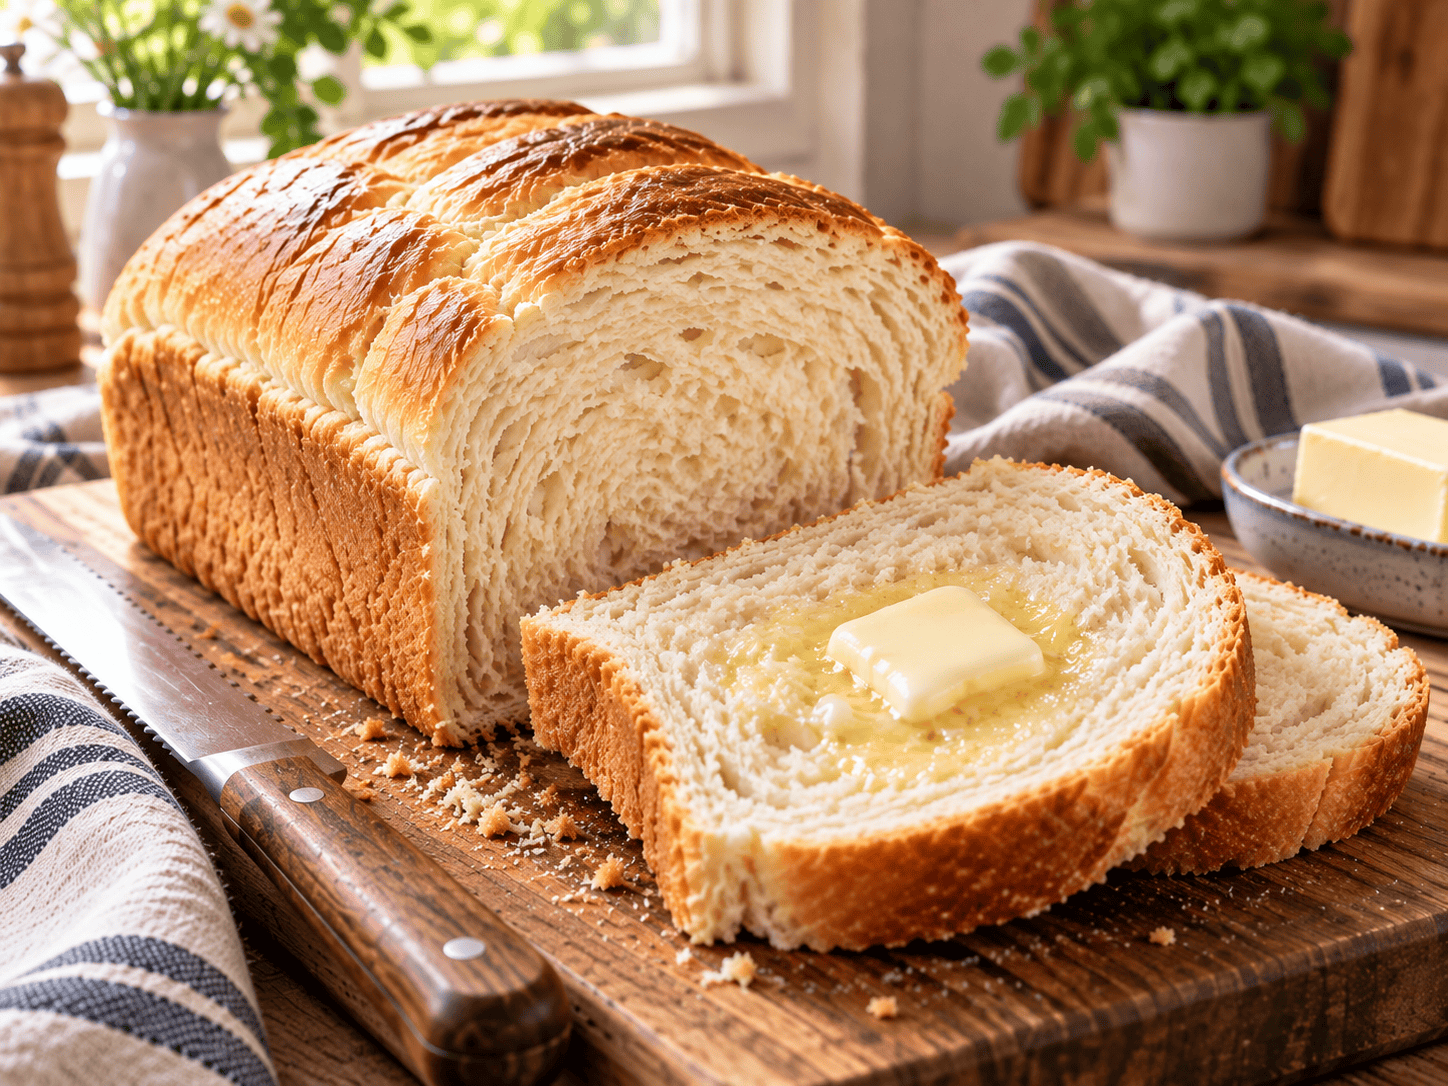
Warm slices of this easy homemade bread are perfect with a little butter.
Prefer to watch the process? The step-by-step Easy Yeast Bread video is included in the recipe card below so you can follow along while you bake.
Readers Also Make These Bread Recipes
- Homemade Hamburger Buns — soft, fluffy buns made with another approachable yeast dough.
- Cheesy Beer Bread — an easy no-yeast option when you do not have time for rising.
- Bunny Bread Dinner Rolls — a playful way to practice shaping yeast dough.
Ingredients for Easy Yeast Bread
Each ingredient has a specific job, but there is nothing unusual or expensive in this homemade bread recipe with yeast.
- 1 cup warm water, 115°F to 120°F: Warm water activates the active dry yeast. Water that is too hot can damage the yeast, while cooler water can slow the rise.
- 1 tablespoon active dry yeast: The yeast produces the gas that gives the bread its soft, airy texture.
- 1 tablespoon granulated sugar: Sugar helps activate the yeast and gives the bread a mild sweetness.
- 2 tablespoons softened butter or margarine: Butter adds flavor and helps keep the crumb tender.
- 2 1/2 cups all-purpose flour, minus approximately 1 1/2 tablespoons: Measure 2 1/2 cups lightly, then remove approximately 1 1/2 tablespoons as directed in the original family recipe.
- 1 teaspoon salt: Salt balances the flavor and helps regulate yeast activity.
What Temperature Should the Water Be for Active Dry Yeast?
Use water between 115°F and 120°F for this recipe. It should feel comfortably warm rather than steaming hot. A digital kitchen thermometer removes the guesswork, especially when you are learning how to make bread with yeast.
How to Make Easy Yeast Bread
This bread follows the traditional yeast-bread process: activate the yeast, mix and knead the dough, let it rise, shape it, complete a second rise, and bake.
1. Activate the Yeast
Pour the warm water into a large mixing bowl. Sprinkle the active dry yeast over the water and add the sugar. Let the mixture stand for approximately 10 minutes.
The surface should look creamy or foamy. That visible activity tells you the yeast is alive and ready to raise the dough.
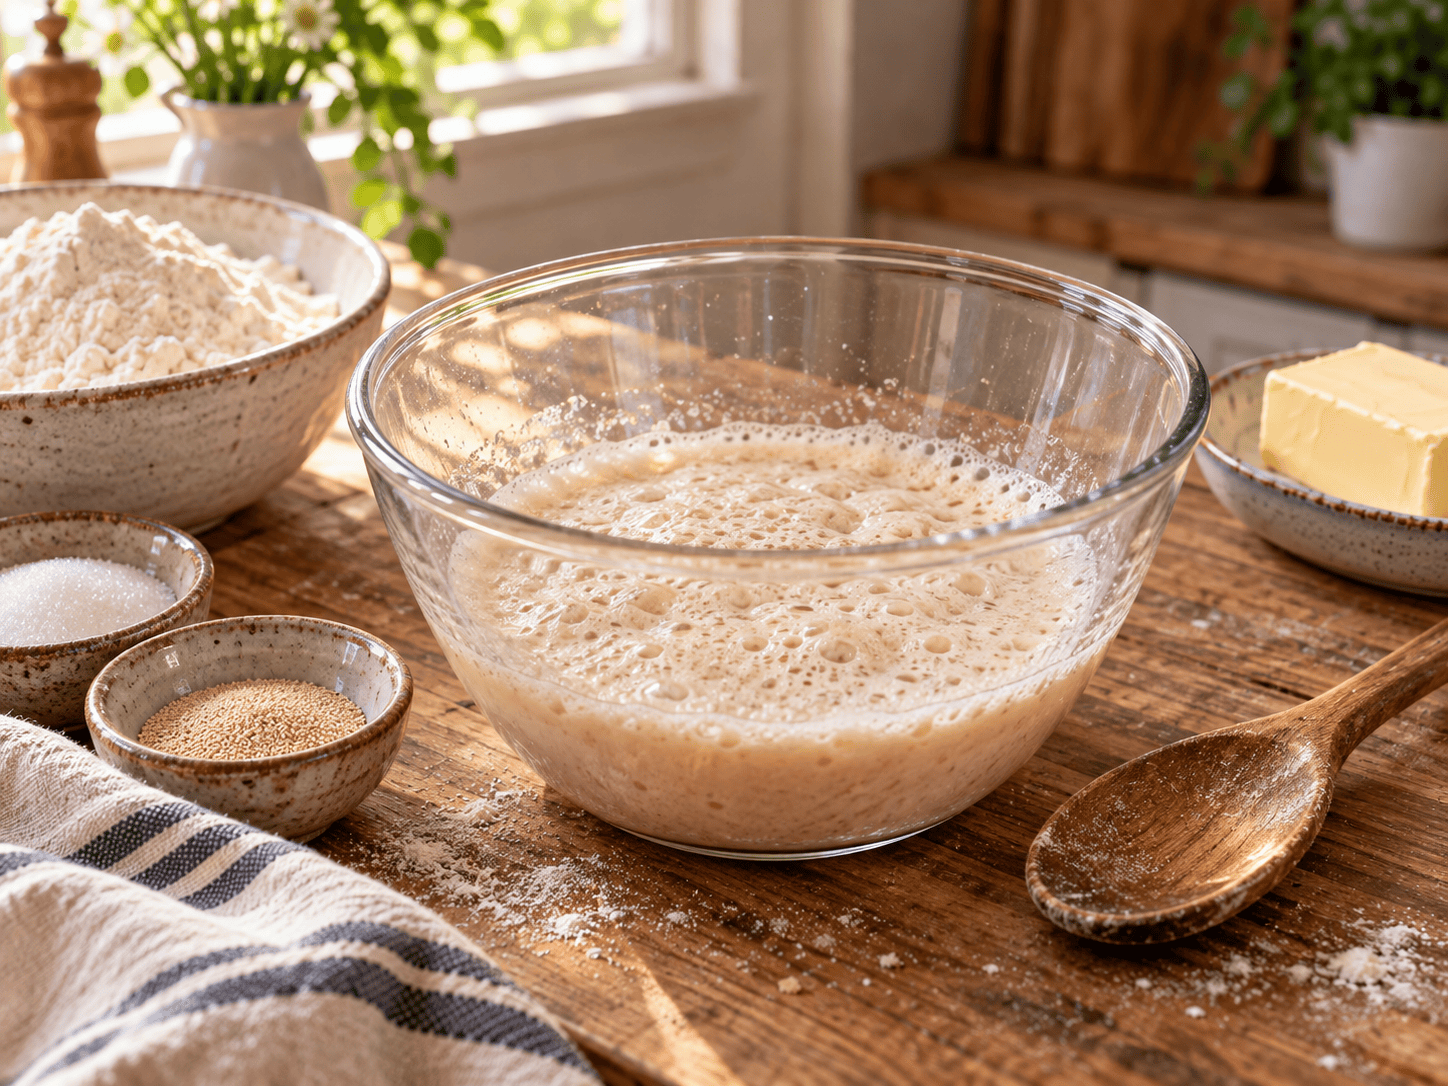
The yeast should look foamy and bubbly after resting in warm water with sugar.
2. Combine the Flour and Salt
Whisk the all-purpose flour and salt together in a separate mixing bowl. Distributing the salt through the flour prevents one concentrated amount from sitting directly against the yeast.
3. Mix the Bread Dough
Add the activated yeast mixture and softened butter to the flour mixture. Stir with a sturdy spoon or spatula until the ingredients come together and form a soft dough.
The dough will be sticky. That is expected. Do not add more flour simply because the dough clings to your hands or the bowl.
4. Knead Until Smooth and Elastic
Knead the dough by hand for approximately 10 minutes. You can also knead it in a stand mixer fitted with a dough hook for 5 to 10 minutes.
As you work, the dough should become smoother and more elastic while remaining slightly tacky. Proper kneading develops the gluten structure that allows the dough to hold the gas produced by the yeast.
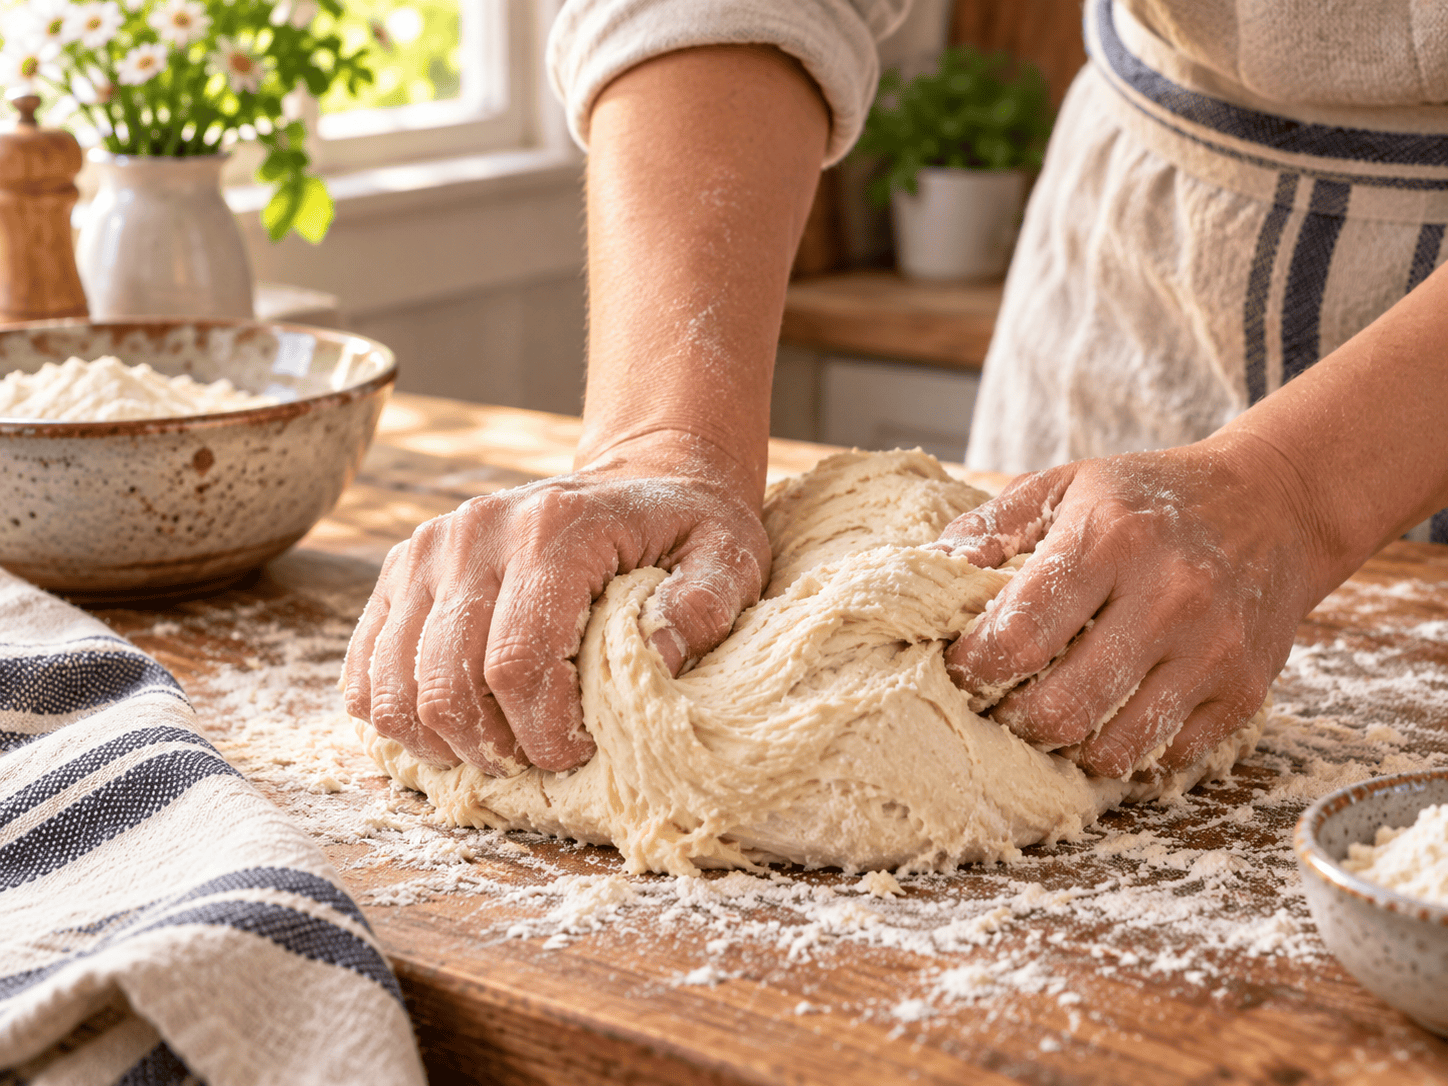
Knead the dough until it becomes smooth, elastic, and still slightly tacky.
5. Complete the First Rise
Place the dough in a lightly greased bowl and turn it once to give the surface a thin coating of oil or butter. Cover the bowl with a clean kitchen towel or plastic wrap.
Let the dough rise in a warm, draft-free place for approximately 45 minutes, or until it has roughly doubled in size.
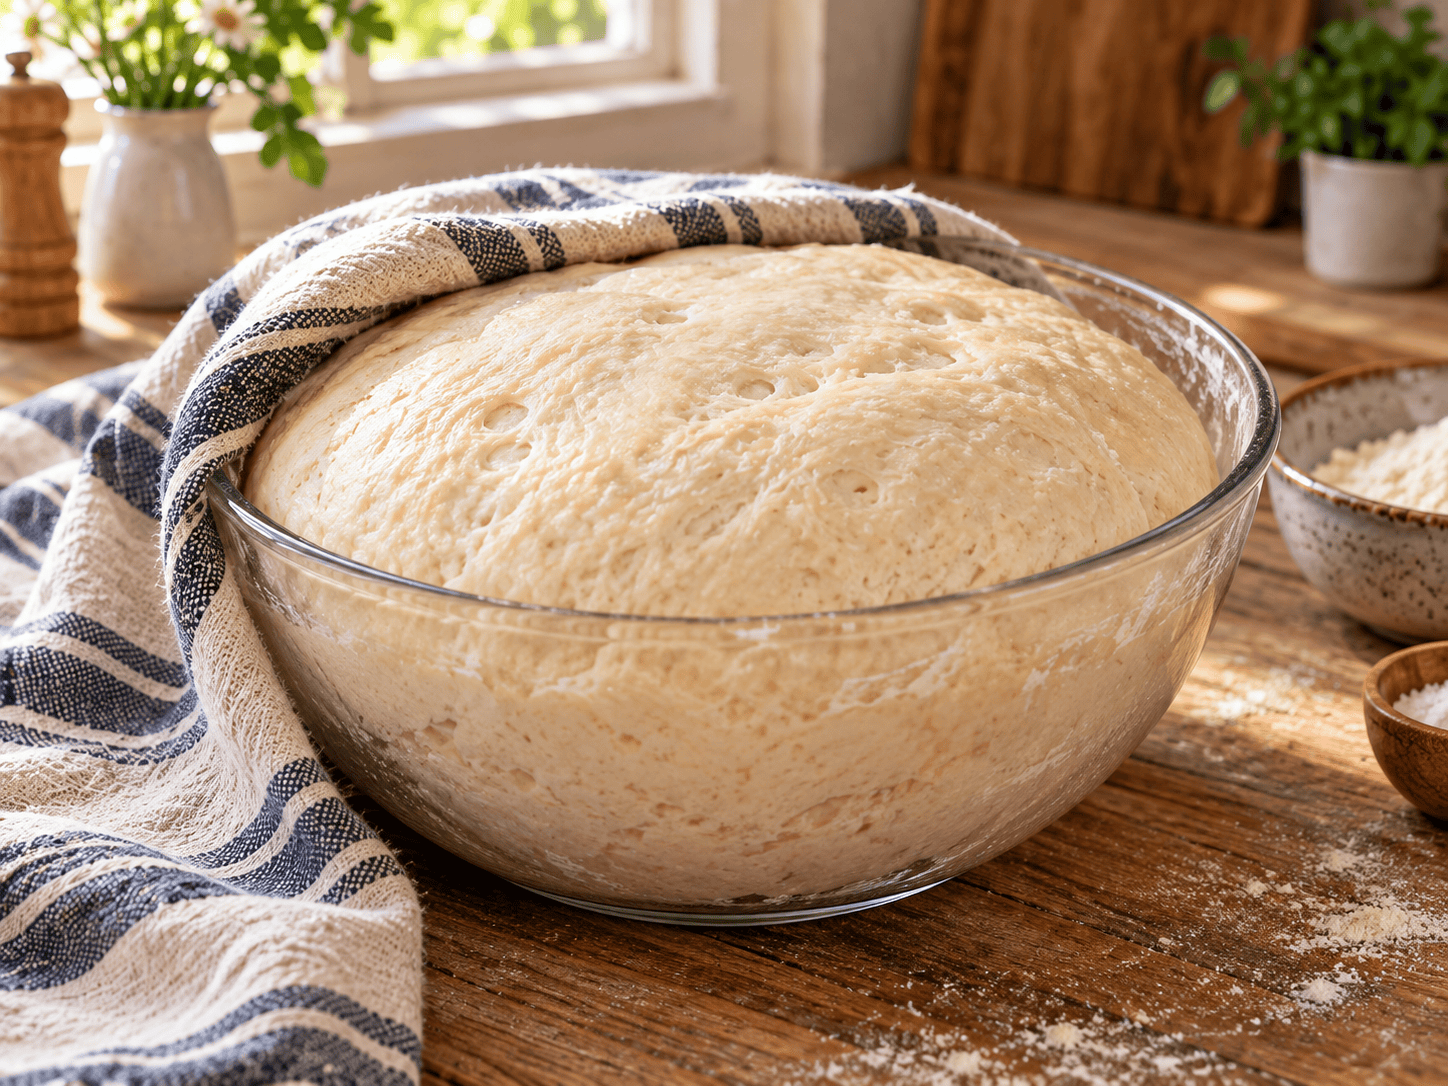
Let the dough rise in a warm place until it has doubled in size.
6. Press Down and Rest the Dough
Gently press the risen dough down to release the largest air pockets. Let it rest for approximately 5 minutes before shaping.
This short rest gives the gluten time to relax, making the dough easier to shape without repeatedly springing back.
7. Shape the Bread
Divide the dough into two equal portions. Shape each portion into a small loaf or rustic round, then place the shaped dough in greased loaf pans or on a greased baking sheet.
You may also divide the dough into evenly sized portions for dinner rolls. Similar-sized portions will rise and bake more evenly.
8. Let the Shaped Dough Rise Again
Cover the shaped dough and let it rise for approximately 45 to 60 minutes, or until it looks noticeably light and puffy.
Use the appearance of the dough rather than the clock alone. Bread rises more quickly in a warm kitchen and may need additional time in a cooler room.
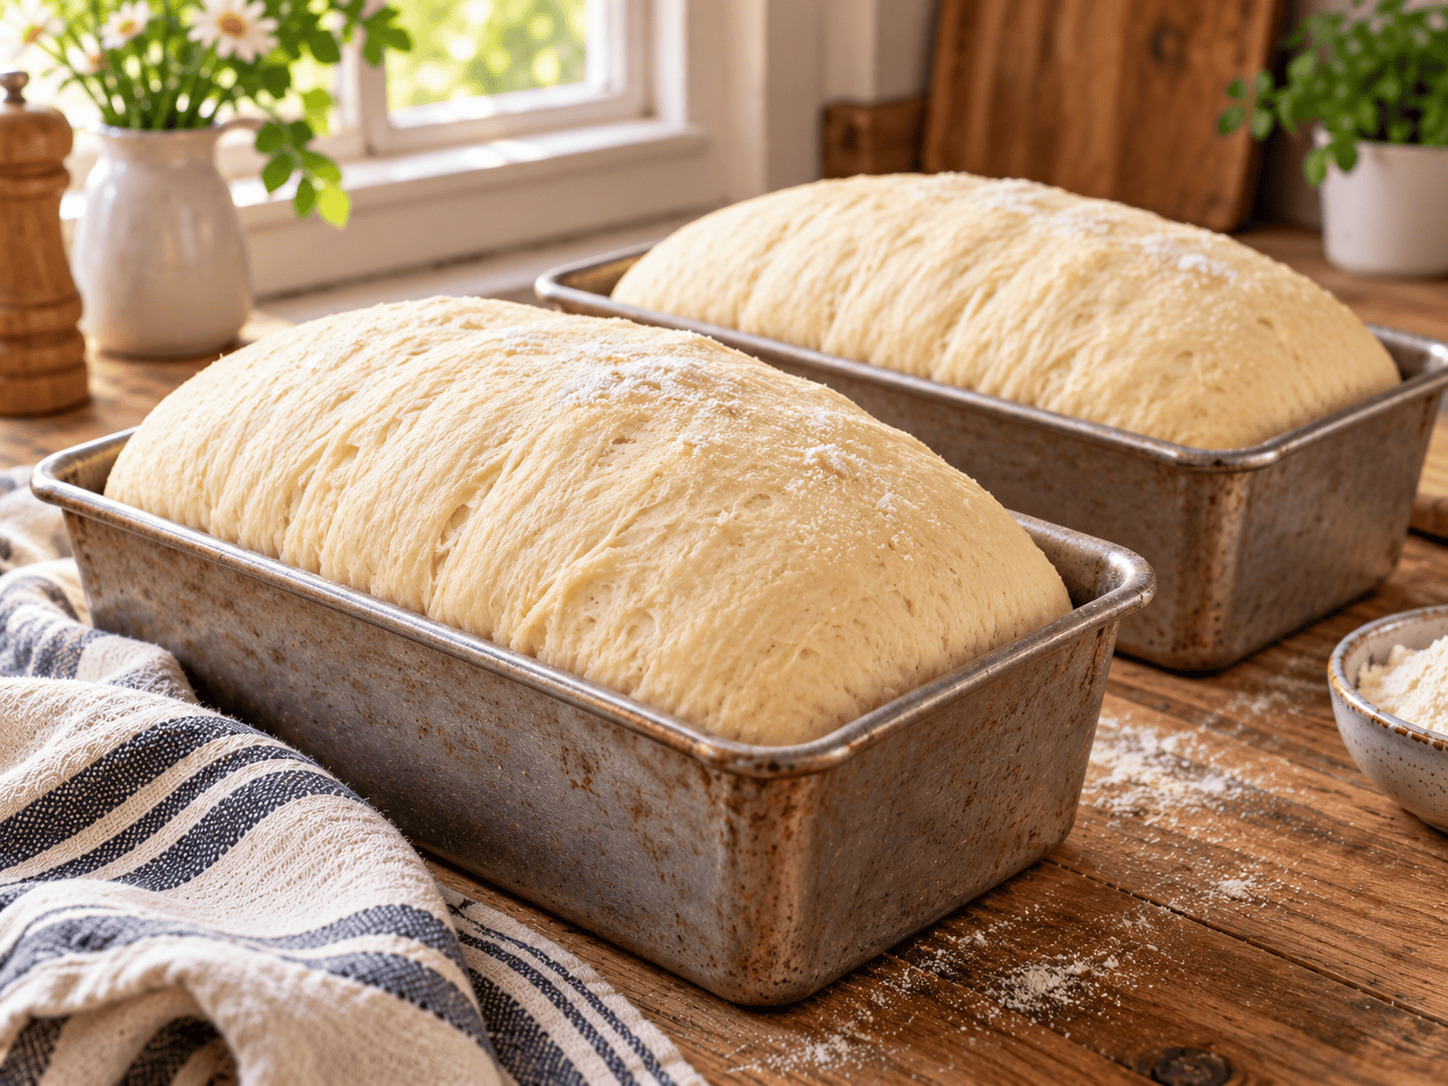
After shaping, let the dough rise again in the loaf pans until light and puffy.
9. Bake the Bread
Preheat the oven to 375°F. Bake the bread for approximately 30 to 45 minutes, depending on the size and shape of the loaves.
The finished bread should be golden brown and sound hollow when tapped. For another doneness check, the center should reach approximately 190°F on an instant-read thermometer.
10. Cool Before Slicing
Transfer the baked bread to a wire cooling rack. Let it cool before slicing so the interior crumb has time to finish setting.
Cutting the bread immediately can compress the crumb or make the center seem gummy, even when the loaf is fully baked.
How Much Flour Should You Add?
Flour behaves differently depending on how it is measured, the brand, humidity, and conditions in your kitchen. Begin with the amount listed in the recipe and judge the dough by its texture.
The dough should hold together but remain soft and slightly tacky. Lightly grease your hands or work surface if it is difficult to handle. Add more flour only when the dough is so wet that it cannot hold any shape.
Avoid pouring in additional flour until the dough feels completely dry. Too much flour is one of the most common reasons homemade yeast bread becomes heavy or dense.
How to Tell When Yeast Bread Has Risen Enough
During the first rise, look for dough that has approximately doubled in volume. During the second rise, the shaped loaves should look noticeably fuller, lighter, and puffy.
Rise times are estimates rather than deadlines. A warm kitchen can shorten the process, while a cool room may lengthen it. Let the dough tell you when it is ready.
Easy Ways to Create a Warm Rising Place
- Place the covered bowl in a draft-free area of the kitchen.
- Use a switched-off oven with only the oven light turned on.
- Set the bowl near, but not directly on, a warm appliance.
- Give the dough extra time when your kitchen is cool.
The dough needs gentle warmth. Do not place it against direct heat or inside an oven that is actively heating.
Troubleshooting Homemade Yeast Bread
Why Didn’t My Bread Rise?
The most common causes are inactive yeast, water that was too hot or too cold, or a cool rising environment. If the yeast did not become foamy during activation, begin again with fresh yeast.
Why Is My Homemade Bread Dense?
Dense bread can result from adding too much flour, not kneading long enough, shortening the rising time, or using inactive yeast. Keep the dough soft and wait until it becomes visibly puffy before baking.
Why Did My Bread Spread Instead of Rising Upward?
The dough may have been too wet, under-kneaded, or allowed to rise too long. A loaf pan provides additional support when you prefer a taller, more uniform loaf.
Why Did the Bread Collapse?
Bread can collapse when it is over-proofed, when the gluten structure is underdeveloped, or when the center has not finished baking.
Why Is the Crust Too Hard?
Baking toward the longer end of the suggested range produces a firmer crust. For a softer finish, brush the warm loaf lightly with melted butter and cover it loosely with a clean kitchen towel while it cools.
Perfect With Cozy Seasonal Meals
Serve this homemade yeast bread beside soup, chili, stew, pasta, roasted meat, or a Sunday supper. It is especially welcome during fall baking season and alongside Thanksgiving or Christmas dinner.
For a sandwich-style meal, shape the dough into rolls and serve them with my Instant Pot French Dip Sandwiches.
During spring, use your new bread-shaping skills to make Bunny Bread Dinner Rolls or bake a traditional batch of Hot Cross Buns.
Easy Yeast Bread Variations
Garlic Herb Bread
Add minced garlic, rosemary, thyme, or Italian seasoning to the dough. Brush the warm bread with melted garlic butter before serving.
Cheese Bread
Fold shredded cheddar or Parmesan into the dough after the first rise. Use a restrained amount so the cheese does not weigh down the loaf.
Cinnamon Raisin Bread
Knead raisins into the dough, then roll the dough with a light coating of cinnamon sugar before shaping it for the second rise.
Seeded Bread
Sprinkle the shaped dough with sesame seeds, poppy seeds, sunflower seeds, or an everything-seasoning blend before baking.
Dinner Rolls
Divide the dough into evenly sized balls and arrange them in a greased baking dish. Begin checking the rolls earlier because smaller portions bake more quickly than full loaves.
Braided Bread
Divide the dough into three ropes, braid them together, and tuck the ends underneath before the second rise.
What to Serve with Homemade Yeast Bread
- Spread warm slices with butter, honey, apple butter, or jam.
- Use cooled slices for sandwiches, grilled cheese, or breakfast toast.
- Serve the bread with soup, chili, stew, pasta, or roasted meat.
- Turn thick slices into French toast.
- Use day-old bread for croutons, breadcrumbs, stuffing, or bread pudding.
How to Store Homemade Yeast Bread
Let the bread cool completely before storing it. Warm bread releases moisture that can collect inside the wrapping and make the crust damp.
Store the cooled bread in an airtight container, bread bag, or tightly sealed wrap at room temperature for up to three days. Homemade bread does not contain the preservatives found in many commercial loaves, so it is best enjoyed while fresh.
Avoid refrigerating the bread unless necessary because refrigeration can cause bread to become stale more quickly.
How to Freeze Yeast Bread
Cool the bread completely, then wrap the whole loaf or individual slices tightly in plastic wrap or foil. Place the wrapped bread in a freezer-safe bag and freeze it for up to three months.
Freezing individual slices makes it easy to remove only what you need. Thaw them at room temperature or place frozen slices directly into the toaster.
How to Reheat Homemade Bread
Warm individual slices in a toaster. To reheat a larger portion, wrap the bread loosely in foil and place it in a 300°F oven for approximately 10 to 15 minutes.
Brush the top lightly with butter before warming when you want a softer crust.
Can You Make Yeast Bread Ahead of Time?
Bake the bread up to one day before serving and store it tightly wrapped at room temperature. For longer make-ahead storage, freeze the cooled loaf or individual slices and thaw them as needed.
Frequently Asked Questions
Is This a Quick Yeast Bread Recipe?
The preparation is simple and requires only about 20 minutes of hands-on work, but the dough still needs two rises. It is not a no-rise quick bread made with baking powder or baking soda.
Is This an Easy Bread Recipe with Yeast for Beginners?
Yes. It uses six basic ingredients, straightforward instructions, and no required specialty equipment. The recipe also explains how the dough should look during mixing, kneading, and rising.
How Long Does Homemade Yeast Bread Take?
Plan for approximately 20 minutes of hands-on preparation, 90 to 105 minutes of rising time, and 30 to 45 minutes of baking time. The exact total depends on room temperature and loaf size.
Can I Knead the Dough by Hand?
Yes. Knead it by hand for approximately 10 minutes, or until it becomes smoother and more elastic while remaining slightly tacky.
Can I Use Instant Yeast Instead of Active Dry Yeast?
Instant yeast can generally be mixed directly with the dry ingredients. The dough may rise more quickly, so judge it by its appearance instead of relying only on the suggested rising times.
Can I Use Bread Flour Instead of All-Purpose Flour?
Yes. Bread flour may produce a slightly chewier crumb because it contains more protein. Add it carefully and keep the dough soft rather than stiff.
Why Is My Yeast Mixture Not Foaming?
The yeast may be inactive, or the water may have been too hot or too cold. If the mixture shows no activity after approximately 10 minutes, begin again with fresh yeast.
How Do I Know When Yeast Bread Is Done?
The bread should be golden brown and sound hollow when tapped. The center should reach approximately 190°F when checked with an instant-read thermometer.
Can I Freeze Homemade Bread Made with Yeast?
Yes. Cool the bread completely, wrap it tightly, and freeze it whole or sliced for up to three months.
What Can I Make with Leftover Yeast Bread?
Use leftover bread for toast, French toast, grilled cheese, croutons, breadcrumbs, stuffing, bread pudding, or open-faced sandwiches.
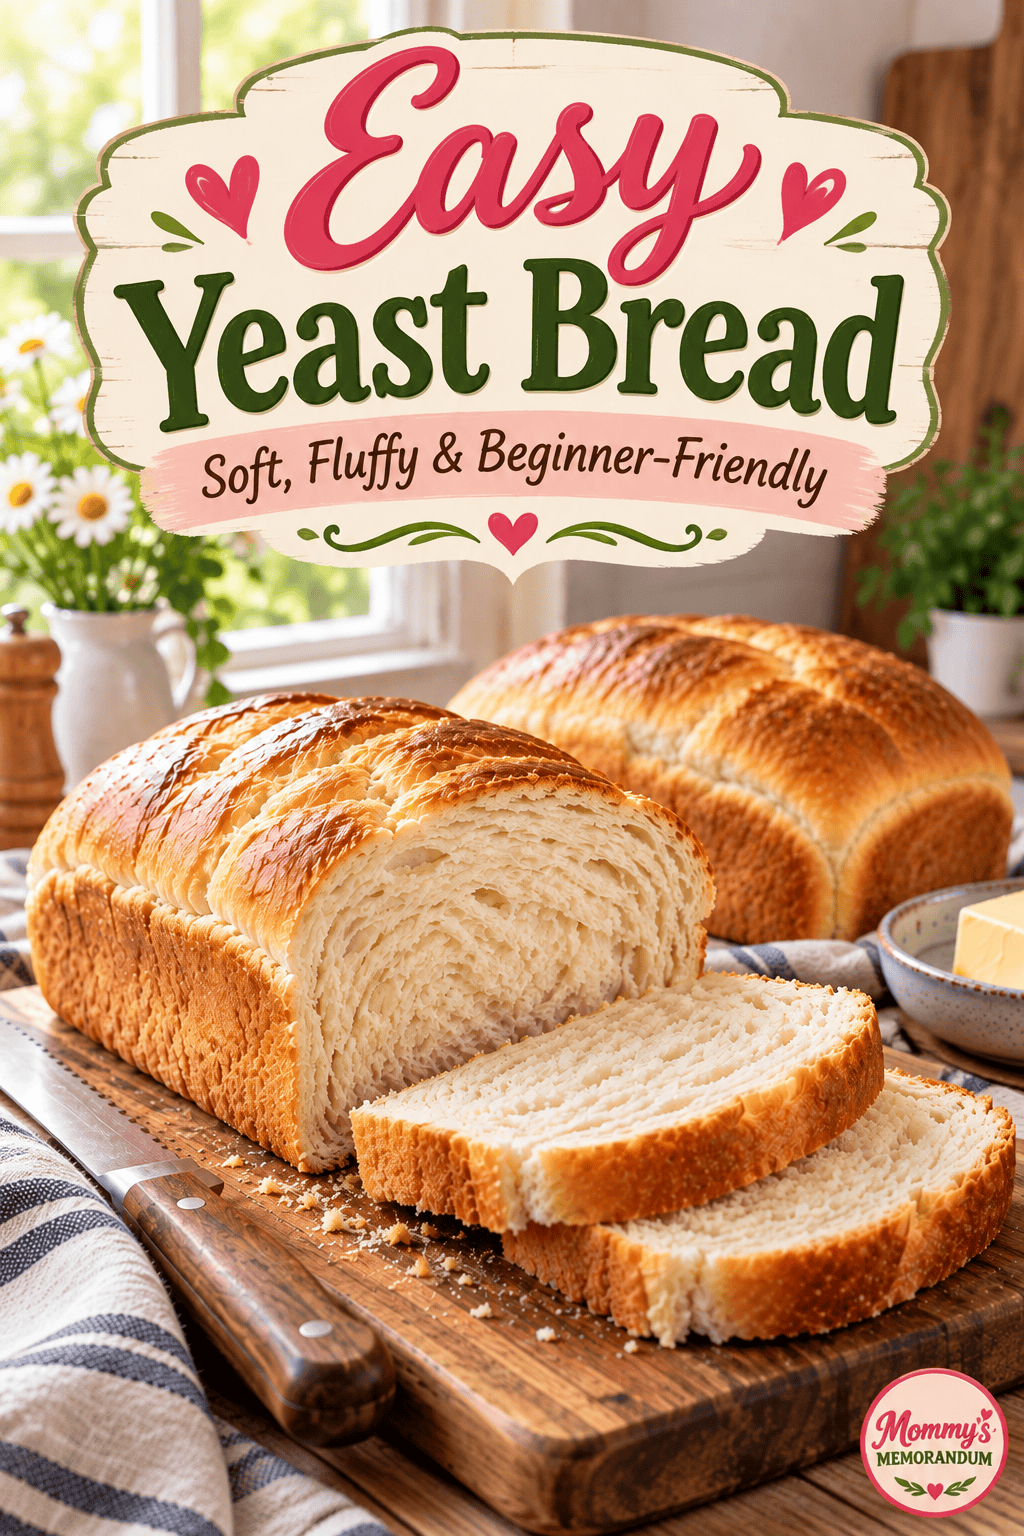
Save this easy yeast bread recipe for a soft, fluffy homemade loaf that is perfect for beginners.
More Bread and Dough Recipes You’ll Love
Explore more homemade bread recipes in the Bread and Baked Goods collection.
Related Bread Recipes
Easy Yeast Bread Recipe
Make two soft, fluffy homemade loaves with active dry yeast and six simple pantry ingredients. This beginner-friendly recipe includes clear kneading, rising, shaping, and baking directions.
Ingredients
- 1 cup warm water, 115°F to 120°F
- 1 tablespoon active dry yeast
- 1 tablespoon granulated sugar
- 2 tablespoons butter or margarine, softened
- 2 1/2 cups all-purpose flour, minus approximately 1 1/2 tablespoons
- 1 teaspoon salt
Instructions
1. Activate the yeast: Pour the warm water into a large mixing bowl. Sprinkle the active dry yeast over the water and add the sugar. Let the mixture stand for approximately 10 minutes, or until the surface looks creamy and foamy.
2. Combine the dry ingredients: In a separate bowl, whisk the all-purpose flour and salt together until evenly combined.
3. Mix the dough: Add the activated yeast mixture and softened butter to the flour mixture. Stir until the ingredients come together and form a soft, sticky dough. Do not add extra flour simply because the dough feels tacky.
4. Knead the dough: Knead the dough by hand for approximately 10 minutes, or knead it in a stand mixer fitted with a dough hook for 5 to 10 minutes. The dough should become smoother and more elastic while remaining slightly sticky.
5. Let the dough rise: Place the dough in a lightly greased bowl and turn it once to coat the surface. Cover the bowl with a clean kitchen towel or plastic wrap. Let the dough rise in a warm, draft-free place for approximately 45 minutes, or until doubled in size.
6. Punch down and rest: Gently press the risen dough down to release large air pockets. Let the dough rest for 5 minutes before shaping.
7. Shape the loaves: Divide the dough into two equal portions. Shape each portion into a small loaf or rustic round. Place the shaped dough in greased loaf pans or on a greased baking sheet.
8. Complete the second rise: Cover the shaped dough and let it rise in a warm place for 45 to 60 minutes, or until it looks noticeably light and puffy.
9. Bake the bread: Preheat the oven to 375°F. Bake the bread for 30 to 45 minutes, depending on the size and shape of the loaves, until the exterior is golden brown and the bread sounds hollow when tapped.
10. Cool and serve: Transfer the bread to a wire cooling rack. Let it cool before slicing so the interior crumb has time to set.
Notes
Notes:
Keep the dough soft: The dough should remain slightly sticky. Adding too much flour can produce a dry, dense loaf.
Check the yeast: If the yeast mixture does not become foamy after approximately 10 minutes, the yeast may be inactive. Begin again with fresh yeast and properly warmed water.
Judge the rise by appearance: Rising times are estimates. Let the dough rise until doubled during the first rise and until visibly puffy during the second rise.
For a softer crust: Brush the warm bread lightly with melted butter and cover it loosely with a clean kitchen towel while it cools.
For another beginner-friendly yeast dough: Try these Homemade Hamburger Buns. When you want bread without yeast or rising time, make this Cheesy Beer Bread.
Expert Tips:
- Use fresh active dry yeast and check the expiration date before beginning.
- Keep the water between 115°F and 120°F so it activates the yeast without damaging it.
- Spoon flour lightly into the measuring cup instead of packing it down.
- A slightly sticky dough produces softer bread than a stiff dough loaded with extra flour.
- Knead until the dough feels smoother and more elastic.
- Let the dough rise in a warm, draft-free location.
- Allow the baked bread to cool before slicing to prevent a gummy or compressed center.
Variations:
Garlic herb bread: Add minced garlic, rosemary, thyme, or Italian seasoning to the dough.
Cheese bread: Fold shredded cheddar or Parmesan into the dough after the first rise.
Cinnamon raisin bread: Add raisins and roll the dough with a light coating of cinnamon sugar before shaping.
Dinner rolls: Divide the dough into evenly sized balls and arrange them in a greased baking dish. Reduce the baking time as needed.
Braided bread: Divide the dough into three ropes, braid them, and tuck the ends underneath before the second rise.
Serving Suggestions:
Serve this homemade yeast bread warm with butter, honey, apple butter, or jam. Use cooled slices for sandwiches, grilled cheese, breakfast toast, or French toast. It also makes a comforting side for soup, stew, chili, pasta, and roasted meats. For a sandwich-style dinner, pair it with an Instant Pot French Dip Sandwich.
Storage:
Let the bread cool completely before storing it. Keep the loaf in an airtight container, bread bag, or tightly sealed wrap at room temperature for up to 3 days. Avoid refrigerating the bread because refrigeration can cause it to become stale more quickly.
Freezing Instructions;
Cool the bread completely, then wrap the whole loaf or individual slices tightly in plastic wrap or foil. Place the wrapped bread in a freezer-safe bag and freeze for up to 3 months. Thaw at room temperature or place frozen slices directly into the toaster.
Reheating Instructions:
Reheat individual slices in a toaster. To warm a larger portion, wrap the bread loosely in foil and place it in a 300°F oven for 10 to 15 minutes. Brush the top lightly with butter before reheating for a softer crust.
Make Ahead Instructions:
Bake the bread up to 1 day before serving and store it tightly wrapped at room temperature. For longer make-ahead storage, freeze the cooled loaf or individual slices for up to 3 months.
Equipment:
Large mixing bowl
Medium mixing bowl
Measuring cups and spoons
Whisk
Wooden spoon or sturdy spatula
Stand mixer with dough hook, optional
Clean kitchen towel or plastic wrap
Two small loaf pans or a baking sheet
Wire cooling rack
Instant-read thermometer, optional
Make soft, fluffy homemade bread with this beginner-friendly basic yeast bread recipe made with active dry yeast and simple pantry ingredients.
Nutrition Disclaimer:
Nutrition information is an estimate and will vary according to the exact ingredients, brands, loaf size, slice thickness, and substitutions used.
FAQs:
What is a quick yeast bread?
A quick yeast bread has a simple, beginner-friendly preparation method but still requires rising time. Unlike baking-powder quick breads, it uses yeast to create its soft, airy texture.
Is this an easy bread recipe with yeast for beginners?
Yes. It uses six basic ingredients, straightforward instructions, and no required specialty equipment.
Why did my yeast bread not rise?
The yeast may have been inactive, the water may have been too hot or too cold, or the dough may have been placed in a cool location.
Why is my homemade yeast bread dense?
Dense bread is often caused by too much flour, insufficient kneading, inactive yeast, or not allowing the dough to rise long enough.
Can I knead this bread dough by hand?
Yes. Knead it by hand for approximately 10 minutes, or until the dough feels smoother and more elastic while remaining slightly tacky.
Can I use instant yeast instead of active dry yeast?
Yes. Instant yeast can usually be mixed directly with the dry ingredients, and the dough may rise more quickly. Watch the dough rather than relying only on the suggested time.
How do I know when yeast bread is done?
The loaf should be golden brown and sound hollow when tapped. The center should reach approximately 190°F when checked with an instant-read thermometer.
Can I freeze homemade yeast bread?
Yes. Cool the bread completely, wrap it tightly, and freeze it whole or sliced for up to 3 months.
Nutrition Information:
Yield:
16Serving Size:
1 sliceAmount Per Serving: Calories: 161Total Fat: 2gSaturated Fat: 1gUnsaturated Fat: 1gCholesterol: 4mgSodium: 150mgCarbohydrates: 31gFiber: 1gSugar: 1gProtein: 4g
The Nutritional Information may not be accurate. This website provides approximate nutrition information for convenience and as a courtesy only. Nutrition data is gathered primarily from the USDA Food Composition Database, whenever available, or otherwise other online calculators.
Homemade Bread Without the Intimidation
This easy yeast bread recipe proves that making bread from scratch does not require special equipment or advanced baking experience. With six familiar ingredients, a little kneading, and enough time for the dough to rise, you can make soft homemade bread that fills the kitchen with the unmistakable smell of something made with care.
Serve it warm with butter, slice it for sandwiches, turn it into breakfast toast, or use the dough as a starting point for rolls and braided loaves. It is simple enough for a first-time baker and comforting enough to become one of those recipes your family recognizes before it even comes out of the oven.
Next Recipe to Try: Homemade Hamburger Buns
Now that you know how to activate yeast, knead a soft dough, and judge a proper rise, put those skills to work with my Homemade Hamburger Buns.
They are soft, fluffy, beginner-friendly, and ready in about 40 minutes—perfect for burgers, sandwiches, and sliders.
This recipe was originally published June 8, 2012, and was updated August 5, 2026, with clearer instructions, rising guidance, flour tips, troubleshooting help, storage information, and answers for beginner bread bakers.