
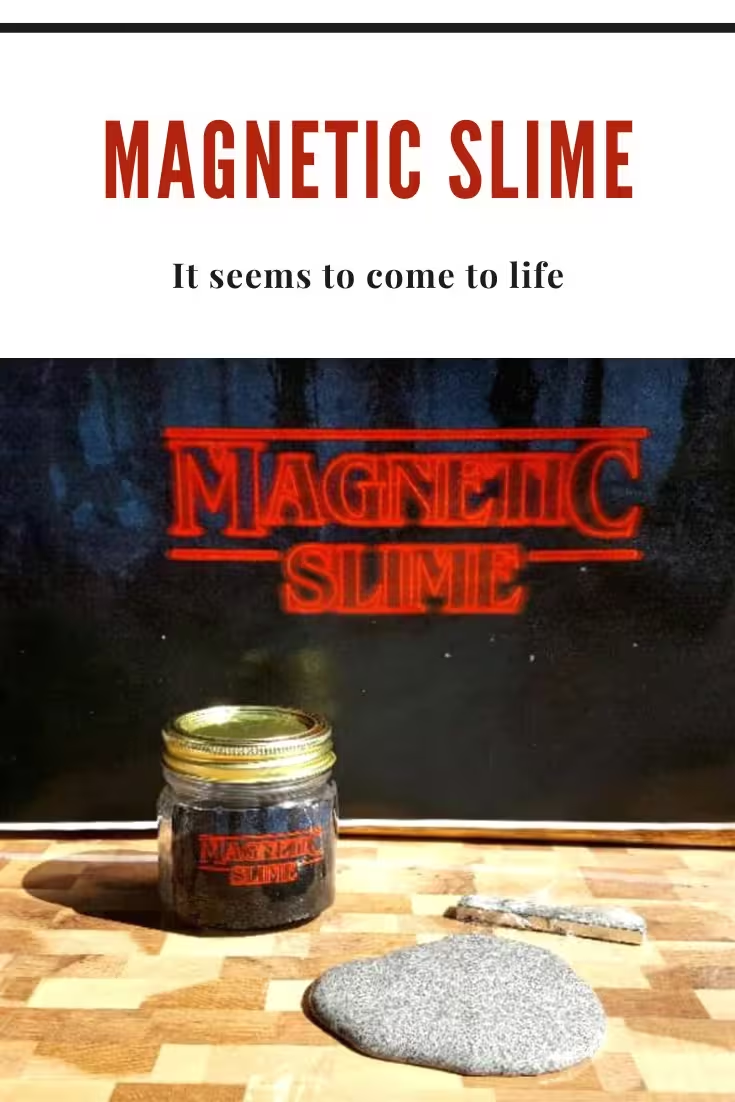
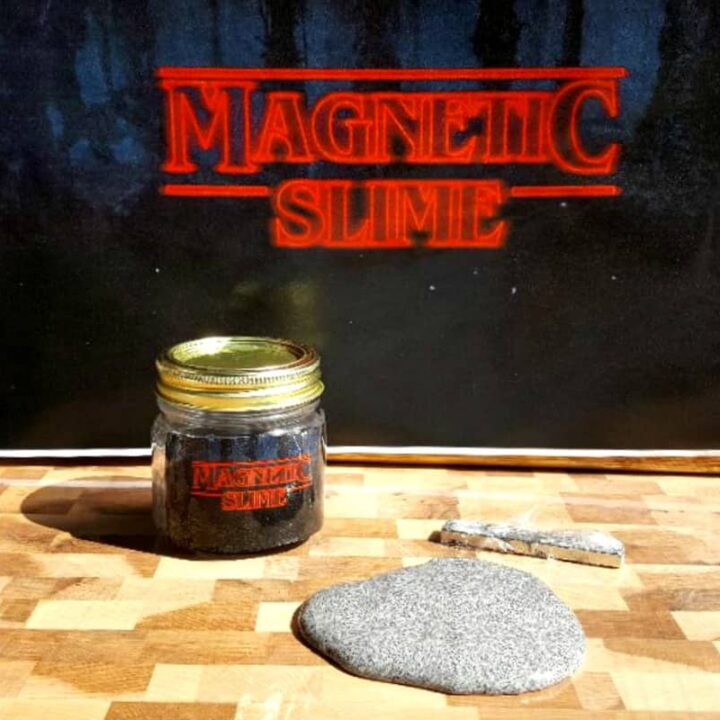
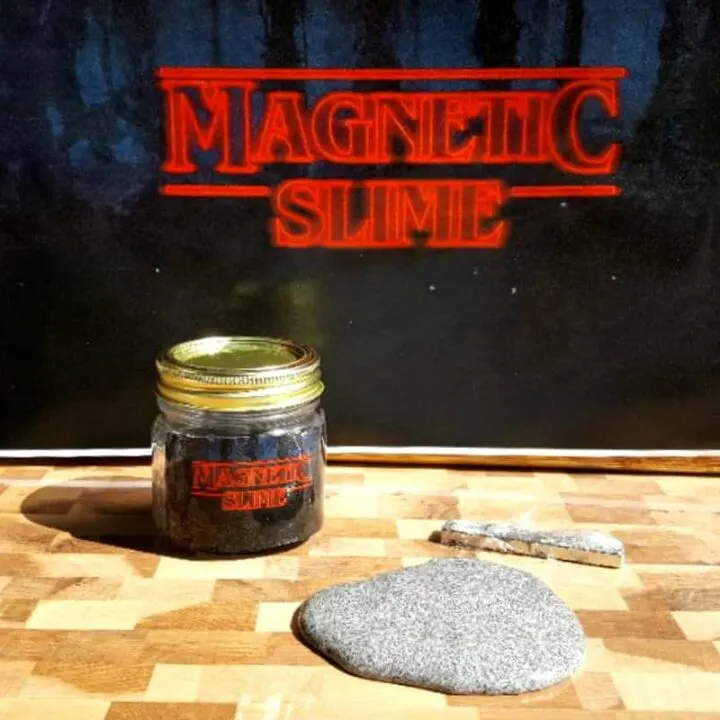
This magnetic slime recipe combines white school glue, liquid starch, and black iron oxide powder to create a stretchy black slime that slowly creeps toward a strong neodymium magnet.
It takes about 15 minutes to make and turns a few simple supplies into an unforgettable hands-on demonstration of magnetism. It is a fun choice for homeschool science, classroom STEM activities, Halloween experiments, rainy afternoons, or a Stranger Things-inspired family night.
Important safety note: This is an adult-supervised science activity for older children—not an edible slime or preschool sensory activity. An adult should measure the iron oxide powder, control the high-powered magnet, and supervise the project from beginning to end.
Jump to the Magnetic Slime Instructions
Readers also make: Start with this easy homemade slime tutorial when you want a colorful version without the magnetic powder.
Magnetic Slime at a Glance
- Project time: About 15 minutes
- Yield: Approximately 1 cup of slime
- Difficulty: Easy with adult assistance
- Best for: Older kids, teens, homeschool lessons, and supervised STEM activities
- Important: Not edible and not suitable for unsupervised play
Watch Magnetic Slime Crawl Toward a Magnet
This short video shows the magnetic slime slowly stretching and creeping toward a strong magnet. Move the magnet closer and the reaction becomes more dramatic—very Hawkins Laboratory, without opening a gate in the living room.
What Is Magnetic Slime?
Magnetic slime is a thick polymer slime containing particles that respond to a magnetic field. When a strong neodymium magnet approaches, the iron-containing particles are pulled toward it.
Because those particles are suspended throughout the sticky slime, the entire blob appears to stretch, rise, or slowly crawl toward the magnet. The slime is not moving on its own, even though it may look suspiciously alive.
Supplies for Magnetic Slime
Materials
- 1/4 cup washable white school glue
- 1/4 cup liquid starch, plus a little more only if needed
- 2 tablespoons black iron oxide powder labeled magnetite or Fe3O4
- 1 large, intact neodymium block or bar magnet, for adult use only
Tools
- Disposable gloves
- Protective table covering
- Small non-food mixing bowl
- Measuring cup and measuring spoon
- Silicone spatula or sturdy craft spoon
- Plastic wrap, a small zipper bag, or packing tape for covering the magnet
- Damp paper towel for cleanup
- Airtight non-food container for brief storage
You can shop for magnetic slime supplies on Amazon.
Magnetic Slime Safety
Please read these precautions before beginning:
- An adult should measure and mix the iron oxide powder.
- Avoid breathing the fine powder. Pour it slowly and keep it close to the bowl rather than shaking or sprinkling it from above.
- Wear disposable gloves and protect clothing and porous work surfaces from staining.
- Use one large magnet that remains in an adult’s hand. Do not use small magnetic balls, cubes, or loose magnet sets.
- Never put the magnet or slime in the mouth.
- Keep high-powered magnets completely away from babies, young children, pets, and anyone likely to swallow or mouth small objects.
- Do not allow strong magnets to snap together because they can pinch fingers, crack, or shatter.
- Keep the magnet away from magnet-sensitive medical devices, cards, and electronics according to the manufacturers’ instructions.
- Wash hands and clean the work surface thoroughly after the experiment.
Review the U.S. Consumer Product Safety Commission magnet safety guidance before using high-powered magnets around children.
How to Make Magnetic Slime
- Prepare the work area. Cover the table, put on disposable gloves, and place the bowl on a stable surface away from food preparation areas.
- Combine the powder and starch. Pour 1/4 cup liquid starch into the bowl. Slowly add 2 tablespoons black iron oxide powder while an adult stirs gently. Continue stirring until no loose, dry powder remains.
- Add the glue. Pour in 1/4 cup washable white school glue. Stir slowly until the ingredients begin forming a dark, cohesive slime.
- Knead the slime. Once all the powder has been incorporated, knead the slime with gloved hands for 1 to 2 minutes. If it remains extremely sticky, add liquid starch 1 teaspoon at a time. Too much starch can make the slime stiff and rubbery.
- Cover the magnet. Wrap the magnet securely with plastic wrap or packing tape, or place it inside a small sealed zipper bag. This makes cleanup easier and keeps the slime from coating the magnet.
- Test the magnetic reaction. Place a small blob of slime on the protected surface. An adult can slowly move the covered magnet toward it without touching the slime.
- Experiment with movement. Try steering the slime from side to side or moving the magnet closer and farther away. Smaller portions of slime usually respond more noticeably than one large blob.
Expert tip: Be patient. Magnetic slime often moves slowly at first and then stretches much more dramatically as the magnet gets closer.
Why Does Magnetic Slime Move?
A neodymium magnet creates a strong magnetic field around it. The black iron oxide particles mixed into the slime respond to that field and are pulled toward the magnet.
The slime is thick and viscous, so the particles cannot move independently. Instead, they pull the surrounding slime with them. This is what creates the creeping, stretching, and “magnet-swallowing” effect.
A regular refrigerator magnet may create little or no visible reaction because its magnetic field is usually not strong enough to move the heavily suspended particles through the slime.
The Stranger Things Connection
This project was inspired by the memorable compass scene in Stranger Things. A compass needle is a small magnet that normally aligns with Earth’s magnetic field. A strong nearby magnetic field can pull the needle away from that alignment and make the compass point in an unexpected direction.
That little piece of science became the inspiration for our own mysterious black slime experiment. The television connection is fun, but the project works just as well for a magnetism lesson, Halloween science table, or screen-free afternoon activity.
This is an unofficial fan-inspired project and is not affiliated with or endorsed by Netflix or the creators of Stranger Things.
Magnetic Slime Experiments to Try
- Distance test: Measure how far away the magnet can be before the slime begins to move.
- Slime-size test: Compare the response of a teaspoon-sized blob with a larger portion.
- Speed test: Time how long the slime takes to reach a magnet placed a fixed distance away.
- Steering challenge: Try guiding the slime through a simple path without touching it.
- Time-lapse video: Record the slime moving toward the magnet and speed up the footage to make the movement easier to see.
Perfect with: Planning a spooky activity day? Add this glow-in-the-dark vampire blood slime for a creepy second experiment with an entirely different texture.
Magnetic Slime Troubleshooting
Why Is My Magnetic Slime Not Moving?
Use a strong neodymium magnet, test a smaller portion of slime, and move the magnet closer. Weak magnets may not create a visible reaction.
Why Is the Slime So Sticky?
Knead it for another minute before adding more activator. If it remains excessively sticky, mix in liquid starch 1 teaspoon at a time.
Why Is the Slime Stiff or Rubbery?
Too much liquid starch can over-activate the slime. Knead in a small amount of white glue, a teaspoon at a time, until it becomes more flexible.
Why Is Black Residue Sticking to the Magnet?
Always cover the magnet before the experiment. Wipe the covered magnet with a damp paper towel before removing the plastic or tape.
Will Magnetic Slime Stain?
It can stain fabric, unfinished wood, grout, carpeting, and other porous surfaces. Protect the table and keep the slime away from clothing and upholstery.
Storage and Cleanup
This magnetic slime is best used the day it is made. If you keep it briefly, place it in a labeled, airtight non-food container stored completely out of the reach of children and pets.
Discard the slime if it dries out, separates, becomes dirty, develops an unusual odor, or no longer has a usable texture. Place used slime in the household trash rather than washing it down a sink or drain.
Keep the magnet separate from the slime and store it in a secure adult-controlled location.
Frequently Asked Questions
Can I Make Magnetic Slime with a Regular Magnet?
A refrigerator or craft magnet will usually produce a very weak reaction. A strong neodymium block or bar magnet produces a much more noticeable result.
Is Magnetic Slime Edible?
No. This slime contains glue, liquid starch, and iron oxide powder and must never be eaten, tasted, or used by children who mouth sensory materials.
Can I Use Iron Filings Instead of Iron Oxide Powder?
Iron filings may also react to a strong magnet, but they are coarser, can create a rougher texture, and may discolor over time. Do not use metal shavings collected from a workshop. Use a product specifically sold for supervised science or craft activities and follow its label precautions.
Does Magnetic Slime Stay Magnetic?
The slime responds when a strong magnet is nearby, but it does not usually behave like a permanent magnet after the magnet is removed.
Can Kids Play with Magnetic Slime by Themselves?
No. The iron oxide powder and high-powered magnet require direct adult control. This should be treated as a supervised science demonstration rather than independent sensory play.
More Hands-On Activities for Kids
- How to Make Colorful Slime
- How to Make DIY Bouncy Balls
- How to Make Moon Sand with Two Ingredients
- Crazy Aaron’s Thinking Putty Review
- Kids Crafts and Activities
How to Make Magnetic Slime
Make magnetic slime with white school glue, liquid starch, and black iron oxide powder. This adult-supervised STEM activity creates a stretchy black slime that slowly moves toward a strong neodymium magnet.
Materials
- 1/4 cup washable white school glue
- 1/4 cup liquid starch, plus more only if needed
- 2 tablespoons black iron oxide powder labeled magnetite or Fe3O4
- 1 large neodymium block or bar magnet, for adult use only
Tools
- Disposable gloves
- Protective table covering
- Small non-food mixing bowl
- Measuring cup
- Measuring spoon
- Silicone spatula or sturdy craft spoon
- Plastic wrap, small zipper bag, or packing tape
- Damp paper towel
- Airtight non-food storage container
Instructions
1. Cover the work surface, put on disposable gloves, and place the mixing bowl on a stable surface away from food preparation areas.
2. Pour the liquid starch into the bowl. Slowly add the black iron oxide powder while an adult stirs gently. Continue stirring until no loose powder remains.
3. Add the white school glue and stir until the mixture begins forming a cohesive black slime.
4. Knead the slime with gloved hands for 1 to 2 minutes. If it remains extremely sticky, add liquid starch 1 teaspoon at a time.
5. Wrap the neodymium magnet securely in plastic wrap or packing tape, or place it inside a sealed zipper bag.
6. Place a small portion of slime on the covered surface. An adult should slowly move the covered magnet toward the slime without allowing children to handle the magnet.
7. Experiment with steering the slime, changing the distance between the slime and magnet, or recording the movement with time-lapse video.
Notes
Safety
This is an adult-supervised science activity for older children. It is not edible and is not intended for preschool sensory play. An adult must measure the iron oxide powder and control the neodymium magnet. Avoid breathing loose powder. Keep the magnet completely away from babies, young children, pets, and anyone likely to swallow small objects. Do not let powerful magnets snap together.
Equipment
Use a non-food mixing bowl, disposable gloves, a protected work surface, measuring tools, a sturdy spoon or spatula, and one large intact block or bar magnet.
Expert Tips
Mix the iron oxide powder into the liquid starch before adding the glue. This helps distribute the powder evenly and reduces clumping. Test a small blob of slime for the most noticeable movement.
Troubleshooting
If the slime is too sticky, knead it longer before adding liquid starch 1 teaspoon at a time. If it becomes stiff or rubbery, knead in a small amount of white glue. If the slime does not move, use a stronger magnet, make the slime portion smaller, or bring the magnet closer.
Variations
Measure the distance at which the slime begins moving, compare different slime portion sizes, steer it through a simple path, or record a time-lapse video.
Storage
This slime is best used the day it is made. Store it briefly in a labeled airtight non-food container completely out of the reach of children and pets.
Cleanup
Discard used slime in the household trash rather than washing it down the drain. Wipe the covered magnet with a damp paper towel before removing its protective covering. Wash hands and clean the work surface after the activity.
More Activities to Try
How to Make Colorful SlimeGlow-in-the-Dark Vampire Blood SlimeHow to Make DIY Bouncy BallsHow to Make Moon Sand
Recommended Products
-

 Elmer's Liquid School Glue, White, Washable, 32 Ounces - Great for Making Slime
 -
 Black Iron Oxide - Fe3O4 - Synthetic - 1 Pound
 -
 MIKEDE Strong Rare Earth Neodymium Magnets, Heavy Duty Bar Magnets with Double-Sided Adhesive, Powerful Pull Force, perfect for Fridge, Garage, Kitchen, Science, Craft, Office, DIY 60x10x3mm 6pack