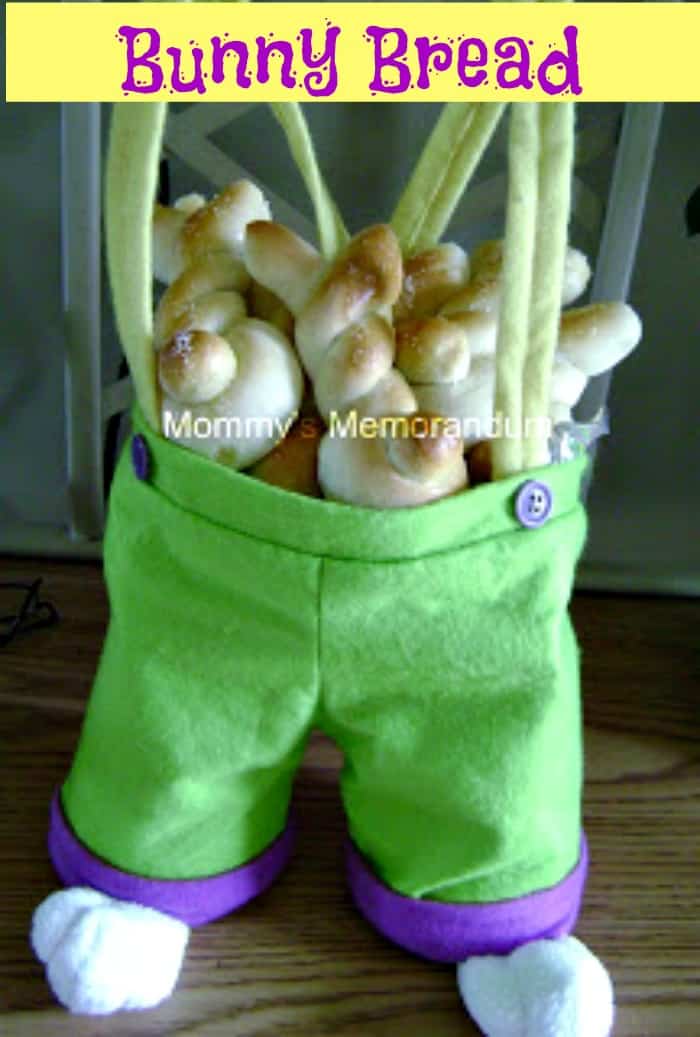
Bunny Bread Recipe: The Cutest Homemade Yeast Rolls You’ll Ever Bake
Hop to it — these bunny‑shaped dinner rolls are the fluffy showstoppers your Easter table has been begging for.
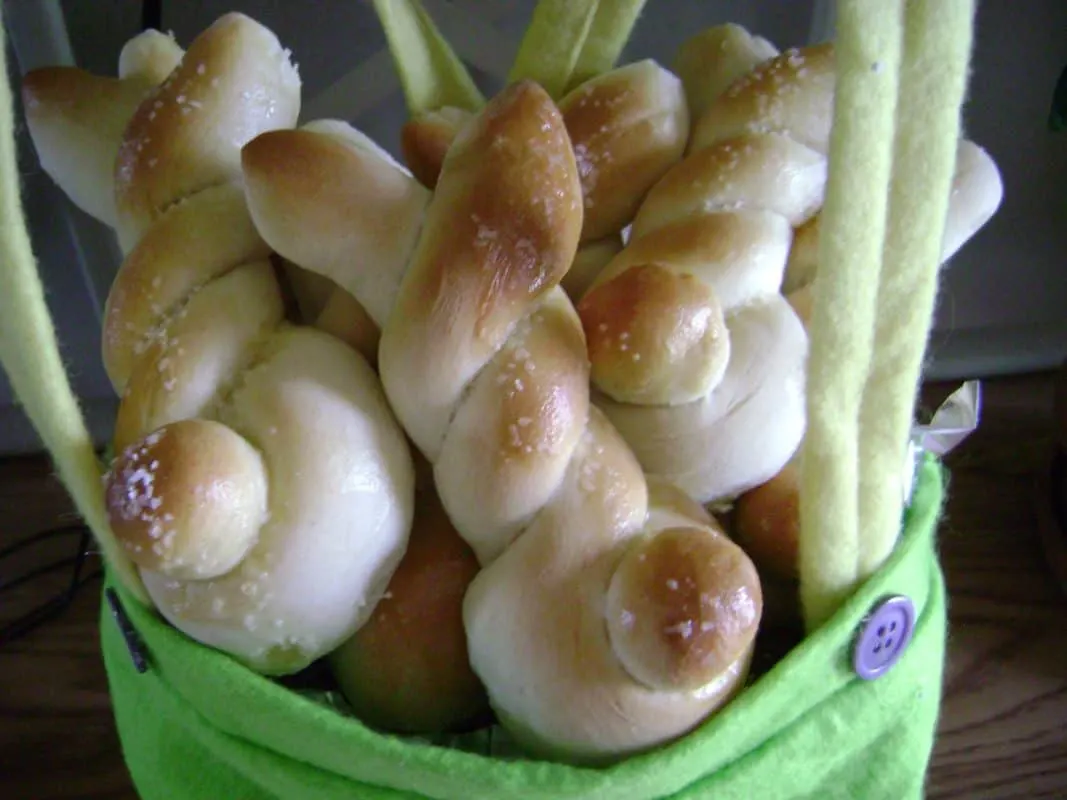
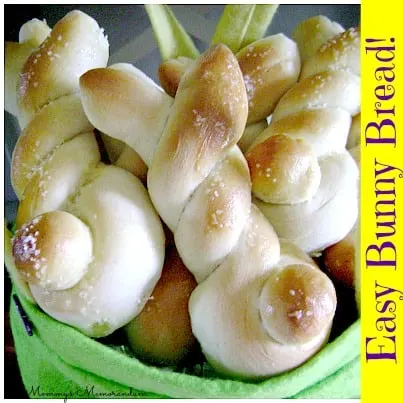
If you’ve ever wanted your holiday table to spark joy, conversation, and maybe a few delighted squeals, this bunny bread recipe is about to become your new spring tradition. These soft, fluffy homemade yeast rolls are shaped like adorable little bunnies — complete with twisty ears and a plump tail — and they’re almost too cute to eat. Almost.
This recipe starts with a simple enriched dough, the kind that bakes into pillowy, slightly sweet rolls with a golden crust. But the real magic happens in the shaping. With just a few twists and a tiny dough ball for the tail, you’ll transform basic pantry ingredients into whimsical bunny‑shaped dinner rolls perfect for Easter brunch, spring celebrations, or any family gathering that could use a little extra charm.
Whether you’re hosting a holiday feast or just want to surprise your crew with something fun and festive, these bunny bread rolls deliver warmth, personality, and a whole lot of “awww.” You might also like our Hot Cross Buns recipe.
Why You’ll Love This Bunny Bread Recipe
There’s something irresistible about bread that doubles as décor, and these bunny rolls check every box.
- Soft, fluffy yeast bread with a rich, slightly sweet flavor
- A fun, hands‑on shaping process (kids love this part)
- Perfect for Easter, spring gatherings, and themed dinners
- Made with simple pantry staples
- Adorable enough for the centerpiece, delicious enough for the dinner plate
- Easy to customize with sweet or savory variations
If you love playful, seasonal baking — like my holiday bread recipes or the cozy comfort of homemade yeast bread basics — this bunny bread fits right in.

Ingredients
These bunny‑shaped dinner rolls use a classic enriched dough that’s easy to work with and bakes beautifully.
For the Dough
- 2 cups milk
- 2 tablespoons Crisco (shortening)
- 2 packets active dry yeast
- 1/2 cup warm water (around 115°F)
- 1/2 cup granulated sugar
- 1/2 tablespoon salt
- Approximately 6–7 cups all-purpose flour (added gradually)
Optional for Sticky Bun Variation
- Ground cinnamon
- Butter
Directions
Step 1: Activate the Yeast
In a small bowl, dissolve the yeast in warm water (about 115°F). Let it sit until foamy — this tells you the yeast is alive and ready to work its magic.
Step 2: Prepare the Milk Mixture
Heat the milk and Crisco together until the mixture reaches 105–115°F. Combine with the activated yeast mixture.
Step 3: Form the Initial Dough
Add the sugar, salt, and 3 cups of flour to the wet mixture. Stir until the dough becomes spongy and sticky.
Step 4: First Rise
Cover the bowl and let the dough rise in a warm, draft‑free spot for about 45 minutes, or until doubled and bubbly.
Step 5: Knead the Dough
Using a stand mixer with a dough hook — or your hands if you’re feeling rustic — gradually add more flour until the dough becomes smooth, elastic, and slightly soft. It should spring back when gently pressed.
Step 6: Second Rise
Transfer the dough to a greased bowl, cover, and let it rise again for 1 to 1.5 hours, or until doubled.
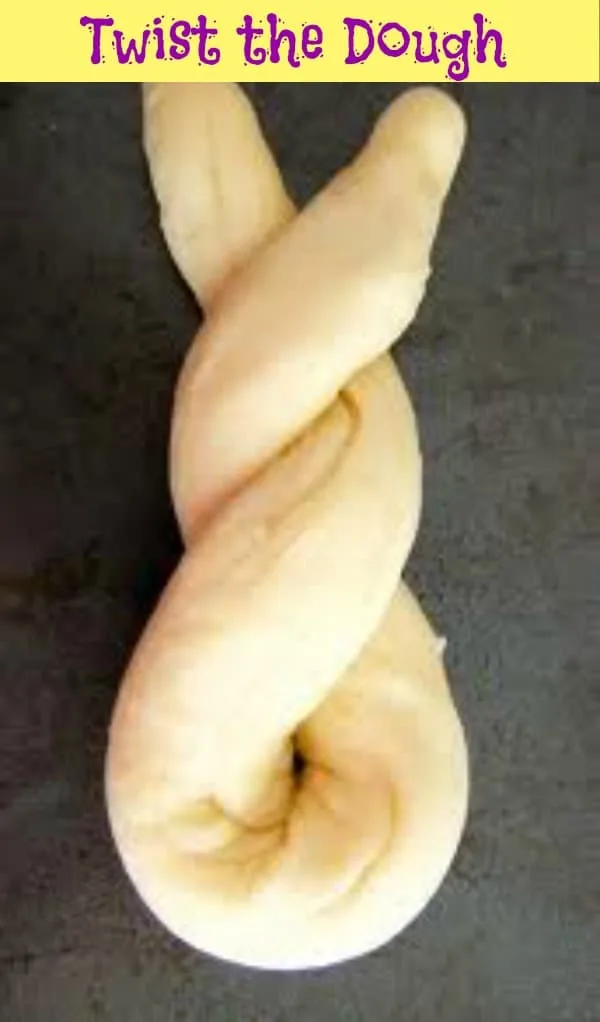
Step 7: Shape the Bunny Bread
This is where the fun begins.
- Divide dough into 1.5‑ounce portions
- Pinch off a small piece from each portion and roll into a ball (this becomes the bunny tail)
- Roll the remaining dough into a 12–14 inch rope
- Fold the rope in half and twist it three times
- Gently separate the top ends to form bunny ears
- Place on a greased baking sheet
- Attach the small dough ball to the base for the tail

Step 8: Final Proof
Let the shaped bunnies rise until puffy and doubled in size.
Step 9: Bake
Preheat oven to 350°F. Brush each bunny with beaten egg white for a glossy, golden finish. Sprinkle coarse salt on the tail if you like.
Bake for 12–15 minutes, or until lightly golden.
Step 10: Finish and Serve
Remove from the oven and brush with melted butter. Serve warm and watch the smiles appear.
Expert Tips
A few pro‑level tricks to ensure your bunny bread turns out soft, fluffy, and perfectly shaped:
- Keep liquids within the proper temperature range so the yeast activates correctly
- Don’t over‑flour the dough — it should stay slightly soft
- Let the dough rise in a warm, draft‑free environment
- Use a kitchen scale for consistent 1.5‑ounce portions
- Keep rope thickness even for uniform bunnies
- For extra shine, brush with egg wash before baking
Variations & Creative Ideas
These bunny rolls are adorable as‑is, but they’re also a blank canvas for creativity.
- Sweet Bunny Rolls: Add a cinnamon‑sugar swirl before shaping
- Savory Bunnies: Mix in herbs like rosemary, garlic powder, or shredded cheese
- Honey Butter Glaze: Brush warm rolls with honey butter
- Chocolate Chip Bunny Bread: Add mini chocolate chips for a dessert‑style twist
- Stuffed Bunnies: Fill with jam or sweetened cream cheese
If you love sweet twists, you’ll also enjoy my cinnamon roll recipes for more dessert‑style bread inspiration.

Serving Suggestions
These bunny‑shaped dinner rolls shine in so many settings:
- As a whimsical centerpiece for Easter dinner
- Alongside soups, roasted meats, or springtime mains
- On a brunch board with butter, honey, and jams
- As edible décor for holiday gatherings
- Paired with your favorite spreads or flavored butters
For a full holiday menu, check out my Easter dinner ideas.
FAQs
Can I make bunny bread ahead of time? Yes. Prepare the dough and refrigerate it after the first rise. Bring to room temperature before shaping.
What flour works best? All‑purpose flour works beautifully, but bread flour gives a slightly chewier texture.
Why didn’t my dough rise? Inactive yeast, incorrect liquid temperature, or a cold environment are the usual culprits.
Can I freeze bunny bread? Absolutely. Freeze baked rolls in an airtight container and reheat when needed.
Final Thoughts
This bunny bread recipe is more than a side dish — it’s a hands‑on, joy‑filled baking experience that brings people together. With its soft texture, golden crust, and irresistibly cute shape, these bunny rolls are guaranteed to become a beloved holiday tradition.
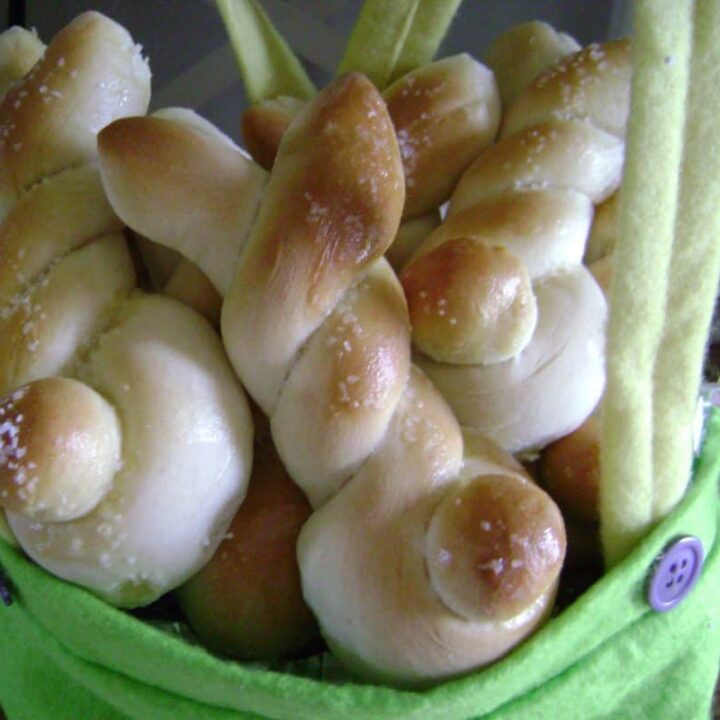
Bunny Bread Recipe (Adorable Bunny‑Shaped Dinner Rolls for Easter)
These soft, fluffy bunny‑shaped dinner rolls are the cutest addition to any Easter brunch or spring celebration. Made from a simple enriched yeast dough and shaped into charming little bunnies with twisty ears and a plump tail, this bunny bread recipe doubles as both décor and a delicious dinner roll. Serve them warm in a basket for an irresistible edible centerpiece that brings smiles to the table.
For more festive baking inspiration, try my Hot Cross Buns Recipe, or Bailey’s Irish Cream Frosting or pair these rolls with Irish Coffee Bars for a sweet spring spread.
Ingredients
For the Dough
- 2 cups milk
- 2 tablespoons Crisco (shortening)
- 2 packets active dry yeast
- 1/2 cup warm water (around 115°F)
- 1/2 cup granulated sugar
- 1/2 tablespoon salt
- 6–7 cups all-purpose flour (added gradually)
Optional Sticky Bun Variation
- Ground cinnamon
- Butter
Instructions
- In a small bowl, dissolve the yeast in warm water (about 115°F). Let it sit until foamy.
- Heat the milk and Crisco together until the mixture reaches 105–115°F. Combine with the activated yeast.
- Add sugar, salt, and 3 cups of flour. Mix until the dough becomes spongy and sticky.
- Cover and let rise for 45 minutes, or until doubled and bubbly.
- Gradually add more flour and knead until smooth, elastic, and slightly soft.
- Transfer to a greased bowl, cover, and let rise 1–1.5 hours, or until doubled.
- Divide dough into 1.5‑ounce portions. Pinch off a small piece for the tail.
- Roll the remaining dough into a 12–14 inch rope, fold in half, twist three times, and separate the ends to form ears.
- Attach the small dough ball to form the tail and place on a greased baking sheet.
- Let shaped bunnies rise until doubled.
- Preheat oven to 350°F. Brush with beaten egg white and bake 12–15 minutes, until golden.
- Brush with melted butter and serve warm.
Notes
Notes:
Variations
- Sweet Bunny Rolls: Add cinnamon sugar before shaping.
- Savory Bunnies: Mix in herbs like rosemary, garlic powder, or cheese.
- Honey Butter Glaze: Brush warm rolls with honey butter.
- Chocolate Chip Bunnies: Add mini chocolate chips to the dough.
- Stuffed Bunnies: Fill with jam or sweetened cream cheese.
Serving Suggestions
Serve these bunny rolls warm in a basket as a charming Easter centerpiece. They pair beautifully with brunch dishes, soups, roasted meats, or sweet spreads. For more springtime inspiration, check out Homemade Irish Cream for a festive beverage pairing.
This recipe was originally published March 18, 2012, and updated March 30, 2026, with improved instructions, updates, and new photos.
Nutrition Information:
Yield: 20 Serving Size: 1Amount Per Serving: Calories: 39Total Fat: 1gSaturated Fat: 0gUnsaturated Fat: 0gCholesterol: 2mgSodium: 150mgCarbohydrates: 8gFiber: 0gSugar: 6gProtein: 1g
The Nutritional Information may not be accurate. This website provides approximate nutrition information for convenience and as a courtesy only. Nutrition data is gathered primarily from the USDA Food Composition Database, whenever available, or otherwise other online calculators.