Reindeer Noses Candy Bags
A tiny treat with big holiday cheer—because even Rudolph knows presentation matters.
If you’re hunting for a Christmas favor that sleighs without draining your holiday budget (or your sanity), these Reindeer Noses Candy Bags are about to become your new go‑to. They’re quick, adorable, classroom‑friendly, and require exactly zero baking—an automatic win during the busiest season of the year. With just two candies and a simple printable label, you can whip up a whole herd of these festive little treats faster than Santa can double‑check the naughty list.
Whether you’re prepping for a classroom holiday party, stocking up on easy neighbor gifts, or need a last‑minute Christmas favor that still looks intentional and charming, this is one of those simple Christmas craft ideas that proves cute doesn’t have to be complicated. Kids love them, teachers appreciate them, and you’ll love how fast they come together.
For even more kid‑friendly holiday fun, you can pair these with other easy projects like my Valentine’s Day crafts.


Adorable Reindeer Nose Favors – Easy Holiday Party Treats
Why You’ll Love This Holiday Favor
- Budget‑friendly and easy to make in bulk
- No baking required (a Christmas miracle)
- Kid‑approved and classroom‑safe
- Customizable with different candies or packaging
- Perfect for last‑minute gifting or party prep
- Ideal for teachers, coworkers, neighbors, and classroom exchanges
Ingredients
- 8 malted milk balls (or another round chocolate candy)
- 1 red gumdrop ball (Rudolph’s nose)
- Optional substitutions: chocolate truffles, chocolate‑covered nuts, or red M&M‑style candies
Directions
- Lay out clear treat bags on a clean, flat surface to streamline assembly.
- Add eight malted milk balls to each bag, keeping them grouped together at the bottom.
- Place one red gumdrop ball into the bag to represent Rudolph’s bright red nose.
- Gently shake or straighten the bag so the candies sit neatly and are visible from the front.
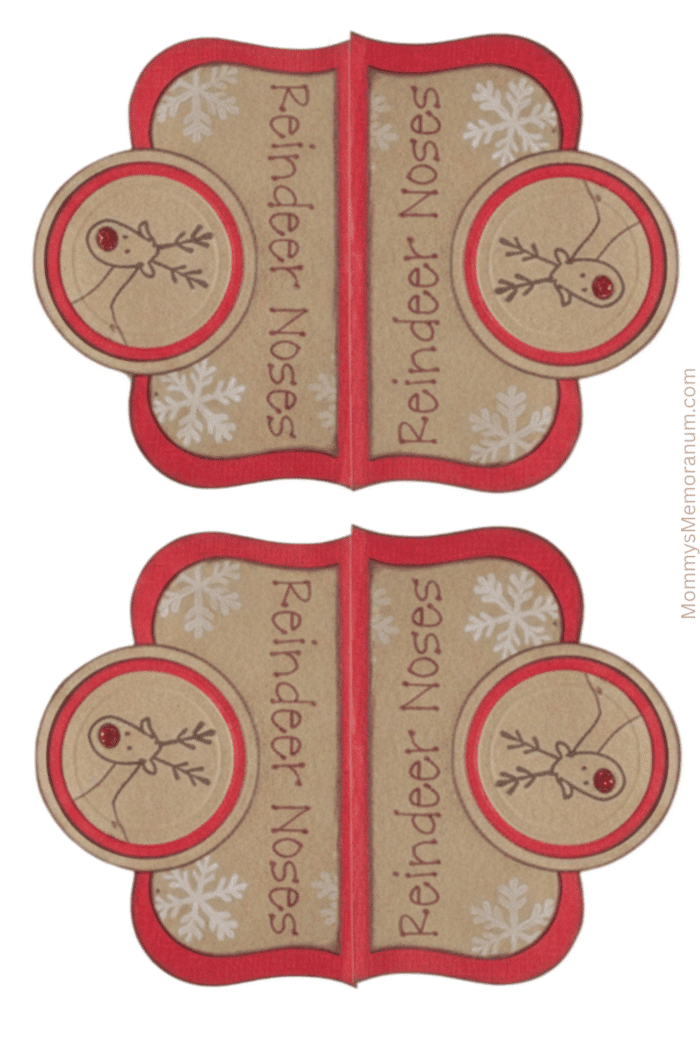
- Fold the top of the bag down and position your “Reindeer Noses” label over the fold.
- Staple through the label and bag to secure the treat.
- Repeat until all favors are assembled, then store in a cool, dry place until gifting.
If you love simple, no‑bake holiday treats, you might also enjoy my kids’ crafts section for more quick ideas that pair perfectly with classroom celebrations.

Expert Tips
- Set up an assembly line when making these in large batches.
- Use clear, flat‑bottom bags so the candy stands upright for a polished look.
- Staple once in the center for small labels or twice on the sides for larger ones.
- Keep finished bags away from heat to prevent chocolate from melting or blooming.
Variations & Creative Tips
- Swap malted milk balls for chocolate truffles or chocolate‑covered pretzels.
- Use red foil‑wrapped chocolates instead of gumdrops.
- Print labels on cardstock for extra durability.
- Add a child’s name or short holiday message for personalized classroom favors.
- Tie with red or green twine instead of stapling for a rustic, handmade look.
For more packaging inspiration, check out my DIY gift packaging tutorials —they pair beautifully with these treats.
Serving Suggestions
- Classroom holiday parties
- Preschool or daycare treats
- Stocking stuffers
- Office candy bowls or coworker gifts
- Holiday craft fairs or church events
- Basket fillers for grab‑and‑go gifting
FAQs
How far in advance can I make Reindeer Noses favors? Up to a week ahead if stored in a cool, dry place.
Are these safe for nut‑free classrooms? Always check candy labels and school guidelines. Substitute nut‑free chocolate if needed.
Can kids help make these? Absolutely—this is a great low‑mess activity for older kids with light supervision.
Do I need a printable label? Not required, but it adds charm and makes the favor instantly recognizable.
Final Thoughts
When the holiday rush hits full speed, it’s the simple, thoughtful ideas that save the day. These Reindeer Noses Candy Bags prove you don’t need complicated supplies or hours in the kitchen to create something festive and memorable. Whether you’re making a dozen or a few dozen, this Christmas favor delivers big cheer with minimal effort.
If you make these for a class party or holiday event, I’d love to hear how you customized them. Your creative spins always inspire the next round of festive fun.