Christmas Candy Sled Favors (Easy Candy Cane Sleighs)
The sweetest little sleighs that always deliver holiday cheer
If you’re ready to sleigh your holiday party favors this year, these Christmas Candy Sled Favors are about to become your new go‑to. They’re whimsical, colorful, and ridiculously easy — the kind of festive DIY that looks impressive but takes almost no time at all. With just a handful of candies and two classic candy canes, you can build a mini Santa’s sled stacked high with “presents” that taste as good as they look.
Whether you’re prepping classroom treats, stocking stuffers, coworker surprises, or a fun family craft night, these DIY candy sleds bring instant joy. They’re budget‑friendly, kid‑approved, and endlessly customizable — a holiday triple win. And because they require zero baking and minimal supplies, they’re perfect for those last‑minute moments when you want something thoughtful without the stress.
Set one at each place for Christmas dinner with a handwritten name tag, or tuck a sled into a gift bag as a sweet party favor. For more simple holiday ideas, try my Christmas party hosting guide and Ham and Swiss Pinwheels for the appetizer table.
Why You’ll Love These Christmas Candy Sled Favors
- Quick and easy to assemble — ideal for last‑minute gifting
- No baking required (your December schedule just breathed a sigh of relief)
- Customizable with any candy you love
- Fun for kids, adults, and anyone who enjoys a little holiday crafting
- Perfect for classrooms, office parties, stockings, and gift baskets
Supplies for One Christmas Candy Sled
- 2 individually wrapped standard candy canes for the runners
- 1 flat, individually wrapped Hershey’s milk chocolate bar for the base (or a similarly shaped wrapped chocolate bar)
- 3–5 smaller individually wrapped candies for the stacked “presents”
- 1 piece of ribbon, about 18 inches long (adjust to fit your candy)
- 6–8 removable adhesive dots or small pieces of double-sided tape, applied to wrappers only
- Optional: 1 small cardstock gift tag or place card and a pen
Making 12 sleds? Gather 24 candy canes, 12 flat wrapped bars or boxes, 36–60 smaller wrapped candies, 12 lengths of ribbon and about 72–96 adhesive dots. Set out 12 name tags if you are using the sleds as Christmas table place settings. The exact number of small candies depends on package size.
Keep every candy sealed in its original wrapper. Adult supervision is important when younger children assemble the sleds; adhesive supplies are not edible.
How to Make Christmas Candy Cane Sleds
- Line up the runners. Place two still-wrapped candy canes parallel on a clean work surface, with their curved hooks pointing the same way. Space them to support the flat candy bar.
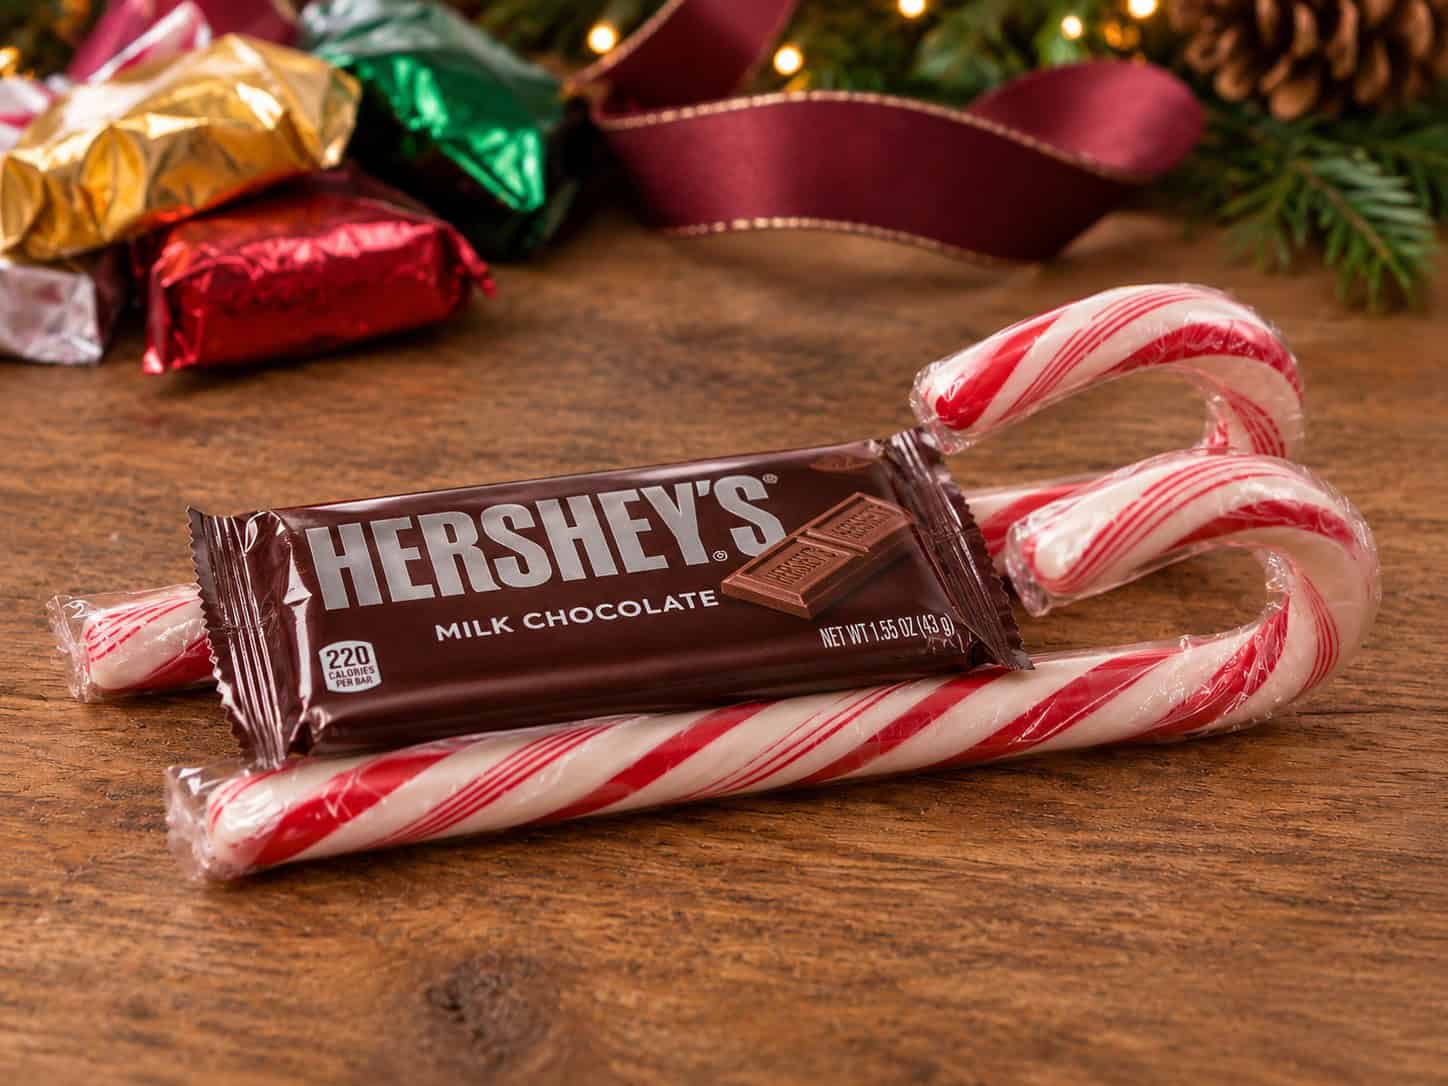
- Attach the base. Use adhesive dots or small pieces of double-sided tape on the outside of the wrappers to attach the flat wrapped Hershey’s chocolate bar across the straight sections of both candy canes. Press gently; avoid cracking the canes.

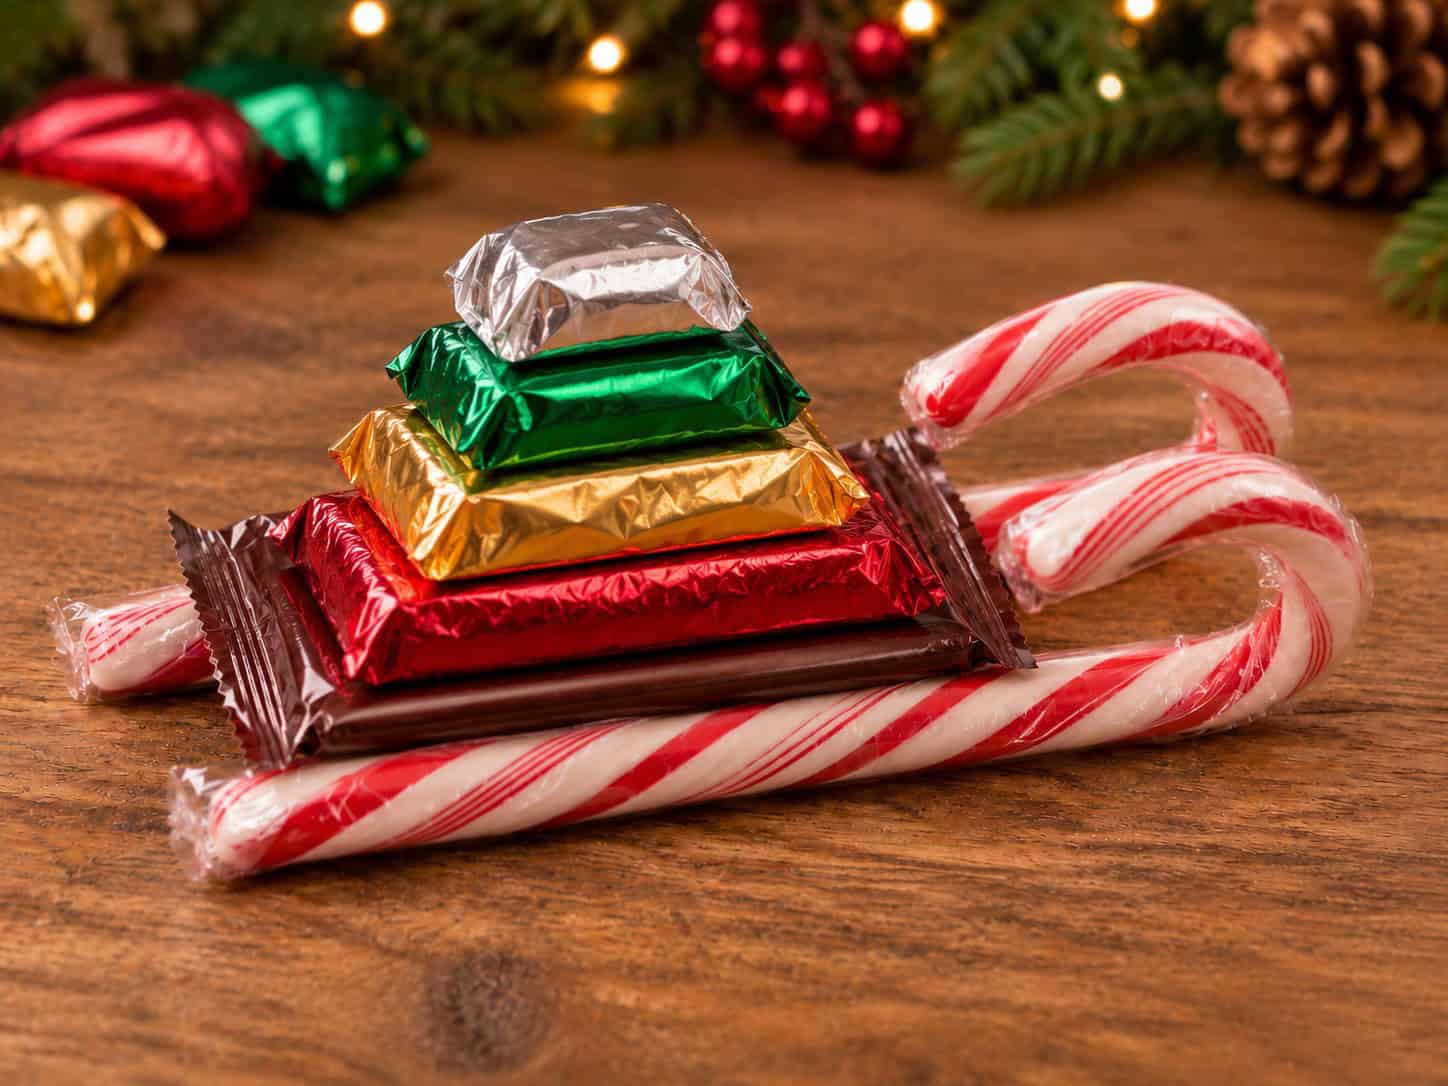
Use a flat, wrapped Hershey’s milk chocolate bar for the base. Attach it across both parallel candy-cane runners. - Stack the presents. Layer three to five smaller wrapped candies, largest on the bottom and smallest on top. Add an adhesive dot between the outer wrappers as needed so the stack will not slide.
Stack the wrapped chocolates from largest to smallest before tying the ribbon. - Finish with ribbon. Wrap ribbon around the assembled sled and tie a small bow. The ribbon is decoration, not the only thing keeping the runners attached.
- Add a name tag. Write each guest’s name on a small cardstock tag and tie it to the ribbon. Set a sled at each dinner place, or group them on a favor tray near the door.
Pro Tip: These make adorable centerpieces when grouped together — like a whole fleet of Santa’s delivery sleds.
Pick Candies That Actually Fit Together
A flat wrapped candy bar or small rectangular candy box makes a sturdier base than loose individual pieces. Position the two candy-cane runners beneath the long sides of that base, with both hooked ends pointing the same direction. Build upward from larger wrapped candies to smaller ones so the stack resembles little presents without becoming top-heavy.
Alternative mini version: Use two wrapped mini candy canes, one wrapped miniature chocolate bar and one small wrapped candy. Scale down the ribbon and name tag accordingly. This is a separate variation rather than the full-size supply count above.
What to Avoid
Keep adhesive on the outside of intact wrappers only. Do not apply glue directly to edible candy. Choose decorations appropriate for your guests; small candy, tags, and decorative bells can be choking hazards for young children. Check ingredient and allergen labels before giving these as classroom treats.
Expert Tips
- Use only wrapped candy, and attach adhesive to the packaging rather than the candy itself. Removable glue dots or double-sided tape are easier than a hot glue gun.
- Mix colors and shapes for a more festive, gift‑stacked look.
- Keep smaller candies toward the top to prevent tipping.
- Tie ribbon tightly if you’re transporting them to school or work.
Variations & Creative Twists
- Swap candy for mini ornaments or tiny toys for a non‑edible version.
- Use metallic or glitter ribbon for extra sparkle.
- Add peppermint bark, holiday gummies, or mini cookies for texture and variety.
- Personalize each sled with name tags for classroom or dinner‑table place settings.
Christmas Candy Sleds as Place Cards and Favors
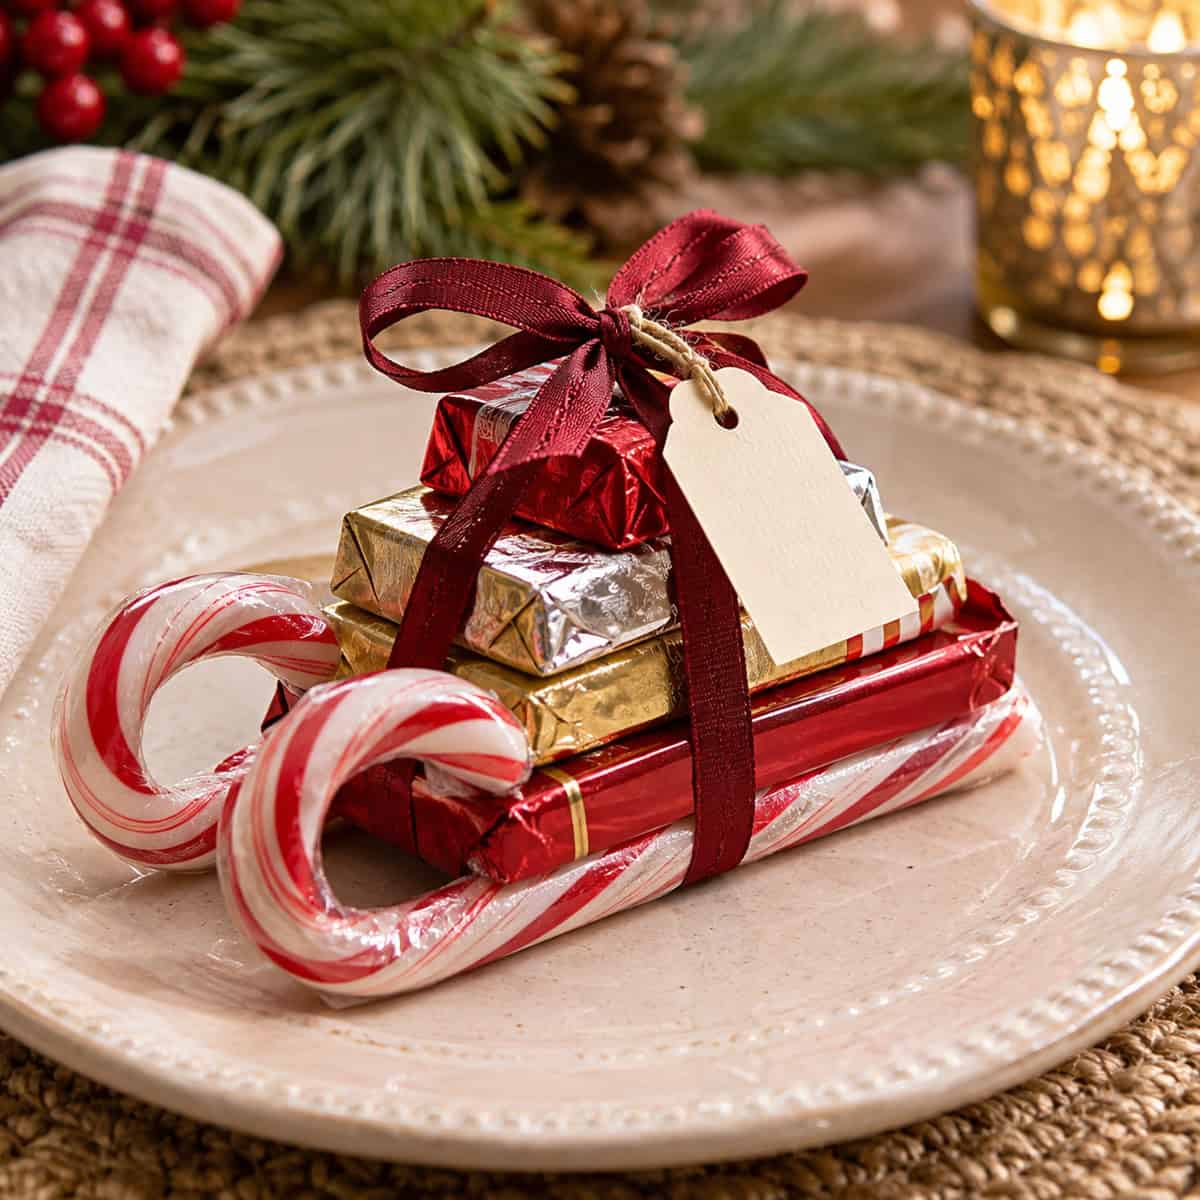
For a sit-down Christmas dinner, add each guest’s first name to a small cardstock tag and tie it to the sled’s ribbon. Place the sled just above the dinner plate or beside the napkin so the centerpiece stays uncluttered. At a buffet, display the sleds on a tray with a “Take a little holiday cheer” card near the exit.
Make-ahead tip: Assemble several days ahead and store flat in a cool, dry location away from direct sunlight. Keep wrappers intact until guests open their treats.
Serving & Gifting Ideas
- Set them at each place setting for holiday dinners.
- Add to stockings, gift baskets, or teacher gifts.
- Use as party favors for Christmas gatherings or office celebrations.
- Display on dessert tables for a whimsical, edible decoration.
FAQs
Can I make these ahead of time? Yes! Assemble up to a week in advance and store in a cool, dry place.
Can I use different types of candy? Absolutely — mix and match to fit your theme. Just make sure the base candy is flat and sturdy.
How do I keep the candy from sliding? A snug ribbon and removable adhesive dots placed between intact wrappers help hold the stack together. Do not glue food directly.
More Favor Ideas
- DIY Christmas Ghirardelli Advent | Chocolate Countdown Craft
- DIY Handmade Gift & Snack Containers
- Reindeer Noses Candy Bags
- Reindeer Dust Recipe

Plan a Little Holiday Party Around Them
Pair these candy cane sleighs with a simple hot cocoa station and a tray of Ham and Swiss Cheese Pinwheels. For a practical table and buffet plan, see How to Host a Christmas Party.
Final Thoughts
These Christmas Candy Sleds aren’t just treats — they’re tiny, joyful statements that say “I thought of you” without requiring hours in the kitchen. They’re festive, fun, and endlessly customizable, making them perfect for gifting, decorating, or simply enjoying the creative process. Whether you’re assembling a dozen or a whole sleigh‑full, these candy sleds are guaranteed to sleigh the season.