When my children were small, this Zombie Brain Jello was a tradition at our Halloween meal. I would serve it after dinner as the prelude to trick-or-treating, and it always got the best response. My children would poke the brain and watch it jiggle before anyone dared to take the first spoonful.
My children are now between 20 and 36 years old, and they still talk about this creepy Halloween tradition. That is the magic of this dessert: it isn’t simply something sweet to eat. It becomes part of the celebration and one of those wonderfully strange family memories that lasts.
This easy Zombie Brain Jello mold recipe combines lime gelatin, whipped topping, mini marshmallows, and bloody red decorating gel. For even more gory, flavorful fun, spoon raspberry “blood” around the finished brain before serving.

Why You’ll Love This Zombie Brain Jello
- It creates a Halloween tradition: This is the kind of dessert children remember and talk about long after they’ve outgrown trick-or-treating.
- It’s wonderfully interactive: Kids love poking the brain and watching it jiggle.
- It looks deliciously disturbing: The brain shape, red veins, and raspberry sauce create a showstopping Halloween centerpiece.
- No baking is required: Mix, layer, refrigerate, and unmold.
- It can be made ahead: Prepare it the night before and decorate shortly before serving.
- It has layers of flavor and texture: Lime gelatin, creamy whipped topping, fluffy marshmallows, and fruity raspberry sauce make every spoonful fun.
Watch How to Make Zombie Brain Jello
Watch the video below to see how to layer, chill, unmold, and decorate this creamy lime Zombie Brain Jello. You’ll also see the clean mold release—without heat or steam—the signature gelatin jiggle, and the raspberry “blood” sauce that makes this Halloween dessert deliciously creepy.
Zombie Brain Jello Ingredients
- 3 cups boiling water, divided
- 4 packages (3 ounces each) lime-flavored gelatin, divided
- 1½ cups ice-cold water, divided
- 1 container (8 ounces) frozen whipped topping, thawed
- 2 cups mini marshmallows
- 1 tube (0.75 ounce) red decorating gel
- Cooking spray, for the mold
Optional Raspberry “Blood” Sauce
- ¼ cup seedless raspberry jam
- Approximately 1 teaspoon warm water, plus more as needed
The red decorating gel is best for tracing fine veins over the brain. The raspberry sauce adds bloody-looking pools and drips around the base while contributing another layer of fruity flavor.
Equipment You’ll Need
- Brain-shaped gelatin mold
- Large mixing bowls
- Whisk
- Rubber spatula
- Measuring cups
- Large bowl for an ice bath
- Cooking spray
- A bowl, rolled kitchen towel, or aluminum foil ring to support the mold
- Black Halloween serving platter
- Food-safe Halloween serving utensils
How to Prepare a Brain-Shaped Gelatin Mold
Wash the brain mold in warm, soapy water, paying attention to its grooves and crevices. Rinse it thoroughly and dry it completely. Water left inside the mold can prevent the cooking spray from coating the surface evenly and may cause the gelatin to stick.
Lightly coat the entire interior with cooking spray, including the detailed grooves. Wipe away any visible excess so the finished brain doesn’t have a greasy surface.
Most brain molds do not sit level on their own. Set the mold open-side up inside a bowl or support it with a rolled kitchen towel or ring of aluminum foil. Make sure it is level and stable before adding the gelatin so it won’t tilt or spill in the refrigerator.
How to Make Zombie Brain Jello
Step 1: Make the Creamy Lime Gelatin
Place 2 packages of lime gelatin in a large mixing bowl. Add 1 cup boiling water and whisk for about 2 minutes, or until the gelatin is completely dissolved.
Stir in ½ cup ice-cold water. Refrigerate for 20–30 minutes, checking frequently, until the mixture has thickened to approximately the consistency of mayonnaise. Do not allow it to set completely.
Step 2: Fold in the Whipped Topping
Gently fold the thawed whipped topping into the thickened gelatin until evenly combined. Spoon the mixture into the prepared brain mold and spread it into an even layer.
Keep the mold level in its supporting bowl or ring and refrigerate for 30–45 minutes, or until the creamy layer is firm enough to support the second layer.
Step 3: Make the Marshmallow Gelatin
Place the remaining 2 packages of lime gelatin in a clean mixing bowl. Add the remaining 2 cups boiling water and whisk for about 2 minutes, or until completely dissolved.
Stir in the remaining 1 cup ice-cold water. Place the bowl over an ice bath and stir until the gelatin begins to thicken slightly.
Fold in the mini marshmallows. Waiting until the gelatin has started to thicken helps prevent all the marshmallows from floating to the same spot.
Step 4: Assemble the Brain
Spoon the marshmallow gelatin over the set creamy layer. Keep the mold level as you fill it.
Brain molds vary in capacity. Do not overfill the mold; leave a little space at the top. Pour any extra mixture into individual cups and refrigerate them separately.
Step 5: Refrigerate Until Firm
Cover the mold without allowing the covering to touch the gelatin. Refrigerate for at least 6 hours, preferably overnight, until the brain is completely firm.
Step 6: Loosen the Gelatin
Gently pull the exposed edge of the gelatin away from the mold with clean fingers. Carefully shake the mold to see whether the gelatin has loosened from the sides.
Place the serving platter upside down over the mold. Hold the mold and platter together securely, invert them, and gently lift away the mold.
If the brain does not release, dip the outside of the mold in warm—not hot—water for 3–5 seconds and try again. Use the warm-water method only as needed because too much heat can soften the detailed brain grooves.
Step 7: Add the Bloody Veins
Use the red decorating gel to trace the grooves of the brain and create glossy, bloody-looking veins.
Step 8: Make the Raspberry “Blood”
Place ¼ cup seedless raspberry jam in a small microwave-safe bowl. Stir in approximately 1 teaspoon warm water.
If necessary, microwave the mixture for 10 seconds, then stir until smooth. Add more water a few drops at a time until the sauce is thin enough to drizzle but still thick enough to resemble blood.
Spoon the raspberry sauce over portions of the brain and allow it to pool around the base. Add it immediately before serving for the most dramatic effect.
Expert Tips for the Best Brain Mold Jello
- Dry the mold completely. Water in the crevices can interfere with the cooking spray and cause sticking.
- Support the mold before filling it. Set it inside a bowl or homemade ring so it remains level in the refrigerator.
- Dissolve the gelatin thoroughly. Whisk each batch with boiling water for about 2 minutes.
- Thicken the first mixture before adding whipped topping. If the gelatin is too warm or thin, the creamy layer may separate.
- Fold instead of beating. Gentle folding keeps the whipped topping light and evenly distributed.
- Let the first layer become firm. This prevents the marshmallow mixture from sinking into it.
- Don’t overfill the mold. Leave a little room at the top and refrigerate extra gelatin in separate cups.
- Chill it overnight when possible. A thoroughly chilled brain is easier to unmold and holds its shape longer.
- Try loosening it before using warm water. A brief warm-water dip should be the backup method so the brain details remain sharp.
- Decorate shortly before serving. The veins and raspberry blood will look glossier and more dramatic.
Which Gelatin Flavor Should You Use?
Lime gelatin gives this recipe its classic green zombie appearance, but other flavors can completely change the character of the finished brain:
- Lime: Creates a bright green zombie or moldy-brain effect.
- Peach: Produces a lighter, more flesh-colored brain.
- Peach and strawberry: Creates a darker pink-red brain with a more realistic gory appearance.
- Cherry, raspberry, or strawberry: Makes a deep red bloody brain.
- Blue raspberry: Creates an icy or frozen-brain effect.
Use the same total quantity of gelatin when substituting flavors.
Zombie Brain Jello Variations
- Gummy surprise: Hide gummy worms or gummy eyeballs inside the marshmallow layer.
- Extra-green brain: Add one or two drops of green food coloring.
- Shimmering brain: Add a small amount of edible glitter made specifically for food.
- Adults-only brain: Replace a small portion of the cold water with chilled vodka. Replacing too much water may prevent the gelatin from setting firmly.
- Extra gore: Use both red decorating gel and raspberry blood sauce.
- Strawberry blood: Substitute seedless strawberry jam for the raspberry jam.

How to Serve Zombie Brain Jello
Serve the brain after Halloween dinner as the deliciously creepy prelude to trick-or-treating. Let the children poke it gently and watch it jiggle before serving the first spoonful—that was always part of the fun in our house.
Display it on a black Halloween serving platter so the bright green gelatin, bloody veins, and raspberry sauce stand out.
Set out food-safe Halloween serving utensils or small black dessert spoons. Make sure any novelty utensils are specifically labeled food-safe before allowing them to touch the dessert.
Keep plastic cobwebs, dry ice, and other non-food decorations separate from the gelatin.
Make-Ahead Instructions
Prepare and assemble the Zombie Brain Jello up to 24 hours before serving. Keep it covered inside the mold in the refrigerator.
For the cleanest shape, unmold it and add the red decorating gel and raspberry blood shortly before serving. The brain can be unmolded several hours ahead if necessary, but it should remain covered and refrigerated.
How to Store Leftover Brain Jello
Cover leftovers tightly or transfer them to an airtight container. Refrigerate for up to 3 days. The marshmallows will soften slightly over time, but the gelatin will remain enjoyable when properly chilled.
Do not leave the gelatin at room temperature for longer than 2 hours.
Can You Freeze Gelatin?
Freezing is not recommended. Gelatin can release liquid and develop a grainy, watery, or rubbery texture after thawing.
Troubleshooting Your Brain Jello Mold
Why did the whipped topping separate?
The gelatin was probably too warm or too thin when the whipped topping was added. Refrigerate it until noticeably thickened before folding in the whipped topping.
Why did the two layers mix together?
The creamy first layer was not firm enough to support the marshmallow gelatin. Refrigerate it until the surface has set before adding the second layer.
Why did the gelatin spill in my refrigerator?
The brain mold was probably not level or adequately supported. Set it inside a bowl, rolled kitchen towel, or aluminum foil ring before filling it.
Why won’t the brain release from the mold?
Gently loosen the exposed edge and shake the mold first. If it remains stuck, dip the outside in warm water for 3–5 seconds and try again.
Why did the brain lose its detailed grooves?
The mold may have been dipped in warm water for too long. Use only a brief dip and repeat it if necessary rather than soaking the mold.
Why are all the marshmallows floating in one area?
The gelatin was still too thin when the marshmallows were added. Stir it over an ice bath until it begins to thicken before folding them in.
Zombie Brain Jello FAQs
Can I make Zombie Brain Jello ahead of time?
Yes. Prepare it the day before, refrigerate it overnight, and decorate it shortly before serving.
Can I make this without a brain-shaped mold?
Yes. Lightly coat a 2½-quart bowl with cooking spray. Cover the outside of a 1-quart bowl with plastic wrap and center it inside the larger bowl. Spoon the creamy gelatin between the bowls and refrigerate until firm. Remove the smaller bowl, fill the cavity with marshmallow gelatin, and refrigerate until completely set.
Can I use homemade whipped cream?
Stabilized homemade whipped cream can work, but frozen whipped topping provides the most predictable texture and stability.
Can I use sugar-free gelatin?
Yes. Use the same number and size of packages and follow this recipe’s measurements instead of the package preparation directions.
How long does Zombie Brain Jello need to set?
Allow at least 6 hours. Overnight refrigeration gives the gelatin the strongest structure and makes unmolding easier.
Can I transport the brain to a Halloween party?
Yes. Transport it inside the mold and unmold it at your destination. Keep it refrigerated or in a well-chilled cooler until serving.
Can I make the raspberry blood ahead of time?
Yes. Prepare it up to 3 days in advance and refrigerate it in a covered container. Warm it briefly and stir before drizzling if it becomes too thick.
Readers Also Make
Perfect With
Related Halloween Recipes
Next Recipe to Try
Turn Halloween dinner into part of the fright-night fun with this creepy Instant Pot Footloaf.
A Halloween Tradition They’ll Remember
This Zombie Brain Jello has everything a memorable Halloween recipe needs: a dramatic reveal, a ridiculous jiggle, a little bit of gore, and a dessert children can’t resist poking.
Years after our trick-or-treating nights together, my children still remember this brain appearing after dinner. Make it once, and it may become the Halloween tradition your family talks about decades from now.
Zombie Brain Jello Mold Recipe for Halloween


This Zombie Brain Jello is a creepy no-bake Halloween dessert made with lime gelatin, whipped topping, mini marshmallows, and bloody red decorating gel. Add raspberry “blood” sauce for even more gory, fruity fun. This easy make-ahead brain mold recipe became a treasured Halloween tradition that my children still remember as adults.
Ingredients
- 3 cups boiling water, divided
- 4 packages (3 ounces each) lime-flavored gelatin, divided
- 1½ cups ice-cold water, divided
- 1 container (8 ounces) frozen whipped topping, thawed
- 2 cups mini marshmallows
- 1 tube (0.75 ounce) red decorating gel
- Cooking spray, for the mold
Optional Raspberry “Blood” Sauce
- ¼ cup seedless raspberry jam
- Approximately 1 teaspoon warm water, plus more as needed
Instructions
1. Wash the brain-shaped gelatin mold in warm, soapy water, paying attention to the grooves and crevices. Rinse and dry it completely.
2. Lightly coat the entire interior of the mold with cooking spray. Wipe away any visible excess so the finished gelatin does not have a greasy surface.
3. Set the mold open-side up inside a bowl or support it with a rolled kitchen towel or aluminum foil ring. Make sure the mold is level and stable before filling it.
4. Place 2 packages of lime gelatin in a large mixing bowl. Add 1 cup boiling water and whisk for about 2 minutes, or until the gelatin is completely dissolved.
5. Stir in ½ cup ice-cold water. Refrigerate for 20–30 minutes, checking frequently, until the mixture has thickened to approximately the consistency of mayonnaise. Do not allow it to set completely.
6. Gently fold the thawed whipped topping into the thickened gelatin until evenly combined. Spoon the mixture into the prepared brain mold and spread it into an even layer.
7. Refrigerate for 30–45 minutes, or until the creamy gelatin layer is firm enough to support the second layer.
8. Place the remaining 2 packages of lime gelatin in a clean mixing bowl. Add the remaining 2 cups boiling water and whisk for about 2 minutes, or until completely dissolved.
9. Stir in the remaining 1 cup ice-cold water. Place the bowl over an ice bath and stir until the gelatin begins to thicken slightly. Fold in the mini marshmallows.
10. Spoon the marshmallow gelatin over the set creamy layer. Do not overfill the mold. Refrigerate any extra gelatin in individual dessert cups.
11. Cover the mold and refrigerate for at least 6 hours, preferably overnight, until the gelatin is completely firm.
12. Gently pull the exposed edge of the gelatin away from the mold with clean fingers. Carefully shake the mold to determine whether the gelatin has loosened.
13. Place the serving platter upside down over the mold. Hold the platter and mold securely together, invert them, and gently lift away the mold.
14. If the brain does not release, dip the outside of the mold in warm—not hot—water for 3–5 seconds and try again. Avoid soaking the mold because too much heat can soften the brain details.
15. Use the red decorating gel to trace the grooves of the brain and create glossy, bloody-looking veins.
16. For the optional raspberry blood, place the seedless raspberry jam in a small microwave-safe bowl and stir in approximately 1 teaspoon warm water. If needed, microwave for 10 seconds and stir until smooth. Add more water a few drops at a time until the sauce is thin enough to drizzle.
17. Spoon the raspberry blood over portions of the brain and allow it to pool around the base. Serve immediately or refrigerate until ready to serve.
Notes
Equipment
Brain-shaped gelatin mold
Large mixing bowls
Whisk
Rubber spatula
Measuring cups
Large bowl for an ice bath
Cooking spray
Bowl, rolled kitchen towel, or aluminum foil ring for supporting the mold
Black Halloween serving platterFood-safe Halloween serving utensils
Prepare and Support the Mold
Wash the brain mold in warm, soapy water and dry every groove completely. Water left inside the mold can prevent the cooking spray from coating the surface evenly and may cause the gelatin to stick.
Lightly coat the entire interior with cooking spray, including the detailed crevices. Wipe away any visible excess so the finished brain does not have a greasy surface.
Most brain molds do not sit level by themselves. Set the mold open-side up inside a bowl or support it with a rolled kitchen towel or aluminum foil ring before filling it. Confirm that it is level and stable so the gelatin will not tilt or spill in the refrigerator.
Expert Tips
Whisk each gelatin mixture with the boiling water for about 2 minutes so the gelatin dissolves completely.
Allow the first gelatin mixture to thicken before folding in the whipped topping. If it is too warm or thin, the creamy layer may separate.
Fold the whipped topping gently instead of beating it to keep the mixture light and evenly blended.
Let the creamy layer become firm before adding the marshmallow gelatin. Otherwise, the layers may mix together.
Stir the second gelatin mixture over an ice bath until it begins to thicken before folding in the marshmallows. This helps prevent all the marshmallows from floating to the same spot.
Do not overfill the mold. Leave a little space at the top and refrigerate any extra gelatin in individual cups.
Chill the assembled brain overnight whenever possible. Thoroughly chilled gelatin releases more easily and holds its shape longer.
Add the red decorating gel and raspberry blood shortly before serving so they remain glossy and dramatic.
How to Unmold the Brain
Gently pull the exposed gelatin away from the edge of the mold with clean fingers. Carefully shake the mold to determine whether the gelatin has released from the sides.
Place the serving platter upside down over the mold, hold both pieces securely, and invert them together.
Use a brief warm-water dip only if the brain does not release. Dip the outside of the mold in warm—not hot—water for 3–5 seconds and try again. Too much heat can soften or erase the detailed brain grooves.
Using Nested Bowls Instead of a Brain Mold
Lightly coat a 2½-quart bowl with cooking spray. Cover the outside of a 1-quart bowl tightly with plastic wrap and center it inside the larger bowl.
Spoon the creamy gelatin mixture into the space between the bowls and refrigerate until firm. Carefully remove the smaller bowl and any remaining plastic wrap.
Spoon the marshmallow gelatin into the center cavity. Cover and refrigerate for at least 6 hours, preferably overnight.
The finished dessert will be rounded instead of anatomically shaped, but red decorating gel and raspberry sauce can still give it a creepy brain-like appearance.
Raspberry “Blood” Sauce
The red decorating gel works best for tracing narrow veins across the brain. The raspberry sauce adds bloody-looking drips and pools around the base while contributing fruity flavor.
Start with approximately 1 teaspoon warm water for ¼ cup seedless raspberry jam. Because jam consistency varies by brand, add additional water only a few drops at a time.
If the sauce becomes too thin, stir in more jam. If it is too thick, add another small amount of warm water.
Seedless strawberry jam can be substituted for the raspberry jam.
Flavor Variations
Lime gelatin creates the classic bright green zombie or moldy-brain effect.
Peach gelatin produces a lighter, flesh-colored brain.
A combination of peach and strawberry creates a darker pink-red brain.
Cherry, raspberry, or strawberry gelatin makes a deep red bloody brain.
Blue raspberry gelatin creates an icy or frozen-brain effect.
Use the same total quantity of gelatin when substituting flavors.
More Variations
Hide gummy worms or gummy eyeballs inside the marshmallow layer for a creepy surprise.
Add one or two drops of green food coloring for a brighter zombie-green color.
Add a small amount of edible glitter made specifically for food for a supernatural shimmer.
For an adults-only version, replace a small portion of the cold water with chilled vodka. Replacing too much water may prevent the gelatin from setting firmly.
For extra gore, use both red decorating gel and raspberry blood sauce.
Serving Suggestions
Serve the brain after Halloween dinner as the creepy prelude to trick-or-treating. Let the children gently poke it and watch it jiggle before serving the first spoonful.
Display it on a black Halloween serving platter so the green gelatin, bloody veins, and raspberry sauce stand out.
Use food-safe Halloween serving utensils or small black dessert spoons.
Keep plastic cobwebs, dry ice, and other non-food decorations separate from the gelatin.
Make Ahead
Prepare and assemble the Zombie Brain Jello up to 24 hours before serving. Keep it covered inside the mold in the refrigerator.
For the cleanest presentation, unmold the brain and add the red decorating gel and raspberry blood shortly before serving.
The brain can be unmolded several hours ahead if necessary, but it should remain covered and refrigerated.
The raspberry blood can be prepared up to 3 days ahead and refrigerated in a covered container. Warm it briefly and stir before using if it becomes too thick.
Storage
Cover leftover Zombie Brain Jello tightly or transfer it to an airtight container.
Refrigerate leftovers for up to 3 days. The marshmallows may soften slightly over time.
Do not leave the gelatin at room temperature for longer than 2 hours.
Freezing
Freezing is not recommended. Gelatin can release liquid and develop a grainy, watery, or rubbery texture after thawing.
Troubleshooting
Why did the whipped topping separate?
The gelatin was probably too warm or thin when the whipped topping was added. Refrigerate it until noticeably thickened before folding in the whipped topping.
Why did the two layers mix together?
The creamy first layer was not firm enough to support the marshmallow gelatin. Refrigerate it until the surface has set before adding the second layer.
Why did the gelatin spill in the refrigerator?
The mold was probably not level or adequately supported. Set it inside a bowl, rolled kitchen towel, or aluminum foil ring before filling it.
Why won’t the brain release?
Gently loosen the exposed edge and shake the mold first. If it remains stuck, dip the outside in warm water for 3–5 seconds and try again.
Why did the brain lose its detailed grooves?
The mold may have been dipped in warm water for too long. Use only a brief dip and repeat it if necessary instead of soaking the mold.
Why are the marshmallows floating in one area?
The gelatin was still too thin when the marshmallows were added. Stir it over an ice bath until it begins to thicken before folding them in.
Frequently Asked Questions
Can I make Zombie Brain Jello ahead of time?
Yes. Prepare it the day before, refrigerate it overnight, and decorate it shortly before serving.
Can I make this without a brain-shaped mold?
Yes. Use the nested-bowl method to create a rounded gelatin dessert with a marshmallow-filled center.
Can I use homemade whipped cream?
Stabilized homemade whipped cream can work, but frozen whipped topping provides the most predictable texture and stability.
Can I use sugar-free gelatin?
Yes. Use the same number and size of packages and follow this recipe’s measurements instead of the package preparation directions.
How long does Zombie Brain Jello need to set?
Allow at least 6 hours. Overnight refrigeration gives the gelatin the strongest structure and makes unmolding easier.
Can I transport the brain to a Halloween party?
Yes. Transport it inside the mold and unmold it at your destination. Keep it refrigerated or in a well-chilled cooler until serving.
Recommended Products
For the most recognizable shape, use this brain-shaped gelatin mold.
Create glossy, bloody-looking veins with red decorating gel.
Display the finished brain on a reusable black Halloween serving platter.
Complete the presentation with food-safe Halloween serving utensils.
Other Halloween Recipes to Try
Pair your Zombie Brain Jello with this fizzy Scream-sicle Halloween Punch.
Add individual treats to the dessert table with these No-Bake Graveyard Pudding Cups.
Make a batch of Halloween Roll-Out Cookies.
Serve these easy Mummy Dogs before dessert.
For a complete creepy dinner, make this Instant Pot Footloaf.
Nutritional Information
Yield: 10 servings
Serving size: Approximately 1/10 of the prepared gelatin brain
Without the optional raspberry sauce, each serving contains approximately 225 calories, 4 grams total fat, 3 grams saturated fat, 0 milligrams cholesterol, 155 milligrams sodium, 47 grams carbohydrates, 0 grams fiber, 41 grams sugar, and 3 grams protein.
The optional raspberry sauce adds approximately 15–20 calories and 4–5 grams of carbohydrates per serving when divided among 10 portions.
Nutrition information is an estimate calculated from commonly available ingredients. Exact values will vary depending on the brands used, substitutions, portion size, and the amount of decorating gel or raspberry sauce applied.
Recommended Products
As an Amazon Associate and member of other affiliate programs, I earn from qualifying purchases.
-
 Jell-O Gelatin Dessert Mix - 3 oz Boxes (Pack of 3) - With Mini Shovel Spoons (Lime) - Metal Spoons
-
 RED RED SOFT GEL PASTE 4.5 OZ Cake Decorating
-
 Kamehame Brain Chocolate Molds, 2 Pcs Halloween Silicone Brain Cake Candy Cupcake Mold
-
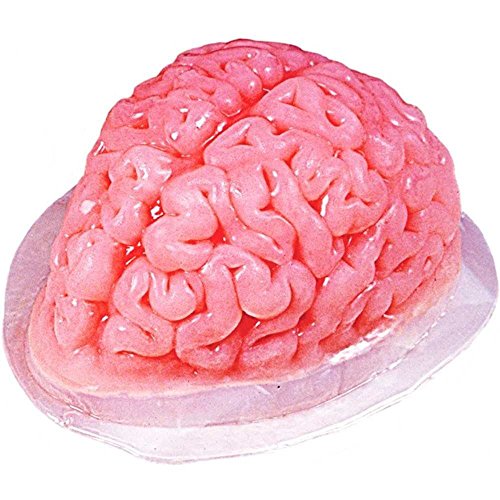 KINREX Halloween Brain Gelatin Mold - Plastic Jello Molds Baking Decorations
Nutrition Information:
Yield:
10Serving Size:
1Amount Per Serving: Calories: 183Total Fat: 0gSaturated Fat: 0gUnsaturated Fat: 0gSodium: 48mgCarbohydrates: 45gFiber: 3gSugar: 32gProtein: 2g
The Nutritional Information may not be accurate. This website provides approximate nutrition information for convenience and as a courtesy only. Nutrition data is gathered primarily from the USDA Food Composition Database, whenever available, or otherwise other online calculators.