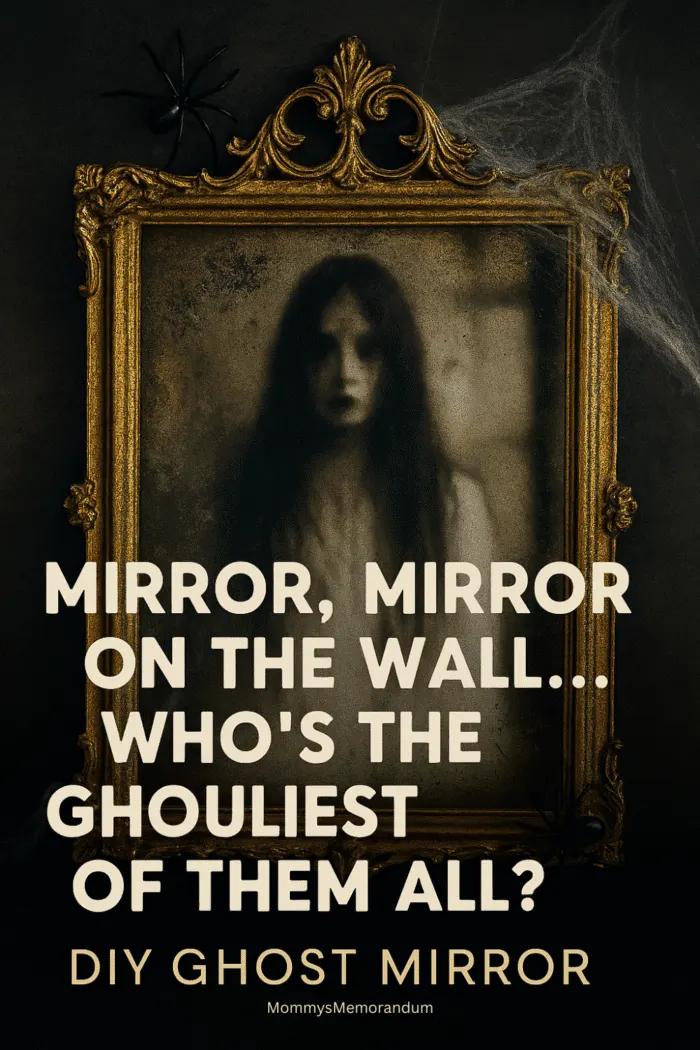
Turn an ordinary mirror into something wonderfully unsettling with this DIY ghost mirror. A transparent ghost image, antique-gold frame, black ink, and a few creepy embellishments create the illusion that someone—or something—is lurking inside the glass.
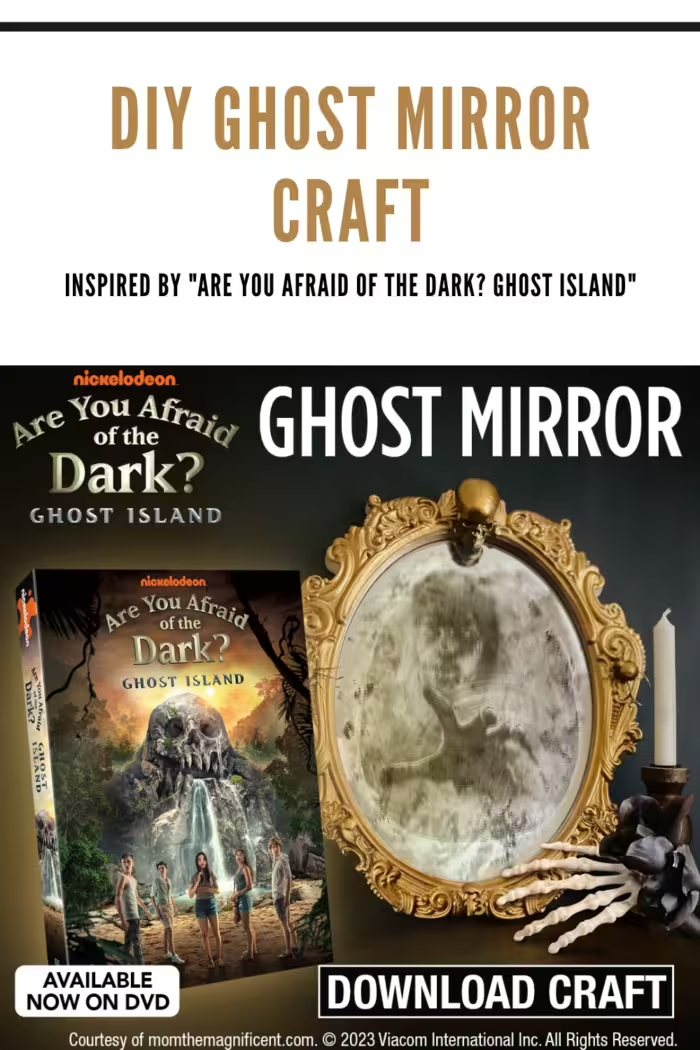
This beginner-friendly haunted mirror craft was inspired by Are You Afraid of the Dark? Ghost Island, but you don’t need special effects or complicated mirror-removal techniques to make it. Start with a real mirror, age the surface, add the ghost image, and embrace the imperfections. The slightly weathered, not-quite-perfect finish is what makes this Halloween mirror convincing.
Quick Craft: This project is beginner-friendly and works especially well with an inexpensive thrift-store mirror. Most of the work is simple painting, cutting, dabbing, and gluing, with additional time needed for paint, ink, and adhesive to dry.

DIY Ghost Mirror Inspired by Are You Afraid of the Dark?
Why You’ll Love This DIY Ghost Mirror
- Beginner-friendly: You don’t have to remove the mirror backing or build an elaborate special effect.
- Thrift-store friendly: An inexpensive secondhand mirror is perfect for this project.
- Easy to customize: Change the frame color, ghost image, or creepy embellishments to suit your Halloween décor.
- Wonderfully imperfect: Uneven aging actually makes the finished mirror look better.
- Free printable: You can use my ghost image instead of hunting for artwork.
- Great Halloween décor: Display it on a mantel, entry table, party buffet, or anywhere guests might unexpectedly catch its reflection.
Choosing a Mirror for Your Haunted Mirror Craft
You don’t need an expensive antique. In fact, this is a great excuse to rescue an inexpensive mirror from a thrift store, yard sale, or your own closet.
An ornate frame makes the transformation especially convincing because gold paint and black aging quickly give all those little details an old, gothic look. But don’t pass up a plain frame if that’s what you have—the ghost effect happens on the mirror itself, so almost any framed mirror can work.
Small scratches and cosmetic flaws aren’t deal-breakers, either. This is one craft where a little age gives you a head start.
DIY Ghost Mirror Supplies
You only need a handful of craft supplies to turn an ordinary mirror into a haunted reflection.
- Framed mirror, thrifted or one you already own
- FolkArt Metallic Acrylic Craft Paint in Antique Gold
- Craft paint brushes
- black permanent/stamp ink pad
- foam daubers for controlled aging
- Mod Podge Matte, 16 oz.
- inkjet transparency film
- detail scissors
- Halloween spiders, skulls, and webbing
- Ghost image or the free printable below
- Mirror cleaner and lint-free cloth
- Protective covering for your work surface
Affiliate note: This post contains affiliate links. If you make a purchase through one of these links, I may earn a commission at no additional cost to you.
Don’t overspend on the mirror. The transformation is the fun part. Save the craft budget for supplies you can reuse on other Halloween projects.
Craft & Cackle: Something Spooky to Listen to While You Work
This haunted mirror has plenty of painting, cutting, dabbing, gluing, and waiting for things to dry—which makes it practically begging for a good Halloween listen. Pour something warm, turn the lights down a little, and let somebody else tell the spooky story while you make the mirror creepy enough to tell its own.
Cozy Witchy Listening
If your Halloween taste leans more enchanted than terrifying, try The Very Secret Society of Irregular Witches. This is my pick for an adult craft night when you want witches, atmosphere, and something cozy playing in the background while you work.
Want the Lights-On Version?
For a classic dose of creepy, Scary Stories to Tell in the Dark: Three Books to Chill Your Bones is a fun choice for older listeners, nostalgic grown-ups, or anyone who thinks making a haunted mirror wasn’t already spooky enough.
Crafting with Older Goblins?
If older kids are joining you at the craft table, there’s also Scary Stories for Kids Age 9-12, with short ghost tales and mysterious adventures that fit right into a Halloween craft session.
New to Audible?
Turn Halloween craft night into story night with Audible Standard. Pick your poison—or your cozy witchy story—press play, and keep crafting while somebody else handles the haunting.
Free Printable Ghost Image
You don’t have to create the creepy artwork yourself. Download my Ghost Mirror printable craft sheet and print the ghost onto transparency film.
Choose transparency film made for your printer type. Let the freshly printed image dry completely before touching, cutting, or attaching it so you don’t smear your apparition before she even gets a chance to haunt anything.
Test the Ghost Placement First
Before applying any Mod Podge, lay the trimmed transparency over the mirror and move it around. Look at the mirror from several angles and decide where the ghost creates the best illusion.
Don’t automatically center it. A ghost emerging slightly off-center can look more unexpected—and therefore creepier.
How to Make a DIY Ghost Mirror
1. Protect Your Work Surface
Cover your table and lay the mirror flat. Working horizontally makes the frame easier to paint and gives you better control when you start aging the glass.
2. Paint the Mirror Frame Antique Gold
Paint the frame with antique-gold metallic craft paint. Use a smaller brush to work paint into carved details, grooves, and corners.
Let the first coat dry, then add a second coat for richer coverage. Don’t worry about creating a factory-perfect finish. Slight variations will work in your favor once the mirror is aged.
3. Add Your Spooky Details
Attach spiders, tiny skulls, webbing, or mystical details such as the number 13 around the frame. Keep some of the gold visible so the decorations look like part of an old ornate mirror rather than something completely covered in Halloween supplies.
A mixed Halloween spider, skull, and webbing set makes this easy, but use whatever creepy little pieces you already have.
4. Clean the Mirror
Once the frame work is finished and secure, clean the glass thoroughly with mirror cleaner and a lint-free cloth.
Remove fingerprints, paint smudges, dust, and adhesive residue now. Anything left on the glass can interfere with the next layers.
5. Age the Mirror with Black Stamp Ink
This is where the mirror starts looking like it has a questionable history.
Use a foam dauber to pick up a small amount of black stamp ink. Begin around the perimeter of the mirror and dab rather than brush.
Work irregularly. Some areas should be darker, some barely touched, and plenty of reflective mirror should remain visible.
Don’t rush the aging. Step back and look at the entire mirror every so often. You can always add another dab of ink. Removing an enthusiastic black blob is considerably less fun.
6. Print and Trim the Ghost
Print the ghost image on compatible transparent printer film and allow the ink to dry completely.
Use detail scissors to trim away unnecessary transparency around the ghost. You don’t need a surgically perfect edge. Reducing the amount of visible clear material is the goal.
7. Position the Ghost Before Gluing
Place the trimmed ghost on the mirror without adhesive first. Adjust it until the figure seems to emerge naturally from the aged areas rather than looking like a picture sitting on top of the glass.
Pay attention to reflections while you’re testing the position. The best placement is the one where both the ghost and a little actual reflection remain visible.
8. Attach the Ghost Image
Once you’re happy with the placement, use a small amount of Mod Podge Matte at the corners to secure the transparency.
Use only what you need. Too much adhesive can make the edges more noticeable. Smooth the transparency carefully and let it settle into place without repeatedly lifting and repositioning it.
If you use Mod Podge for other projects, my Mod Podge sealer tips can help you get cleaner results.
9. Blend the Ghost into the Aged Mirror
Once the ghost is attached, dab a little more black stamp ink around selected edges of the transparency and lightly over strategic areas of the image.
This final layer is what helps visually marry the ghost to the aged glass. You’re trying to make the apparition look like it belongs inside the mirror—not like you taped a transparency to it five minutes ago.
Keep this layer restrained. Perfect is suspicious, but completely black is just…black.
10. Let Everything Dry
Give the finished mirror time to dry before standing it upright or styling it. Follow the drying guidance on the specific paint, ink, and adhesive products you’re using.
Then step back and enjoy your haunted handiwork. If someone refuses to look directly into it, I’m counting that as a successful craft.
How to Make the Ghost Look Like It’s Inside the Mirror
The illusion works best when the ghost doesn’t overpower the reflection. Keep some clean mirror visible, use the black aging unevenly, trim away excess transparency, and blend selected edges of the image with the final ink application.
Lighting matters, too. Try displaying the mirror where light comes from the side rather than shining directly onto the glass. Candlelight or warm low lighting makes the ghost image feel considerably more atmospheric.
DIY Ghost Mirror Troubleshooting
Why can I see the edges of the transparency?
Trim away as much unused transparency as practical before attaching the ghost. After it’s secured, strategically dab a small amount of black ink near obvious edges to help them disappear into the aged finish.
Why does my ghost look like a picture stuck on a mirror?
You probably need more visual blending. Leave reflective areas around the ghost but add irregular aging near portions of the transparency. Also look at the mirror from several feet away—the effect should be judged as décor, not from three inches away at the craft table.
Why is my mirror too dark?
Too much black ink can swallow the reflection and the ghost. Start lightly and build the aging in layers. The contrast between clean reflection, darkened areas, and the transparent apparition creates the effect.
My printed ghost smeared. What happened?
Check that your transparency film is compatible with your printer and that you’re printing on the correct side of the film. Give the image plenty of time to dry before cutting or handling it, following the film manufacturer’s instructions.
The transparency keeps curling. What should I do?
Handle it gently and avoid repeatedly bending it while cutting. Test the placement before adding adhesive so you only have to secure it once. A small amount of Mod Podge at the corners helps hold it flat without coating the entire mirror.
Expert Tips for a Better Haunted Mirror
- Use two coats of gold paint. The deeper metallic finish makes a thrifted frame look much richer.
- Age gradually. Black ink is easier to add than subtract.
- Keep some reflection. The ghost is more convincing when viewers can still see themselves.
- Trim the transparency. Less unused film means fewer obvious edges to disguise.
- Test before gluing. Move the ghost around until you find the eeriest placement.
- Don’t chase perfection. Uneven aging, slightly imperfect paint, and irregular edges contribute to the antique haunted effect.
- Style with low light. Candles, warm LEDs, and side lighting make the apparition much more dramatic.
Creative DIY Haunted Mirror Variations
Make Yourself the Ghost
For a personalized version, create a suitably spooky photo of yourself or a willing family member and print the edited image on compatible transparency film. A desaturated or black-and-white image will generally blend more naturally with the aged-mirror look.
Change the Frame Color
Antique gold gives this version its gothic-vintage character, but silver, bronze, pewter, or matte black can completely change the mood.
Make a Creepy Portrait Mirror
Instead of a full ghost figure, try a faded vintage-style face positioned so it appears to emerge from one section of the glass.
Go Creepy-Cute
Not every ghost needs to cause nightmares. Use a friendlier ghost illustration and fewer skulls for Halloween décor that leans more playful than paranormal.
Where to Display Your DIY Ghost Mirror
- Entryway: Put it where guests naturally expect to check their reflection.
- Mantel: Surround it with battery-operated candles, dried flowers, and wispy webbing.
- Halloween party: Use it as part of a photo area or haunted décor vignette.
- Hallway: An unexpected location makes the apparition more effective.
- Gothic décor: Skip the overt Halloween accessories and let the antique frame and ghost image work year-round.
DIY Ghost Mirror FAQs
Can I use a thrift-store mirror?
Absolutely. A thrifted mirror is one of the best choices because minor frame imperfections work beautifully with the aged haunted look.
Do I need an ornate mirror frame?
No. Ornate frames naturally create a vintage gothic effect, but the ghost technique works with simpler framed mirrors, too.
What kind of transparency paper should I use?
Choose transparency film specifically compatible with your printer type. The printable ghost needs to remain translucent so the mirror can show through the image.
Can I use a regular paper ghost image?
You can experiment with thin paper, but it won’t create exactly the same effect. Transparency film allows the reflection and aged mirror underneath to remain visible, which is what gives this version its ghost-in-the-glass appearance.
Can I use a different ghost image?
Yes. You can use another ghost, a vintage portrait, or even create a spooky version of your own photograph. Just make sure you have permission to use the artwork you print.
Can I make the frame silver or black instead of gold?
Definitely. Silver gives the mirror a colder haunted-house look, while matte black creates a darker gothic finish.
How do I make the ghost look more realistic?
Keep the image translucent, preserve some reflective mirror around it, avoid perfectly even black aging, and use the final ink layer to soften obvious transparency edges.
What can I use instead of black stamp ink?
If you substitute another product, test it first in an inconspicuous area to make sure it adheres to the mirror and gives you enough control to build the aged effect gradually.
Can I remove the ghost after Halloween?
Because craft products and mirror finishes vary, don’t assume the project will be completely reversible. If preserving the original mirror is important, test your adhesive and ink on an inconspicuous area before committing to the full project.
More Halloween Inspiration
If this mirror has you ready to haunt the rest of the house, browse my Halloween recipes and ideas for more creepy, clever ways to celebrate.


A Reflection You Won’t Forget
This DIY Ghost Mirror doesn’t need complicated electronics or special-effects wizardry to make people look twice. A thrifted mirror, transparent ghost image, a little antique gold paint, and deliberately imperfect aging are enough to turn an ordinary reflection into Halloween décor with serious personality.
And remember: if the finished ghost looks a little too comfortable in there, that’s between you and the mirror.
Ready to make it? Download the free Ghost Mirror printable here.
DIY Ghost Mirror: Easy Haunted Mirror Craft for Halloween


Turn a thrifted mirror into an eerie DIY Ghost Mirror with antique gold paint, black stamp ink, a transparent ghost image, and spooky embellishments. This beginner-friendly Halloween craft creates an aged haunted-mirror illusion that's perfect for mantels, entryways, and gothic Halloween décor.
Materials
- 1 framed mirror, thrifted or one you already own
- Antique gold metallic acrylic craft paint
- Black permanent stamp ink
- Mod Podge Matte
- Inkjet transparency film
- Printed ghost image
- Halloween spiders, skulls, and webbing
- Mirror cleaner
- Lint-free cloth
- Protective covering for work surface
Tools
- Craft paint brushes
- Foam daubers
- Detail scissors
Instructions
1. Cover your work surface and lay the mirror flat.
2. Paint the mirror frame with antique gold metallic craft paint, working the paint into grooves and decorative details. Allow it to dry and apply a second coat.
3. Attach spiders, skulls, webbing, or other Halloween embellishments to the frame. Leave some of the gold frame visible.
4. Clean the mirror thoroughly with mirror cleaner and a lint-free cloth to remove fingerprints, dust, paint, and adhesive residue.
5. Dab a small amount of black stamp ink around the perimeter of the mirror with a foam dauber. Work irregularly and gradually, leaving plenty of reflective glass visible.
6. Print the ghost image on compatible inkjet transparency film and allow the print to dry according to the film manufacturer's directions.
7. Trim away excess transparency around the ghost image with detail scissors.
8. Place the trimmed ghost transparency loosely on the mirror. Move it around until you find a position where the apparition blends naturally with the aged areas while some reflection remains visible.
9. Apply a small amount of Mod Podge Matte at the corners and carefully secure the ghost transparency to the mirror.
10. Lightly dab additional black stamp ink around selected edges and partially over the ghost image to blend the transparency into the aged mirror.
11. Allow the finished mirror to dry according to the product directions before standing it upright or displaying it.
12. Display the finished ghost mirror with warm side lighting, candles, or other Halloween décor to make the apparition more convincing.
Notes
Don't Overdo the Aging
Start with very little black ink and build the effect gradually. The illusion works best when portions of the mirror remain reflective. Perfect is suspicious, but completely black is just black.
Test Your Haunting Before Gluing
Move the trimmed ghost around the mirror before applying adhesive. Slightly off-center placement can look more unexpected and realistic than automatically centering the apparition.
Choosing Transparency Film
Use inkjet transparency film compatible with your printer and follow the manufacturer's printing and drying directions.
Recommended Craft Supplies
For this project, I use FolkArt Antique Gold Metallic Acrylic Paint, black permanent stamp ink, foam daubers, and Mod Podge Matte. Detail scissors make trimming the transparency easier, while a Halloween spiders, skulls, and webbing assortment makes decorating the frame simple.
Free Ghost Mirror Printable
Download the free Ghost Mirror printable craft sheet to create the apparition shown in this project.
Make the Ghost More Convincing
Keep some reflective mirror visible, trim unnecessary transparency, and use the final light application of black ink to soften obvious edges. Warm side lighting or candlelight makes the finished apparition especially effective.