Easy Candy Apples to Savor: Irresistible Autumn Delights
As the leaves crunch underfoot and the air turns delightfully crisp, it’s time to bite into something even crunchier—homemade candy apples. This recipe is a real sucker punch of nostalgia: glossy, ruby-red shells wrapped around tart apples, ready to steal the spotlight at any fall gathering. Whether you’re channeling county fair vibes or crafting spooky treats for Halloween, these candy apples are a sweet way to stick to tradition.


Why You’ll Love This Recipe
Candy apples are more than just a treat—they’re a fall icon. Here’s why they’re worth the sticky fingers:
- Simple ingredients and a quick candy-making process
- That glossy red shell is a visual showstopper
- Endless topping options for creative flair
- A nostalgic nod to childhood fairs and Halloween parties
Ingredients You’ll Need
- 6 medium apples (Granny Smith or Honeycrisp work best)
- 6 wooden sticks or candy apple skewers
- 2 cups granulated sugar
- ¾ cup water
- ½ cup light corn syrup
- ½ teaspoon red food coloring
- Candy thermometer
Ingredient Tips
- Choose firm apples with a tart bite to balance the sweet coating
- Wash and dry apples thoroughly—any wax or moisture will prevent the candy from sticking
- Red food coloring gives that iconic candy apple hue, but feel free to experiment with other colors for themed treats
Directions
Prep the Apples Wash apples in warm water to remove wax. Dry completely. Remove stems and insert sticks into the tops.
Set Up Your Workspace Line a baking sheet with parchment paper and lightly grease it. Have toppings ready if using.
Make the Candy Coating In a heavy saucepan, combine sugar, water, corn syrup, and food coloring. Stir until dissolved. Bring to a boil over medium-high heat without stirring. Cook until the mixture reaches 300°F (hard crack stage) on a candy thermometer.
Dip the Apples Remove from heat. Tilt the pan and dip each apple, rotating to coat evenly. Let excess drip off. Place on prepared sheet to cool and harden.

Expert Tips
- Use a deep saucepan for easier dipping
- Work quickly—the candy sets fast once it cools
- If the coating thickens, gently reheat to loosen
- For extra flair, dip in crushed candy or edible glitter before the coating sets
Variations and Creative Twists
- Spooky Sparkle: Add black or purple food coloring for Halloween vibes
- Crunchy Coating: Roll in crushed cinnamon candy or sprinkles
- Glam Apples: Use gold dust or edible glitter for a party-ready look
- Mini Bites: Slice apples and skewer for bite-sized candy apple pops
Serving Suggestions
- Serve at fall festivals or Halloween parties
- Wrap individually in cellophane for giftable treats
- Pair with hot cider or mulled wine for a cozy combo
- Use as a centerpiece for your dessert table—they’re as pretty as they are tasty


FAQs
Can I make these ahead of time? Yes. Candy apples are best enjoyed within 24 hours but can be made up to a day in advance.
How do I prevent the candy from sliding off? Make sure apples are completely dry and wax-free before dipping.
Can I use natural food coloring? Absolutely—beet juice or pomegranate powder can add color, though results may vary.
More Fall Apple Recipes and Halloween Treats
Apple Breakfasts & Bakes
Apple Cinnamon Pecan Baked Oatmeal – Cozy, nutty, and perfect for chilly mornings.
Applesauce Cake – Moist and spiced with fall flavors.
Apple Streusel Muffins – Perfect for grab-and-go mornings.
Sweet Apple Treats
Vanilla Cinnamon Baked Apples – A warm, oven-baked twist.
Apple Pie Bars – A slice of heaven in every bite.
Mini Baked Apple Pies – Tangy and adorable.
Easy Caramel Apples – Sticky, sweet, and irresistible.
Savory Apple Dishes
Kielbasa Apple Pasta Bake – A hearty, savory twist.
Green Apple Guinness Melt – Bold and unexpected.
Country Apple Dumplings – Rustic and comforting.
For Furry Friends
Peanut Butter Applesauce Dog Treats – Because pets love fall too.


Final Thoughts
These candy apples are more than a recipe—they’re a celebration of fall’s bold flavors and vibrant colors. Whether you’re crafting them for a party, gifting them to friends, or simply indulging in a sticky-sweet moment, they’re guaranteed to bring smiles. So grab your apples, stir up some sugar, and let the season shine—one glossy bite at a time.
Let me know if you’d like Pinterest overlays, alt text, or a cheeky tagline batch to match this post. I’m ready to help you make this one pop.


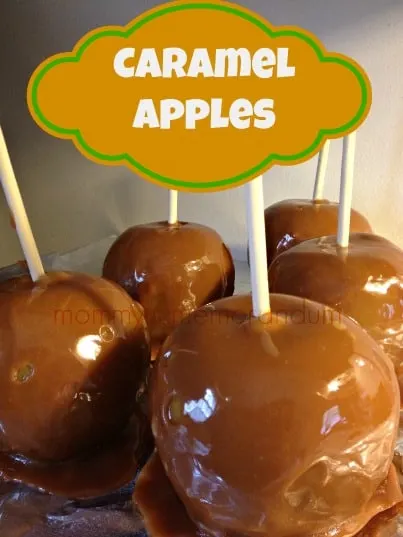
Easy Caramel Apples
This easy caramel apples recipe is a no-fail favorite for fall. With just four ingredients and a few simple steps, you’ll create glossy, homemade caramel apples that are as beautiful as they are delicious. Whether you're planning a festive fall gathering or craving a quick caramel apple treat, this recipe delivers the perfect balance of tart crunch and buttery sweetness.
Ingredients
- 4 medium-size apples (Granny Smith, Fuji, or Gala)
- 4 caramel apple sticks or wooden popsicle sticks
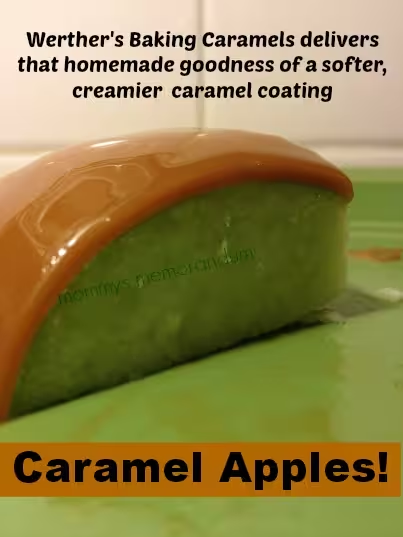
- 1 package (9 oz.) Werther’s Original Baking Caramels, unwrapped
- 1 tablespoon milk
Instructions
- Prep Apples
Wash apples thoroughly using a scrub sponge and a few drops of dish detergent to remove wax. Rinse and dry completely. Remove stems and insert sticks into the tops of the apples. - Prepare Work Area
Line a 13x9-inch baking sheet with parchment paper and lightly spray with non-stick cooking spray. For best results, chill the tray in the refrigerator while preparing the caramel. - Make the Caramel
In a tall, deep microwave-safe bowl (about 5 cups), combine caramels and milk. Microwave in 30-second intervals, stirring between each, until the caramel is melted and smooth (about 2–3 minutes). Let cool slightly if too runny—this helps the caramel cling to the apples. - Dip the Apples
Working one at a time, dip each apple into the caramel at an angle, rotating to coat evenly. Let excess caramel drip off, then gently scrape the bottom of the apple against the bowl’s edge. Flip the apple upside down briefly to help the caramel set evenly. Immediately roll in toppings or sprinkle them on while the caramel is still warm. Place on the prepared baking sheet. - Set
Refrigerate apples for at least 30 minutes to allow the caramel to firm up. For the best texture, wait the full time before serving. - Serve
Slice apples just before serving or enjoy whole for a classic caramel apple experience.
Notes
Expert Tips for No-Fail Caramel Apples
- Choose firm, unblemished apples for the best caramel adhesion.
- Cold apples help the caramel set faster and stick better.
- Lightly greased parchment paper prevents sticking and ensures a smooth, glossy finish.
- If the caramel thickens while dipping, reheat in 15-second bursts to maintain a dip-able consistency.
- For festive caramel apples, try rolling in chopped nuts, crushed cookies, or colorful sprinkles
Nutrition Information:
Yield: 4 Serving Size: 1Amount Per Serving: Calories: 410Total Fat: 1gSaturated Fat: 0gTrans Fat: 0gUnsaturated Fat: 0gCholesterol: 1mgSodium: 341mgCarbohydrates: 107gFiber: 9gSugar: 94gProtein: 3g
The Nutritional Information may not be accurate. This website provides approximate nutrition information for convenience and as a courtesy only. Nutrition data is gathered primarily from the USDA Food Composition Database, whenever available, or otherwise other online calculators.