Handmade Gift/Snack Containers have so many uses and are a festive way to share a snack or gift.
We’re getting ready for Valentine’s Day at our house and us; nothing says “LOVE” like a hand-made gift.
Part of our Valentine will be one of these Handmade Gift/Snack Containers.
They’re easy to make, and once you have made one, they’re quick to assemble and hold uber “WOW!” power!
They are also versatile.
You can make these for school “treats,” birthday favors, baby showers, bridal showers or just because!


To make one Gift/Snack Container, you will need:
8.5″x11″ Colored Card Stock
2 or 3 Coordinating Scrapbooking Paper
glue
scissors
velcro
embellishments (ribbon, doo-dads, stickers, anything goes!)


Directions for making a Handmade Gift or Snack Container:
1.) Take your colored cardstock and measure in 2″ on each side vertically.


2.) Within the 2″ columns, measure 2.5″ from the bottom and the top, in all four corners.
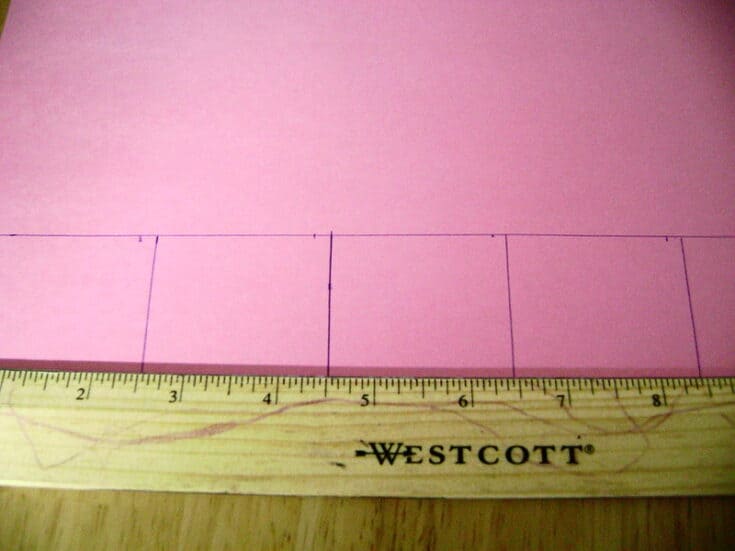
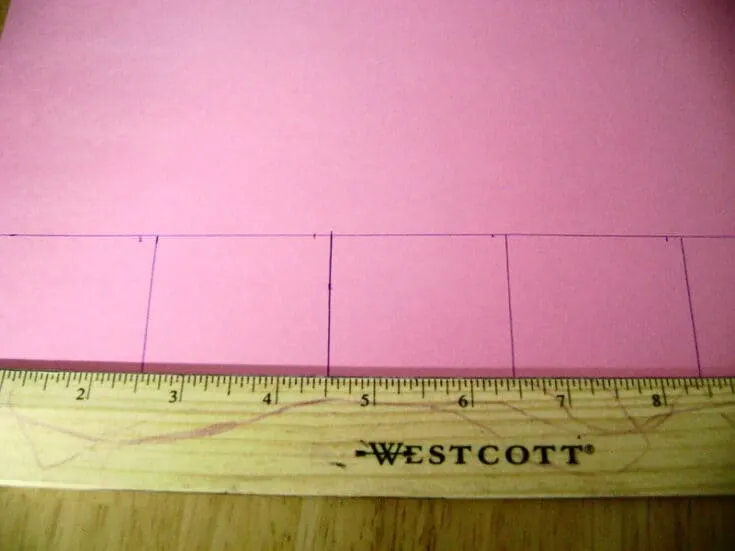
3.) From your 2.5″ line, measure up 2″ on all four sides


4.) In the 2″ squares draw a diagonal line, connecting the bottom outside corner to the top “inside” corner.
5.) Score along the lines you have just drawn. You will want to score all the way across the page from the top of your diagonal lines (4.5″ from the edge of the paper) This will be your containers “base.”
Tip: You don’t need a “fancy” tool to score. Just place your ruler against the line, and open your scissors.
Drag your open scissors along the edge of the ruler, applying enough pressure to “score” it, but not cut all the way through.)
6.) Fold, back and forth, along the scored lines.
This will make the folding easier.
7.) Fold along the 2″ column and glue the 2.5″ boxes to the paper.


8.) Fold the diagonal fold, up to the 2.5″ square and glue.
9.) Repeat until you have a “bottom” on your container.


You have just completed the most difficult part of the project! The next part is customizing your container!
10.) On the backside of your coordinating paper, measure two boxes 4.5″x4.25″ and cut out.
These are your front and back panels for your container.


11.) Glue one panel to the front of your container and one panel to the back of your container.

12.) Using the same colored cardstock as your “container” measure one 4″x4.5″. Cut Out.
This is your “lid.”

13.) Along the 4.5″ edge of your “lid,” measure down 1″ and score.
14.) Fold “scored” line back and forth.
15.) Using either the same paper as the panels or another coordinating print, measure 1″x4.5″ and glue just beneath the scored edge of your “lid,” on the “longer” section.
16.) Place glue along 1″, edge and secure to your “container.”
17.) To fasten your container closed you can cut slits in the front of the container, matching to slits in the lid and tie with ribbon OR you can use velcro circles to close the container.

18.) Add embellishments to your container to make it YOURS!

19.) The final step is filling them.
You can put snacks or include things like miniature notepads, pencils, crayons, a small book, trial-sized items–anything you like!
The possibilities are ENDLESS!
Looking for more great Crafts? Try the Easy Ghirardelli Advent, Candy Filled Snakes, and these heart-shaped washcloths.
We appreciate your subscription to Mommy’s Memorandum.