The Ultimate Guide to Making Instant Pot Yogurt
Yogurt is a staple in many households, and for good reason. It’s versatile, delicious, and packed with probiotics. Making yogurt at home not only gives you control over the ingredients but also offers the satisfaction of crafting something delicious from scratch. With an Instant Pot, this process becomes even easier. Today, we’ll walk through the steps to make both traditional and Greek yogurt using your Instant Pot.
Why Choose Instant Pot Yogurt?
At my house, yogurt goes fast. This Instant Pot Yogurt Recipe is so delicious that it’s become my weekly ritual. I make one batch, and it lasts (almost) a full week. The best part? I get to control what goes into it. No artificial flavors or preservatives, just pure goodness. Plus, you can switch up the flavorings to suit your family’s preferences. So far, mixed berry and key lime are the favorites, but lemon, blueberry, strawberry, and peach are also big hits.

Prep Time, Cook Time, and Servings
- Prep Time: 15 minutes
- Cook Time: 8 hours (incubation) + 6-8 hours (refrigeration)
- Servings: Approximately 8 cups
Ingredients
- 1 gallon whole milk
- 2 tablespoons yogurt (choose the kind that only has live cultures)
Equipment
- Instant Pot
- Candy thermometer
- Whisk
- Ice bath (sink filled with cold water)
- Medium bowl
- Cheesecloth and colander or coffee filters (for Greek yogurt)
Expert Tips
- Use whole milk for the creamiest texture.
- Ensure your starter yogurt has live cultures.
- The longer you incubate, the more tart the yogurt will be.


Step-by-Step Instructions
Heating the Milk
- Pour the milk into the Instant Pot: Start by pouring the milk into a cold Instant Pot inner pot. Cover with a lid. (You can use any lid; I prefer a glass lid for easy monitoring.)
- Boil the milk: Press the YOGURT button and then ADJUST until the Instant Pot reads BOIL. Stir or whisk the milk a few times during this cycle to ensure it heats evenly.
- Check the temperature: When the Instant Pot beeps, open the lid, whisk the milk, and use a candy thermometer to check the temperature. You want it to reach 180 degrees Fahrenheit. If it isn’t quite there, use the SAUTE function and whisk continuously until the milk reaches 180-185 degrees Fahrenheit.


Cooling the Milk
- Cool the milk: Once the milk reaches 180-185 degrees Fahrenheit, remove the cooking pot and place it in an ice bath (a sink filled with cold water). Whisk often to cool the milk to 110 degrees Fahrenheit. If it dips below 110°F, put the insert back in the Instant Pot, press YOGURT, then ADJUST, and monitor the thermometer until it’s back in the right zone.


Tempering the Yogurt Starter
- Remove the film: Carefully lift off the film of coagulated milk on the surface and discard it.
- Temper the starter: Place the starter yogurt in a medium bowl, add 1/2 cup of the warm milk, and whisk until smooth. Pour this mixture back into the milk in the Instant Pot and whisk to combine.


Incubating the Yogurt
- Incubate: Return the inner pot to the Instant Pot, and lock on the lid. Press the YOGURT button and adjust the time to 8:00 hours. The Instant Pot will count up, indicating the incubation time. The longer you incubate, the more tart the yogurt will be.
- Check the yogurt: The yogurt is set when it jiggles as one unit if you nudge the insert. Some clear liquid (whey) may float on the surface—this is normal.
Cooling and Storing
- Rest and refrigerate: After the incubation, remove the pot, keep it covered, and let it rest at room temperature for two hours. Then, place the inner pot in the refrigerator for 6-8 hours without disturbing it.
Final Steps
- Enjoy your yogurt: After refrigeration, the yogurt should be thick enough to hold a spoon straight up. For smooth yogurt, whisk it. For Greek yogurt, strain it using cheesecloth and a colander or coffee filters inside a colander. The longer you strain, the thicker it will become. You can use the strained liquid (whey) for homemade bread!
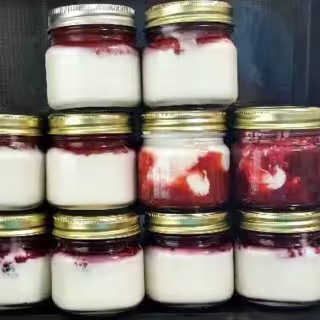
I like to divide my yogurt into small mason jars and top them with delicious toppings. Try my Instant Pot Mixed Berry Compote Recipe for a delightful addition.
How Warm Does Milk Have to Be to Kill Bad Bacteria for Making Yogurt?
A Note on Incubation: Yogurt isn’t cooked; it’s incubated, meaning it needs to be held at a constant temperature (between 110 and 116 degrees Fahrenheit) to encourage the desired Thermophilic (heat-loving) cultures to multiply. The Instant Pot maintains this temperature, ensuring perfect yogurt without the hassle.
Pro Tip: Ensure your milk reaches at least 180 degrees Fahrenheit to kill off all the “bad” bacteria. This step is crucial for a safe and delicious batch of yogurt.
Want More Delicious Recipes?
Craving more scrumptious and easy-to-make recipes? Explore my Pinterest board for a treasure trove of culinary inspiration. And for a handy collection of quick and delightful recipes, check out my cookbook, The How-To Cookbook for Teens: 100 Easy Recipes to Learn the Basics. Packed with easy-to-follow recipes, it’s perfect for elevating your cooking game. Grab your copy today and start transforming your meals!
Frequently Asked Questions
Q: Can I use low-fat milk? A: Yes, but the texture will be less creamy compared to whole milk.
Q: How long does homemade yogurt last? A: Homemade yogurt can last up to two weeks in the refrigerator.
Q: Can I flavor the yogurt during the incubation? A: It’s best to add flavorings after incubation to avoid interfering with the fermentation process.
By making yogurt at home, you not only save money but also enjoy a healthier, tastier version of store-bought varieties. Give it a try and let me know your favorite flavor combinations!
Instant Pot Yogurt Recipe It's Easier than You Think!
Unlock the secret to perfect Instant Pot yogurt with our step-by-step recipe! Enjoy creamy, homemade yogurt with customizable flavors, all made effortlessly in your Instant Pot. Say goodbye to store-bought yogurt and hello to a healthier, tastier alternative that you control from start to finish.
Ingredients
- 1 gallon whole milk
- 2 tablespoons yogurt (choose the kind that only has live cultures)
Instructions
Heating the Milk
- Pour the milk into the Instant Pot: Start by pouring the milk into a cold Instant Pot inner pot. Cover with a lid. (You can use any lid; I prefer a glass lid for easy monitoring.)
- Boil the milk: Press the YOGURT button and then ADJUST until the Instant Pot reads BOIL. Stir or whisk the milk a few times during this cycle to ensure it heats evenly.
- Check the temperature: When the Instant Pot beeps, open the lid, whisk the milk, and use a candy thermometer to check the temperature. You want it to reach 180 degrees Fahrenheit. If it isn't quite there, use the SAUTE function and whisk continuously until the milk reaches 180-185 degrees Fahrenheit.
Cooling the Milk
- Cool the milk: Once the milk reaches 180-185 degrees Fahrenheit, remove the cooking pot and place it in an ice bath (a sink filled with cold water). Whisk often to cool the milk to 110 degrees Fahrenheit. If it dips below 110°F, put the insert back in the Instant Pot, press YOGURT, then ADJUST, and monitor the thermometer until it’s back in the right zone.
Tempering the Yogurt Starter
- Remove the film: Carefully lift off the film of coagulated milk on the surface and discard it.
- Temper the starter: Place the starter yogurt in a medium bowl, add 1/2 cup of the warm milk, and whisk until smooth. Pour this mixture back into the milk in the Instant Pot and whisk to combine.
Incubating the Yogurt
- Incubate: Return the inner pot to the Instant Pot, and lock on the lid. Press the YOGURT button and adjust the time to 8:00 hours. The Instant Pot will count up, indicating the incubation time. The longer you incubate, the more tart the yogurt will be.
- Check the yogurt: The yogurt is set when it jiggles as one unit if you nudge the insert. Some clear liquid (whey) may float on the surface—this is normal.
Cooling and Storing
- Rest and refrigerate: After the incubation, remove the pot, keep it covered, and let it rest at room temperature for two hours. Then, place the inner pot in the refrigerator for 6-8 hours without disturbing it.
Final Steps
- Enjoy your yogurt: After refrigeration, the yogurt should be thick enough to hold a spoon straight up. For smooth yogurt, whisk it. For Greek yogurt, strain it using cheesecloth and a colander or coffee filters inside a colander. The longer you strain, the thicker it will become. You can use the strained liquid (whey) for homemade bread!
Notes
Expert Tips
- Use whole milk for the creamiest texture.
- Ensure your starter yogurt has live cultures.
- The longer you incubate, the more tart the yogurt will be.
Nutrition Information:
Yield: 16 Serving Size: 1Amount Per Serving: Calories: 149Total Fat: 8gSaturated Fat: 5gTrans Fat: 0gUnsaturated Fat: 2gCholesterol: 24mgSodium: 106mgCarbohydrates: 12gFiber: 0gSugar: 12gProtein: 8g
The Nutritional Information may not be accurate. This website provides approximate nutrition information for convenience and as a courtesy only. Nutrition data is gathered primarily from the USDA Food Composition Database, whenever available, or otherwise other online calculators.