Butterfinger Cookie Bars
The one where your favorite candy bar becomes the main character in a no‑fuss dessert.
If you love the taste of cookies but could happily skip the scooping, rolling, and baking tray shuffle, these Butterfinger Cookie Bars are about to become your new dessert obsession. This easy cookie bar recipe takes everything you adore about Butterfinger candy bars—the crispy peanut‑butter layers, the chocolatey goodness, the nostalgic crunch—and transforms it into a soft, chewy, bakery‑style bar cookie that practically makes itself.
We’re talking minimal prep, one pan, and just a handful of ingredients. It’s the kind of dessert that saves the day when you need something fast, crowd‑pleasing, and guaranteed to disappear from the plate. And if you’re already a fan of shortcut desserts like my wildly popular Mountain Dew Apple Dumplings, you’re going to fall hard for these Butterfinger Cookie Bars.


Why You’ll Love This Butterfinger Cookie Bars Recipe
These cookie bars check every box for easy homemade desserts, candy bar treats, and quick potluck recipes.
One-Pan Dessert Magic
No scooping dough. No rotating baking sheets. Everything bakes in one pan for maximum ease and minimal cleanup.
Only 4 Main Ingredients
A short ingredient list means this recipe is approachable, beginner‑friendly, and perfect for last‑minute baking.
Perfect Candy Bar Dessert
Butterfinger bars melt into a gooey, crunchy peanut‑butter center that tastes like a bakery‑style candy bar cookie.
Great for Parties & Potlucks
Slice into 24 neat squares—ideal for sharing, gifting, or stashing away for late‑night cravings.
Beginner-Friendly Recipe
Even first‑time bakers can master these easy cookie bars. No special equipment. No complicated steps. Just delicious results.
Ingredients for Butterfinger Cookie Bars
These simple ingredients come together to create an indulgent candy bar dessert that tastes far more impressive than the effort required.
Main Ingredients
- 2 packages Betty Crocker sugar cookie mix
- 2 eggs
- 4 tablespoons water
- 8 king‑size Butterfinger candy bars
Additional Ingredients
- Non‑stick cooking spray
- Parchment paper (optional but helpful)
How to Make Butterfinger Cookie Bars
This easy cookie bar recipe comes together in just a few simple steps. The directions below are structured for schema and reader clarity.
Step 1: Preheat the Oven
Preheat your oven to 350°F (175°C).
Step 2: Prepare the Baking Dish
Spray a glass baking dish with non-stick spray to prevent sticking.


Step 3: Mix the Cookie Dough
In a mixing bowl, combine:
- Sugar cookie mix
- Eggs
- Water
Stir until a thick cookie dough forms.


Step 4: Crush the Butterfinger Candy Bars
Place two Butterfinger bars into a zip-top bag and crush them with a rolling pin.


Step 5: Fold Candy into the Dough
Mix the crushed Butterfinger pieces into the cookie dough until evenly distributed.


Step 6: Spread the First Layer
Spread half of the dough evenly in the prepared baking dish.
Tip: Use parchment paper sprayed with non-stick spray to press the dough flat without sticking.


Step 7: Add Candy Bar Layer
Place five Butterfinger bars on top of the dough layer.


Step 8: Top with Remaining Dough
Spread the remaining dough evenly over the candy bar layer.


Step 9: Bake the Cookie Bars
Bake for 40 minutes, or until the cookie bars are fully set and lightly golden.


Step 10: Add Final Butterfinger Topping
Crush the remaining Butterfinger bar and sprinkle it over the hot cookie bars. Press gently into the surface and return to the oven for 3 minutes to melt.


Step 11: Cool and Slice
Allow the bars to cool completely before slicing into squares.
Expert Tips for Perfect Cookie Bars
- Use parchment paper for spreading—no sticky fingers.
- Let bars cool fully before slicing for clean edges.
- Press the topping gently so the candy adheres.
- Use a sharp knife for neat, bakery‑style squares.
Variations & Creative Ideas
Want to experiment? Try these fun twists:
Swap the Candy
Use chopped:
- Snickers
- Reese’s Cups
- Twix
- Heath bars
Add Chocolate Chips
Mix in ½ cup chocolate chips for extra decadence.
Drizzle with Chocolate
Melt chocolate chips and drizzle over cooled bars for a candy‑shop finish.
Serving Suggestions
Butterfinger Cookie Bars are delicious:
- Warm with vanilla ice cream
- With caramel drizzle
- As a lunchbox treat
- At potlucks, bake sales, and parties
If you love easy, crowd‑pleasing desserts, don’t miss my Mountain Dew Apple Dumplings—another shortcut dessert that always gets rave reviews.
Frequently Asked Questions
Can I use a different cookie mix?
Yes! Any sugar cookie mix works beautifully.
Can I substitute another candy bar?
Absolutely. Peanut‑butter or chocolate‑caramel bars are great alternatives.
Can these cookie bars be frozen?
Yes. Wrap cooled bars tightly and freeze for up to 3 months.
How many servings does this recipe make?
This recipe yields 24 cookie bars, depending on how large you slice them.
Final Thoughts
If you love easy desserts with nostalgic candy‑bar flavor, these Butterfinger Cookie Bars are destined to become a family favorite. With minimal prep, simple ingredients, and that irresistible peanut‑butter crunch, this recipe proves that the best desserts don’t need to be complicated.
Serve them warm with ice cream, slice them for parties, or freeze a few for emergency sweet cravings. Once you try them, you may never go back to traditional cookies again.
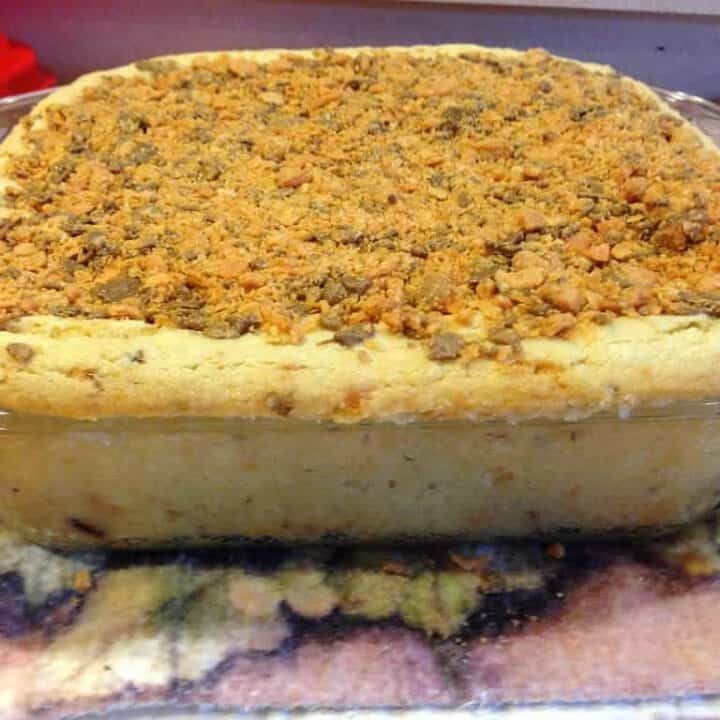

Butterfinger Cookie Bars Recipe-Just 4 Ingredients!
These Butterfinger Cookie Bars offer the deliciously soft, chewy texture of a cookie with chopped Butterfinger candy bar bits in the batter, they are an easy make.
Ingredients
- 2 packages Betty Crocker sugar cookie mix
- 2 eggs
- 4 Tablespoons water
- 8 king-size Butterfinger bars
Instructions
- Preheat oven to 350 degrees. Spray a glass baking dish with Pam (or any non-stick spray…).
- Mix sugar cookie mix, eggs, and water until thoroughly blended.
- Place two of the Butterfinger bars into a Ziploc bag.
- Use rolling pin and roll candy bars until crushed.
- Add crushed bars to the sugar cookie dough.
- Mix the dough until candy bar bits are well incorporated.
- spread half of the mixture on the bottom of the glass dish.
- t’s easiest if you spray non-stick on a piece of parchment paper and use the parchment paper to even the dough out.
- Layer 5 Butterfinger bars on top of the cookie dough.
- Spread the remaining dough on top of the Butterfinger bars and even out.
- Now you’re ready for baking!
- Bake for 40 minutes or until the cookie dough is cooked through.
- Crush the remaining Butterfinger bar in a Ziploc baggie.
- Remove from the oven and place the crushed Butterfinger bar on top.
- Press the candy bar into the baked cookie.
- Return to the oven for 3 minutes (until the chocolate on top melts)
- Allow to cool and then slice into small bars. Serve with ice-cream.
Notes
- For easy spreading of the dough, use non-stick spray on parchment paper.
- Press the candy bar topping into the baked cookie to ensure it adheres well.
- Allow the bars to cool completely before slicing for cleaner cuts.
Nutrition Information:
Yield: 24 Serving Size: 1Amount Per Serving: Calories: 78Total Fat: 3gSaturated Fat: 2gTrans Fat: 0gUnsaturated Fat: 2gCholesterol: 16mgSodium: 43mgCarbohydrates: 11gFiber: 0gSugar: 7gProtein: 1g
The Nutritional Information may not be accurate.