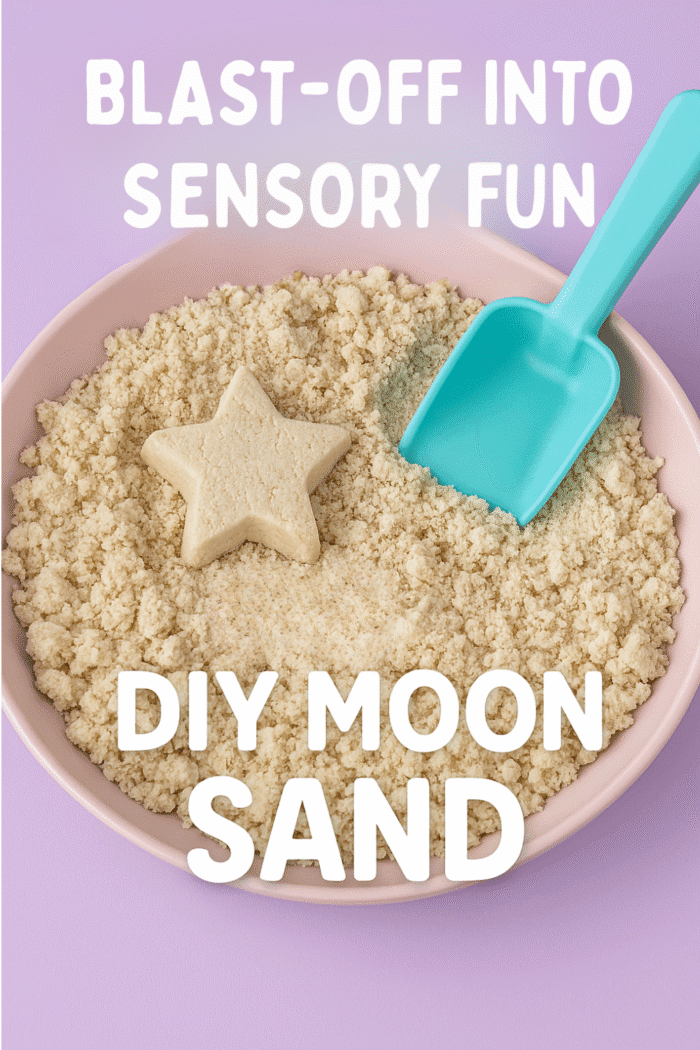
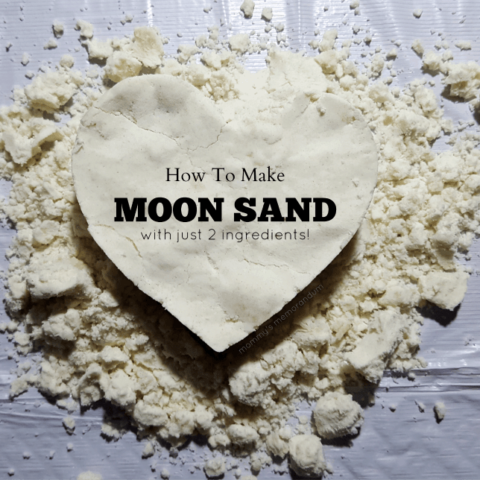
How to Make Moon Sand with 2 Ingredients
Need a quick sensory activity that feels like a little kitchen-counter magic? This 2-ingredient Moon Sand recipe is soft, squishy, moldable, and wildly satisfying for little hands. Even better, you only need flour and baby oil to make it.
This easy DIY moon sand is perfect for rainy days, summer afternoons, classroom sensory bins, homeschool activities, playdates, space-themed lessons, or those “please give them something screen-free before everyone loses their orbit” moments.
With just a few minutes of mixing, kids can scoop, mold, crumble, press, build, smash, and start again. It is part sensory play, part science activity, part imagination fuel, and completely kid-approved.

More Kids Crafts & Activities to Keep Little Hands Busy
Love simple activities that turn basic supplies into big kid fun? Explore more screen-free ideas in my Kids Crafts & Activities hub, where you’ll find sensory play, printable activities, paper crafts, STEM projects, party ideas, and rainy-day boredom busters.
After making this homemade moon sand, keep the hands-on learning going with Oobleck Science, try DIY Bouncy Balls, or pair it with DIY Tangrams for Kids for a full afternoon of sensory, science, and problem-solving fun.
What Is Moon Sand?
Moon sand is a soft, crumbly, moldable sensory material that feels a little like damp beach sand and a little like cloud dough. Kids can squeeze it into shapes, press it into molds, crumble it back apart, and build again.
Unlike regular sand, homemade moon sand has a silky texture because the flour gives it a soft base while the oil helps it hold together. It is not wet, sticky, or slimy. It is more like fluffy, moldable “moon dust” that can be scooped, packed, and shaped.
That makes it a favorite for sensory bins, pretend play, quiet time, preschool activities, and space-themed lessons.
Why You’ll Love This DIY Moon Sand Recipe
- Only 2 ingredients: Flour and baby oil are all you need for the basic recipe.
- Ready in 5 minutes: No cooking, waiting, drying, or complicated setup.
- Budget-friendly: Make a big batch for less than most store-bought sensory sand.
- Great for sensory play: Kids can scoop, pour, squish, mold, crumble, and explore texture.
- Easy to customize: Add color, scent, glitter, small toys, cookie cutters, or space-themed accessories.
- Works indoors or outdoors: Use a bin, tray, 9×13 pan, or sensory table to keep the play area contained.
- Perfect for learning: Add toy astronauts, rocks, scoops, letters, numbers, or shape cutters for STEM-rich play.
Moon Sand Ingredients
This moon sand recipe uses a simple 8:1 ratio of flour to oil. That means eight parts flour to one part baby oil.
Basic Ingredients
- 8 cups all-purpose flour — This creates the soft, powdery base.
- 1 cup baby oil — This gives the moon sand its silky, moldable texture.
Optional Add-Ins
- Powdered tempera paint: Add color without adding too much moisture.
- Food coloring: Use sparingly; it mixes best when stirred into the oil first.
- Biodegradable glitter: Adds a little cosmic sparkle.
- Essential oil: A drop or two of lavender or vanilla can add a calming scent.
- Small toys: Try toy astronauts, stars, mini dinosaurs, rocks, shells, or letter pieces.
Safety note: Moon sand is for supervised play only. It is not edible, and it should be kept away from children who are still mouthing toys or sensory materials.
How to Make Moon Sand
Making homemade moon sand is wonderfully simple. The trick is mixing slowly and checking the texture as you go.
Step 1: Add the Flour
Pour 8 cups of all-purpose flour into a large mixing bowl, sensory bin, or plastic storage container. A wide container makes mixing easier and keeps the flour from puffing everywhere.
Step 2: Add the Baby Oil
Pour 1 cup of baby oil over the flour. If you are adding color, stir the color into the oil first before pouring it into the flour.
Step 3: Mix Until Soft and Moldable
Use a fork, pastry cutter, spoon, or clean hands to mix the flour and oil together. Keep blending until the mixture feels soft, silky, and slightly crumbly but still holds together when squeezed.
The texture should feel like damp sand at the beach. If it is too dry, add a small splash of oil. If it feels too oily, sprinkle in a little more flour.
Step 4: Set Up a Play Station
Transfer the moon sand to a sensory bin, 9×13 pan, baking tray, or shallow plastic container. Add scoops, measuring cups, cookie cutters, molds, toy animals, small rocks, plastic spoons, or space-themed toys.
Step 5: Store for Later
When playtime is finished, scoop the moon sand into an airtight container or zip-top bag. Store it in a cool, dry place and use it again for future sensory play.


How to Tell If Your Moon Sand Texture Is Right
The best homemade moon sand should:
- Feel soft and silky when you run it through your fingers.
- Hold its shape when packed into a cup or mold.
- Crumble apart easily when squeezed or broken.
- Feel dry to the touch, not wet or sticky.
- Stay loose enough for scooping, pouring, and sensory bin play.
If your moon sand does not hold together, add a little more baby oil, one tablespoon at a time. If it feels greasy, add more flour, a few tablespoons at a time, until the texture balances out.
Moon Sand Play Ideas
Once the moon sand is mixed, the real fun begins. Here are easy ways to turn one batch into hours of creative play.
Create a Lunar Landscape
Add toy astronauts, rocks, small stars, and bottle caps to create moon craters, mountains, and launch pads. Kids can pretend they are building a moon base or exploring a new planet.
Use Cookie Cutters and Molds
Cookie cutters, silicone molds, measuring cups, and muffin tins are perfect for shaping moon sand. Kids can pack it tightly, flip it over, and see which shapes hold best.
Make a Treasure Hunt Bin
Bury small toys, letter tiles, counting bears, puzzle pieces, or plastic gems in the moon sand. Give kids a spoon, scoop, or paintbrush and let them dig for treasure.
Practice Letters and Numbers
Flatten the moon sand in a tray and let kids trace letters, numbers, shapes, or sight words with their fingers. This is a simple way to sneak early learning into sensory play.
Build a Construction Site
Add small trucks, blocks, scoops, and pebbles so kids can dig, dump, level, and build. This is especially fun for toddlers and preschoolers who love construction play.
Pair It with a Space Lesson
Use moon sand to talk about craters, rocks, planets, astronauts, and how different surfaces feel. Ask questions like, “What happens when you press the scoop into the sand?” or “Can you make a crater?”
Why Moon Sand Is Great for Sensory Play
Moon sand gives kids a hands-on way to explore texture, pressure, shape, and movement. They can pinch, scoop, pour, squeeze, pat, flatten, crumble, and mold it over and over again.
That kind of play helps support:
- Fine motor skills through scooping, pinching, pressing, and shaping.
- Hand strength as kids squeeze and pack the moon sand into molds.
- Creative thinking as they build landscapes, stories, and pretend worlds.
- Independent play because sensory bins invite open-ended exploration.
- Calming play because repetitive scooping and squeezing can feel soothing.
- Early STEM curiosity as kids explore texture, volume, cause and effect, and material changes.
Translation? It is a craft-table win disguised as moon dust.
How to Make Colored Moon Sand
If you want colorful moon sand, powdered tempera paint is usually the easiest option because it adds color without making the mixture too wet.
- Add the flour to your bowl.
- Stir in a small amount of powdered tempera paint.
- Add the baby oil.
- Mix until the color is evenly blended.
You can also use food coloring, but it works best when mixed into the oil before adding it to the flour. Start with a few drops and add more as needed. Too much liquid color can change the texture.
How to Store Homemade Moon Sand
Store moon sand in an airtight container, lidded sensory bin, or zip-top bag. Keep it in a cool, dry spot between play sessions.
If the moon sand starts to feel dry after storage, add a small splash of baby oil and mix it back in. If it smells off, looks dirty, or has been handled by lots of little hands during a party or classroom activity, it is best to toss it and make a fresh batch.
Moon Sand Cleanup Tips
Moon sand is easier to manage when you start with a contained play area. Use a large tray, plastic bin, baking sheet, or washable tablecloth underneath the activity.
- Let kids play outside when the weather is nice.
- Use a sensory bin with higher sides for toddlers and preschoolers.
- Keep a small dustpan and brush nearby.
- Shake tools and toys over the bin before washing them.
- Vacuum or sweep stray crumbs after playtime.
- Avoid using moon sand on carpet if possible.
A little setup makes cleanup much easier. Future-you will appreciate the mission planning.


Moon Sand Variations
Cloud Dough Style Moon Sand
Use the same flour-and-oil ratio, but call it cloud dough for a softer, fluffier sensory bin theme. Add cotton balls, cloud cutouts, scoops, and blue paper for sky-themed play.
Space-Themed Moon Sand
Add toy astronauts, stars, smooth rocks, small rockets, and black or silver glitter for a moon mission sensory bin.
Beach-Themed Moon Sand
Add shells, small buckets, plastic shovels, and sea animal toys. This is a great summer activity when you want beach vibes without packing the car.
Dinosaur Dig Moon Sand
Bury small dinosaur toys or plastic bones and let kids excavate them with spoons and paintbrushes.
Color Sorting Moon Sand
Make two or three small batches in different colors. Add matching pom-poms, buttons, blocks, or counting bears for sorting practice.
Moon Sand vs. Kinetic Sand vs. Cloud Dough
Moon sand, kinetic sand, and cloud dough are similar, but they are not exactly the same.
- Moon sand: Usually homemade with flour and oil. Soft, crumbly, and moldable.
- Kinetic sand: Store-bought sensory sand that sticks mostly to itself and has a stretchy, flowing feel.
- Cloud dough: Often made with flour and oil, just like moon sand, but usually described as fluffier and softer.
- Play sand: Traditional sand used for sandboxes. It is grainier and does not hold together the same way unless damp.
If you are looking for an easy homemade option, this 2-ingredient moon sand is the simplest place to start.
What to Do If Your Moon Sand Did Not Turn Out
My Moon Sand Is Too Dry
Add more baby oil, one tablespoon at a time, and mix well after each addition. Stop when the mixture holds together when squeezed.
My Moon Sand Is Too Oily
Add more flour, a few tablespoons at a time, until the texture feels soft but not greasy.
My Moon Sand Is Too Messy
Move it to a deeper bin or smaller play tray. Give kids fewer tools at first and add more once they understand the play area boundaries.
My Moon Sand Will Not Hold a Shape
It probably needs a little more oil. Add a small amount, mix thoroughly, and test again by packing it into a measuring cup.
My Colored Moon Sand Looks Streaky
Keep mixing. If using food coloring, the color may take longer to distribute. Powdered tempera paint usually blends more evenly.
More Screen-Free Activities for Kids
If this DIY moon sand recipe was a hit, you may also love these hands-on activities:
- Oobleck Science Activity — A squishy, gooey 2-ingredient science activity kids can mix and explore.
- How to Make DIY Bouncy Balls — A hands-on STEM craft that lets kids make and test their own bouncing balls.
- DIY Tangrams for Kids — A printable puzzle craft that builds spatial reasoning, geometry skills, and problem-solving.
- How to Make Paper Wolverine Claws — A fun paper-folding craft for superhero pretend play.
- Kids Crafts & Activities — The full hub for sensory play, printables, paper crafts, classroom activities, and creative family fun.
Frequently Asked Questions About Moon Sand
What are the ingredients for moon sand?
The basic moon sand ingredients are 8 cups of flour and 1 cup of baby oil. That simple 8:1 ratio creates a soft, moldable sensory material kids can scoop, press, and shape.
How do you make moon sand at home?
To make moon sand at home, mix 8 cups of flour with 1 cup of baby oil until the texture is soft, crumbly, and moldable. Add more oil if it is too dry or more flour if it feels too greasy.
Is moon sand the same as cloud dough?
Moon sand and cloud dough are very similar. Both are often made with flour and oil. Moon sand is usually described as moldable and sand-like, while cloud dough is often described as softer and fluffier.
Can I make moon sand without baby oil?
Yes. You can make moon sand with vegetable oil, coconut oil, or another mild oil, but the texture and scent may change. Baby oil creates a silky texture, while food-based oils may feel slightly heavier.
Can I use gluten-free flour?
Yes, you can try gluten-free flour if needed, though the texture may vary depending on the blend. Start with the same 8:1 ratio and adjust with a little more flour or oil as needed.
Is homemade moon sand safe for toddlers?
Homemade moon sand can be used with toddlers during close supervision, but it is not edible and should not be used with children who are still putting sensory materials in their mouths.
How long does homemade moon sand last?
Homemade moon sand can last for multiple play sessions when stored in an airtight container. Toss it if it becomes dirty, smells unpleasant, or has been used by many children during a group activity.
Can you add color to moon sand?
Yes. Powdered tempera paint is a great option for colored moon sand. You can also use food coloring, but mix it into the oil first and use it sparingly so the texture does not become too wet.
Does moon sand dry out?
Moon sand may dry out a little over time. If that happens, add a small splash of baby oil and mix it until the texture becomes soft and moldable again.
What can kids do with moon sand?
Kids can build moon craters, make sensory bins, practice letters, scoop and pour, use cookie cutters, create pretend construction sites, bury treasures, and explore textures through open-ended play.


Final Thoughts: A Little Flour, A Little Oil, A Lot of Fun
This homemade moon sand recipe proves that kids do not need fancy supplies to have a wildly creative afternoon. With just flour and baby oil, you can make a soft, moldable sensory activity that works for toddlers, preschoolers, homeschool lessons, classroom centers, playdates, and rainy-day fun.
Make a batch, add a few scoops and molds, and let your little astronauts build their own lunar landscape. It is simple, affordable, hands-on, and just messy enough to feel like childhood should.
Don’t forget to pin this 2-ingredient moon sand recipe so you have it ready the next time boredom tries to land in your kitchen.

How to Make Moon Sand with 2 Ingredients!
his easy DIY moon sand recipe uses just flour and baby oil to create soft, moldable sensory sand for kids. Perfect for sensory bins, rainy days, classroom activities, and screen-free play.
Materials
- 8 cups all-purpose flour
- 1 cup baby oil
- 1 tablespoon powdered tempera paint, optional
Tools
- Large mixing bowl
- fork or pastry cutter
- sensory bin or storage container
- measuring cups
Instructions
- Pour flour into large mixing bowl.
- Add Baby Oil.
- Mix well with pastry cutter or fork, or your hands!
- It's ready for play!
- Use cookie cutters, molds, or just imagination for hours of fun.
This craft was originally published May 9, 2017, and updated May 18, 2026, with improved instructions, updates, and new photos.