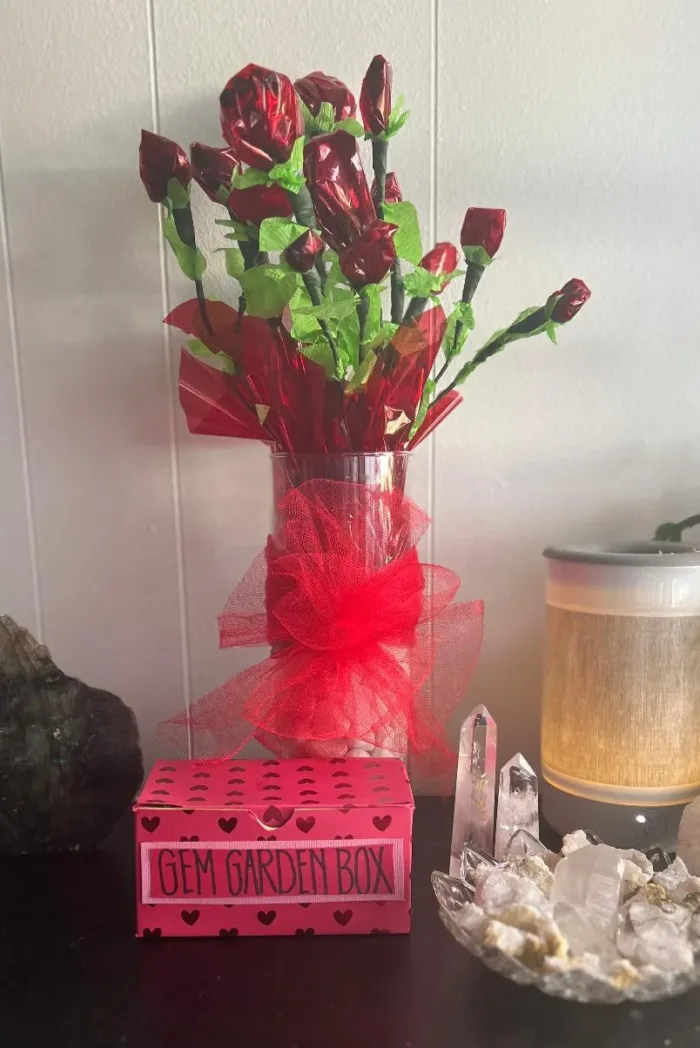
These DIY crystal roses wrap individual stones in colored cellophane to create rosebuds, then attach each bud to a floral-wire stem. Number the finished roses and pair them with matching crystal identification cards inside a handmade Gem Garden Box, giving the recipient both a bouquet and a guide to every stone.
This crystal flower bouquet is an evergreen handmade gift for birthdays, bridal showers, anniversaries, Mother’s Day, Valentine’s Day, or anyone who loves crystals. The cost depends mainly on the stones you choose, while the remaining supplies are simple floral and paper-craft materials.
Readers also make: For an edible flower gift, try these Hershey Kisses Roses.
Watch How to Make Crystal Roses
Watch how the cellophane folds around the crystal to form a rosebud, how the bud is secured to a floral-wire stem, and how each finished rose is numbered to match the identification cards in the Gem Garden Box.
What Is a Crystal Rose Bouquet?
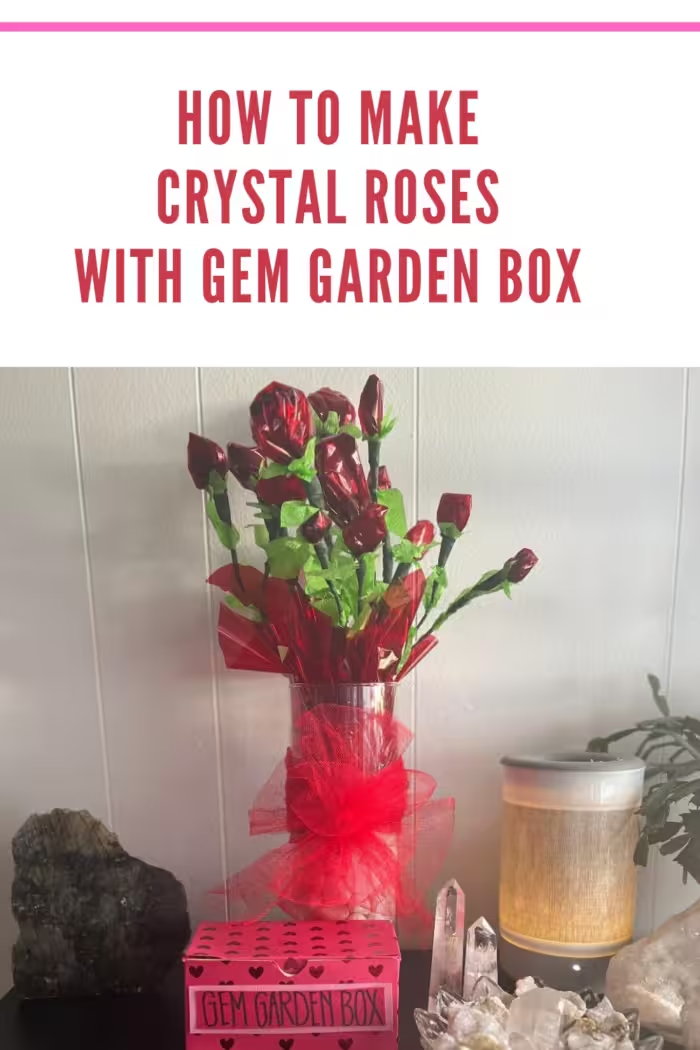
A crystal rose is a small stone wrapped in cellophane to resemble a flower bud and attached to a wrapped floral-wire stem. The finished bouquet looks decorative, but each rose can also be unwrapped so the recipient can keep the crystal inside.
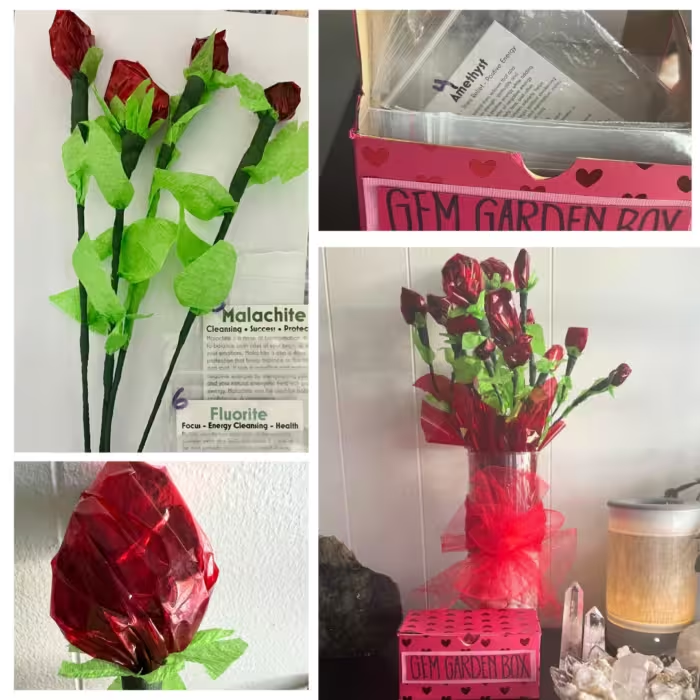
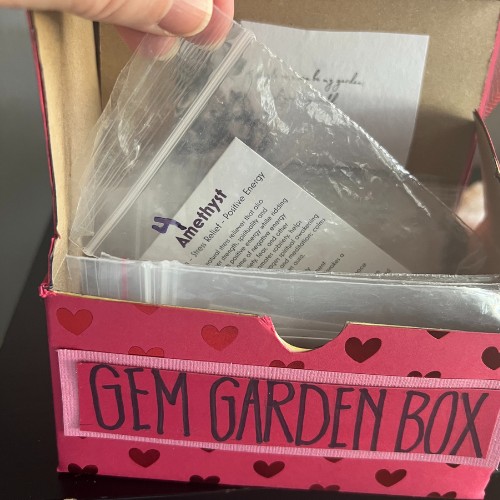
The Gem Garden Box makes the gift more useful. Each stem receives a number, and the same number is added to the crystal’s identification card. The cards are stored in the decorated box so the recipient can match every rose to its stone.
I used red cellophane, green floral tape, handmade streamer leaves, and crystals purchased from New Moon Beginnings. The identification cards included with my order made it easy to create the numbered guide.
Why You’ll Love This Crystal Flower DIY
- It is personal: Choose stones by color, birth month, favorite crystal, or personal meaning.
- It lasts: Unlike fresh flowers, the bouquet can be displayed or unwrapped and kept.
- It is customizable: Change the cellophane, leaves, ribbon, vase, and box paper to suit the occasion.
- It includes a built-in guide: The numbered cards help the recipient identify every crystal.
- It works for many occasions: Use it for birthdays, bridal showers, anniversaries, holidays, thank-you gifts, or everyday encouragement.
Supplies for the Crystal Roses
- Crystals or polished stones of your choice
- Colored cellophane, cut into squares
- 20- to 30-gauge floral wire; use thicker wire or bundle several pieces for heavier stones
- Green floral tape
- Artificial floral leaves, ribbon, crepe paper, or streamer paper for leaves and sepals
- Scotch tape or another clear tape
- Fine-tip permanent marker
- Ribbon or tulle for the finished bouquet
- Vase
- Pebbles or vase beads for stability
Tools
- Scissors
- Wire cutters
- Ruler
How to Make Crystal Roses
1. Cut the Cellophane
Cut one square of cellophane for each crystal. A 5-by-5-inch square works for many small stones, but adjust the size so the cellophane can completely wrap the crystal with enough material left to form the petals.
2. Center the Crystal
Place the crystal in the center of the square with the four cellophane points facing up, down, left, and right.
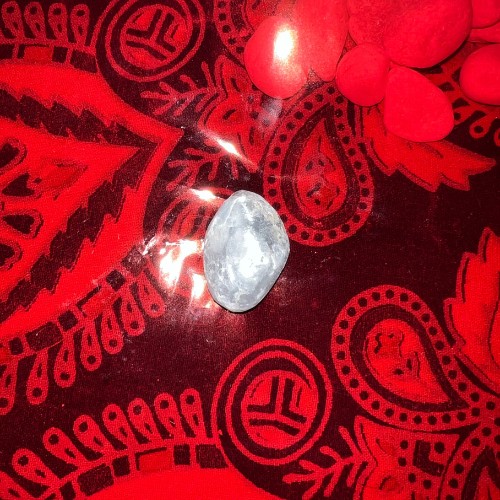
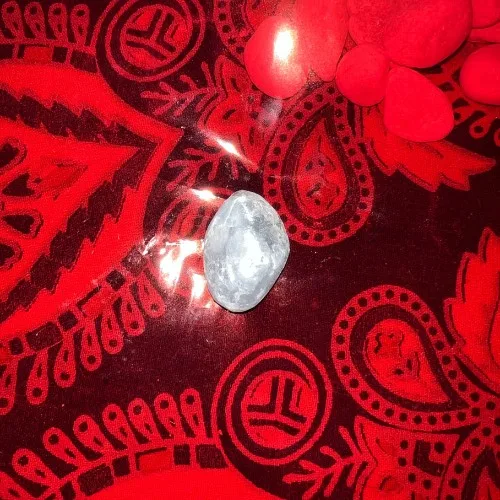
3. Fold the First Petal
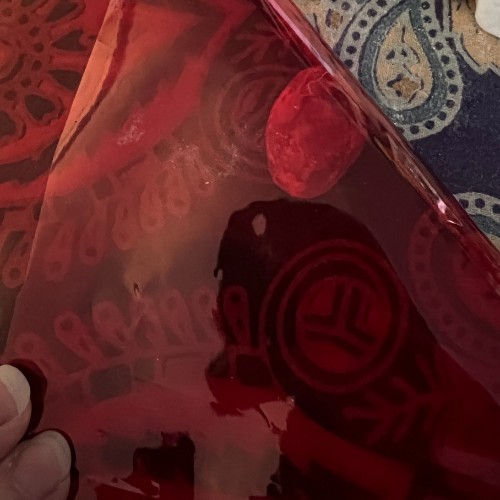
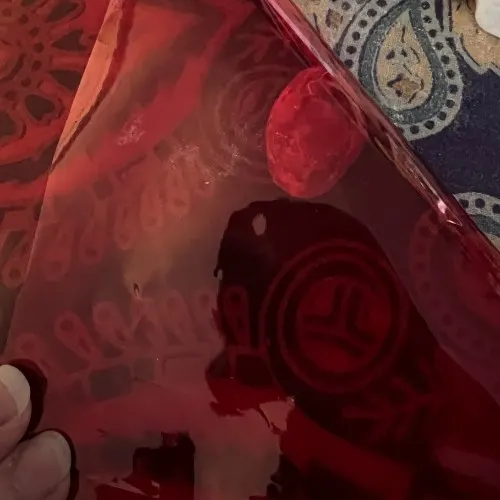
Bring the top corner of the cellophane down over the crystal toward the bottom corner. Keep the fold smooth but not so tight that the cellophane tears.
4. Fold the Side Petals
Fold the left and right corners across the front of the crystal, overlapping them slightly. Adjust the folds until the wrapped stone resembles a compact rosebud.
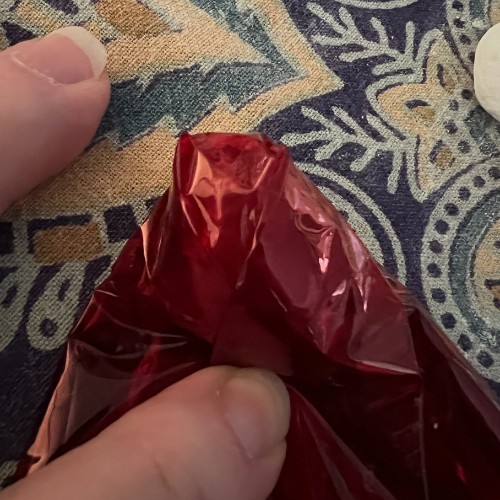
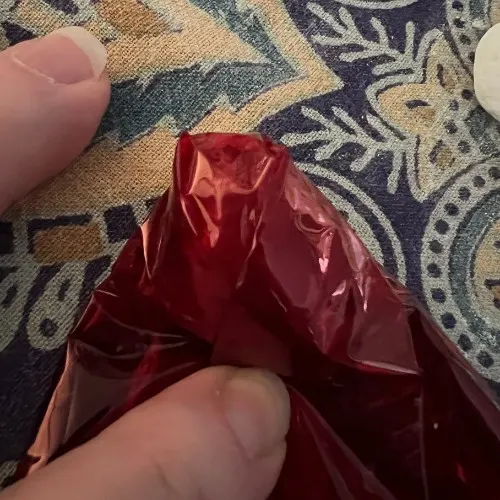
5. Secure the Crystal Bud
Pinch the loose cellophane beneath the crystal and wrap the base firmly with floral tape. Stretch the tape gently as you wrap so it adheres to itself. Check that the crystal cannot slip out before adding the stem.
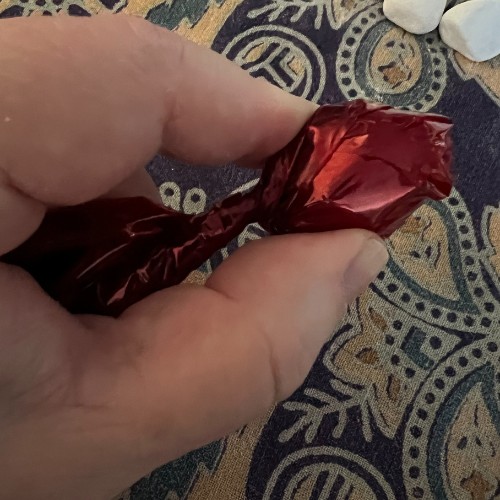
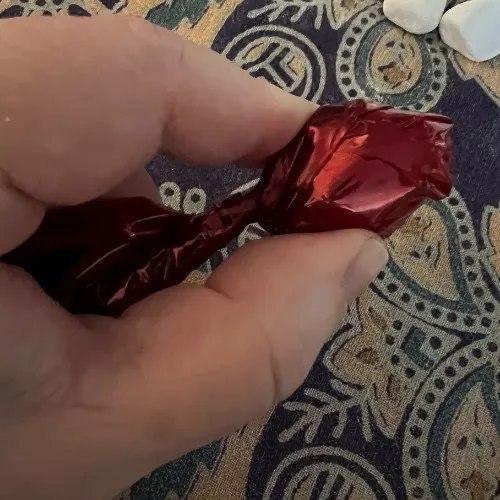
6. Add a Sepal
Use a premade floral sepal or make one from green streamer paper, crepe paper, or ribbon. For a simple handmade version, fold a small square corner to corner and cut a shallow V from the open edge. Wrap the piece around the base of the bud and secure it with floral tape.
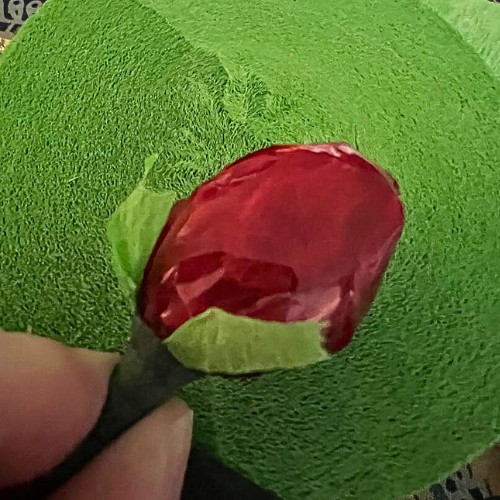
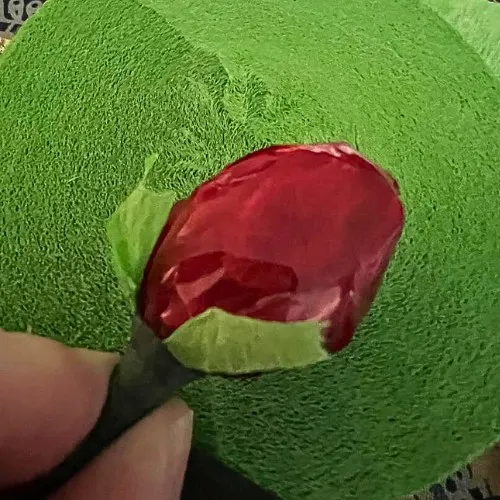
7. Attach the Floral-Wire Stem
Place the end of one floral wire against the taped base of the bud. For a heavier crystal, hold two or more wires together to create a sturdier stem. Starting directly beneath the crystal, wrap floral tape around both the bud and wire, then continue spiraling down the stem.
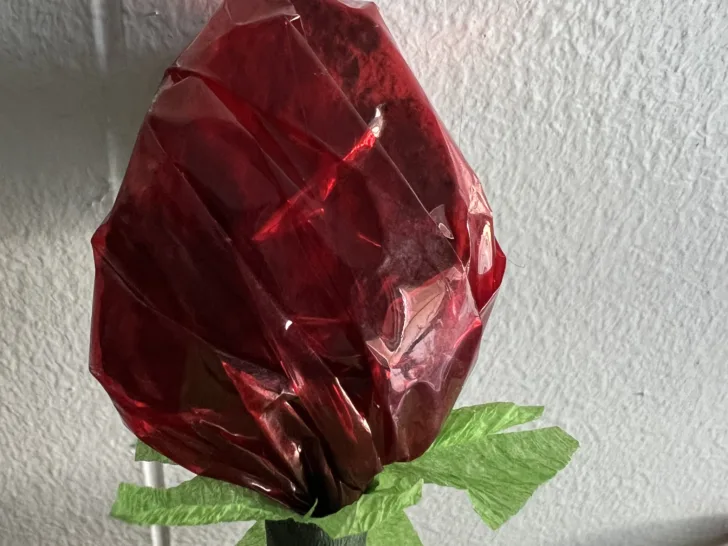
8. Add Leaves and Finish the Stem
Place one or two artificial leaves against the wire where you want them. You can also fold ribbon or crepe paper into leaf shapes. Hold each leaf against the stem while continuing to wrap the floral tape downward. Trim the wire with wire cutters when the stem reaches the desired length.
9. Number the Rose
Fold a short piece of clear tape around the stem to create a small flag. Write a number on the tape with a permanent marker, then write the same number on the matching crystal identification card.
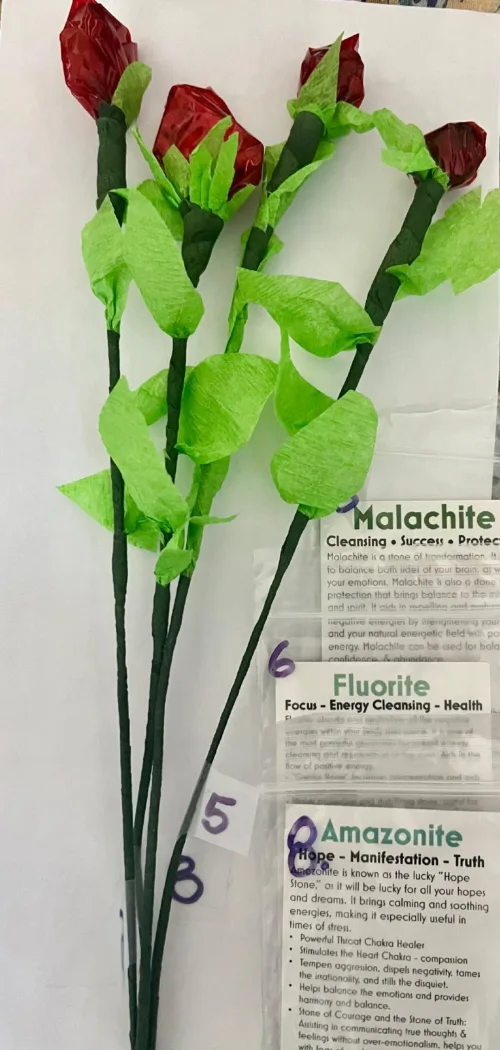
Repeat the process until you have enough flowers for the bouquet. Use one cellophane color for a coordinated arrangement or combine several colors for a mixed crystal garden.
How to Make the Gem Garden Box
Supplies
- One clean, empty tea box; I used a Celestial Seasonings box
- Two 12-by-12-inch sheets of decorative cardstock
- Small piece of coordinating cardstock for the label border
- Craft glue
- Paintbrush for spreading the glue
- Printed or handmade “Gem Garden Box” label
- Crystal identification cards
Tools
- Scissors
- Pencil or fine-tip marker
- Ruler
- Bone folder, scoring tool, or another blunt edge
1. Prepare the Box Template
- Carefully open the glued tabs of the empty tea box and flatten the box without tearing the cardboard.
- Place the flattened box on the first sheet of cardstock and trace as much of the outline as will fit.
- Mark the original fold lines.
- Trace the remaining portion of the box on the second sheet of cardstock.
- Cut out both paper templates.
- Use a ruler and blunt scoring tool to score the fold lines without cutting through the paper.
2. Cover and Reassemble the Box
- Lay the flattened tea box printed-side up.
- Apply a thin, even coat of craft glue. A slightly damp paintbrush helps spread the glue without leaving thick ridges.
- Position the cardstock templates over the box and smooth them from the center outward to remove air bubbles.
- Allow the glue to dry completely.
- Refold the box along the original creases and glue the tabs back into place.
3. Fill the Box with Crystal Cards
Place the numbered identification cards inside the box. Confirm that every number on a rose stem has a matching card before closing the box.
4. Add the Front Label
Design your own label or customize the original template. Mount the printed label on a slightly larger piece of coordinating cardstock to create a border, then glue it to the front of the box.
5. Add an Inside Card
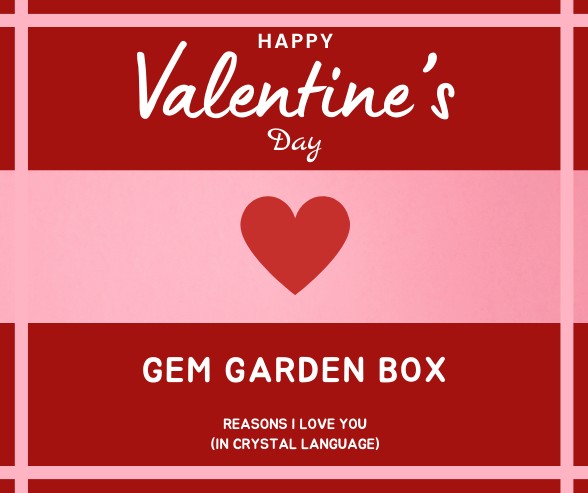
Finish the box with a greeting or instruction card inside the lid. You can use one of the original Valentine designs or edit the wording and colors for a birthday, bridal shower, anniversary, Mother’s Day, or another occasion.


How to Arrange the Crystal Rose Bouquet
- Add pebbles or vase beads to the bottom of the vase for weight and stability.
- Arrange the crystal roses, placing the tallest stems in the center and shorter stems around the outside.
- Layer cellophane or tissue around the bouquet as you would wrap a gift-bag arrangement.
- Tie ribbon or tulle around the vase or around the point where the wrapping gathers.
- Place the Gem Garden Box beside the bouquet or tie it to the arrangement with ribbon.
Expert Tips for Better Crystal Roses
- Test one flower first. Use the largest or heaviest stone to determine the right cellophane size and number of wires.
- Keep the folds loose enough to shape. Cellophane tears when pulled too tightly around sharp crystal points.
- Stretch floral tape as you wrap. Gentle tension helps it stick to itself and creates a smoother stem.
- Use more wire for heavy stones. Bundle two or three wires before wrapping the stem if a finished flower bends.
- Number the cards immediately. Label each rose and card as soon as the flower is finished so the stones are not mixed up.
- Use thin layers of glue. Too much glue can wrinkle the cardstock or soften the tea-box cardboard.
Crystal Rose Bouquet Variations
- Birthstone bouquet: Choose stones associated with the recipient’s birth month.
- Rainbow bouquet: Match different crystal colors with coordinating cellophane.
- Wedding or bridal shower bouquet: Use the event colors for the petals, ribbon, and box paper.
- Single crystal rose: Make one flower and attach its identification card as a gift tag.
- Neutral display bouquet: Use clear, white, or pale cellophane for year-round home decor.
Storage and Display
Keep the bouquet dry and away from high heat, direct flames, and prolonged direct sunlight. Dust the cellophane gently with a soft cloth. Do not place the wrapped stems in water. If the bouquet will be transported, pack the Gem Garden Box separately and support the flowers so the heavier crystals do not bend the wire stems.
Safety Note
Floral wire and wire cutters have sharp edges, and small crystals can be choking hazards. Adults should handle the cutting and stem assembly, and the finished bouquet should be kept away from babies, toddlers, and pets.
Frequently Asked Questions
What kind of crystals work best for crystal roses?
Small, lightweight polished stones are easiest to wrap and support. Irregular or pointed stones can also work, but use a larger cellophane square and avoid pulling the material tightly against sharp edges.
How do I keep a heavy crystal rose from bending?
Use a thicker floral wire or bundle two or more wires together before wrapping the stem with floral tape. A shorter stem will also support more weight than a very long one.
Can I make the bouquet without crystal identification cards?
Yes. The numbered card system is optional, but it adds meaning to the gift and helps the recipient remember which stone was wrapped inside each flower.
How many crystal roses should I make?
Make one statement rose, a small bouquet of three to six flowers, or a traditional dozen. The best number depends on the size and weight of the stones and the vase you plan to use.
Can I make the Gem Garden Box for occasions other than Valentine’s Day?
Yes. Keep the same construction method and change the cardstock, label, ribbon, and inside message to suit a birthday, bridal shower, anniversary, Mother’s Day, holiday, or thank-you gift.
Can I prepare this project ahead of time?
Yes. Cover and assemble the box first, then make and number the roses in small batches. Store the finished flowers upright in a dry container until you are ready to arrange the bouquet.
How to Make Crystal Roses with a Gem Garden Box
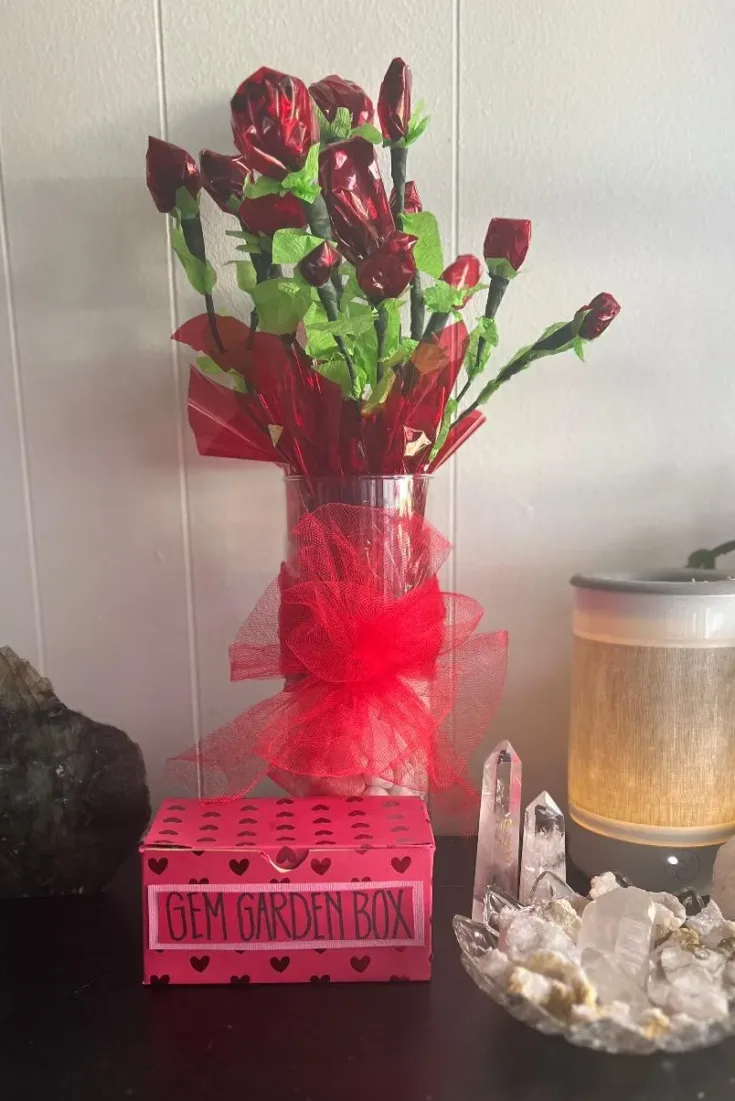
Wrap individual crystals in colored cellophane to create rosebuds, attach them to floral-wire stems, and number each flower to match the identification cards stored inside a handmade Gem Garden Box.
Materials
- Crystals or polished stones of your choice
- Colored cellophane
- 20- to 30-gauge floral wire
- Green floral tape
- Artificial floral leaves, ribbon, crepe paper, or streamer paper
- Clear tape
- Fine-tip permanent marker
- Ribbon or tulle
- Vase
- Pebbles or vase beads
- One clean, empty tea box
- Two 12-by-12-inch sheets of decorative cardstock
- Small piece of coordinating cardstock
- Craft glue
- Crystal identification cards
- Printed or handmade Gem Garden Box labels
Tools
- Scissors
- Wire cutters
- Ruler
- Paintbrush
- Bone folder or blunt scoring tool
Instructions
1. Cut one cellophane square for each crystal. A 5-by-5-inch square works for many small stones, but adjust the size as needed.
2. Place a crystal in the center of the cellophane with the four corners pointing up, down, left, and right.
3. Bring the top corner down over the crystal toward the bottom corner.
4. Fold the left and right corners across the front, overlapping them slightly to form a rosebud.
5. Pinch the loose cellophane beneath the crystal and secure the base firmly with floral tape.
6. Add a premade sepal or make one from green streamer paper, crepe paper, or ribbon. Secure it beneath the bud with floral tape.
7. Hold one floral wire against the taped base. Bundle two or more wires together when the crystal is heavy.
8. Wrap floral tape around the bud and wire, then continue spiraling the tape down the stem.
9. Add artificial leaves, ribbon loops, or paper leaves while wrapping the stem.
10. Trim the wire when the stem reaches the desired length.
11. Fold a short piece of clear tape around the stem to create a flag. Number the flag and add the same number to the crystal identification card.
12. Repeat until the bouquet contains the desired number of crystal roses.
13. Carefully flatten a clean tea box. Trace it onto two sheets of decorative cardstock, mark the folds, score the lines, and cut out the paper templates.
14. Spread a thin coat of glue over the flattened box. Attach the cardstock, smooth out bubbles, allow it to dry, and reassemble the box.
15. Add the numbered crystal cards and decorative labels to the Gem Garden Box.
16. Fill a vase with pebbles or vase beads, arrange the crystal roses, add cellophane or tissue around the bouquet, and finish with ribbon or tulle.
Notes
Expert Tips
Test the largest or heaviest stone first so you can determine the best cellophane size and number of floral wires. Stretch the floral tape gently as you wrap so it adheres to itself and creates a smoother stem.
Troubleshooting
If the crystal slips, add another tight layer of floral tape around the base. If the stem bends, bundle two or three floral wires together or shorten the finished stem. If the cardstock wrinkles, use less glue and smooth it from the center toward the edges.
Variations
Create a birthstone bouquet, a rainbow crystal garden, a wedding-color arrangement, a single statement rose, or a neutral bouquet using clear or pale cellophane.
Display and Gifting
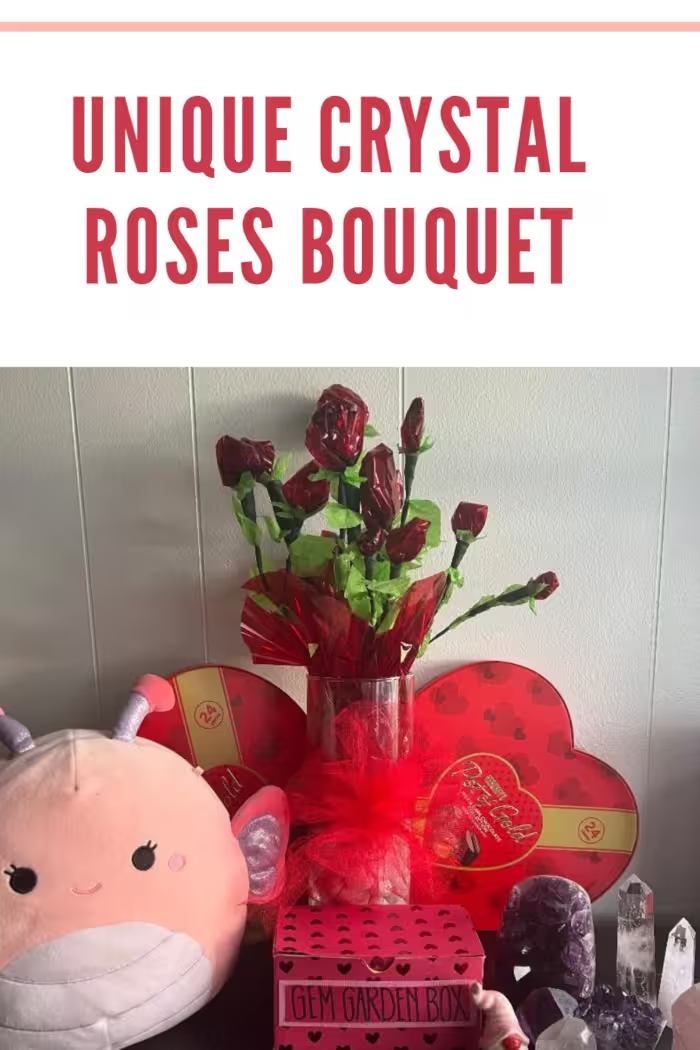
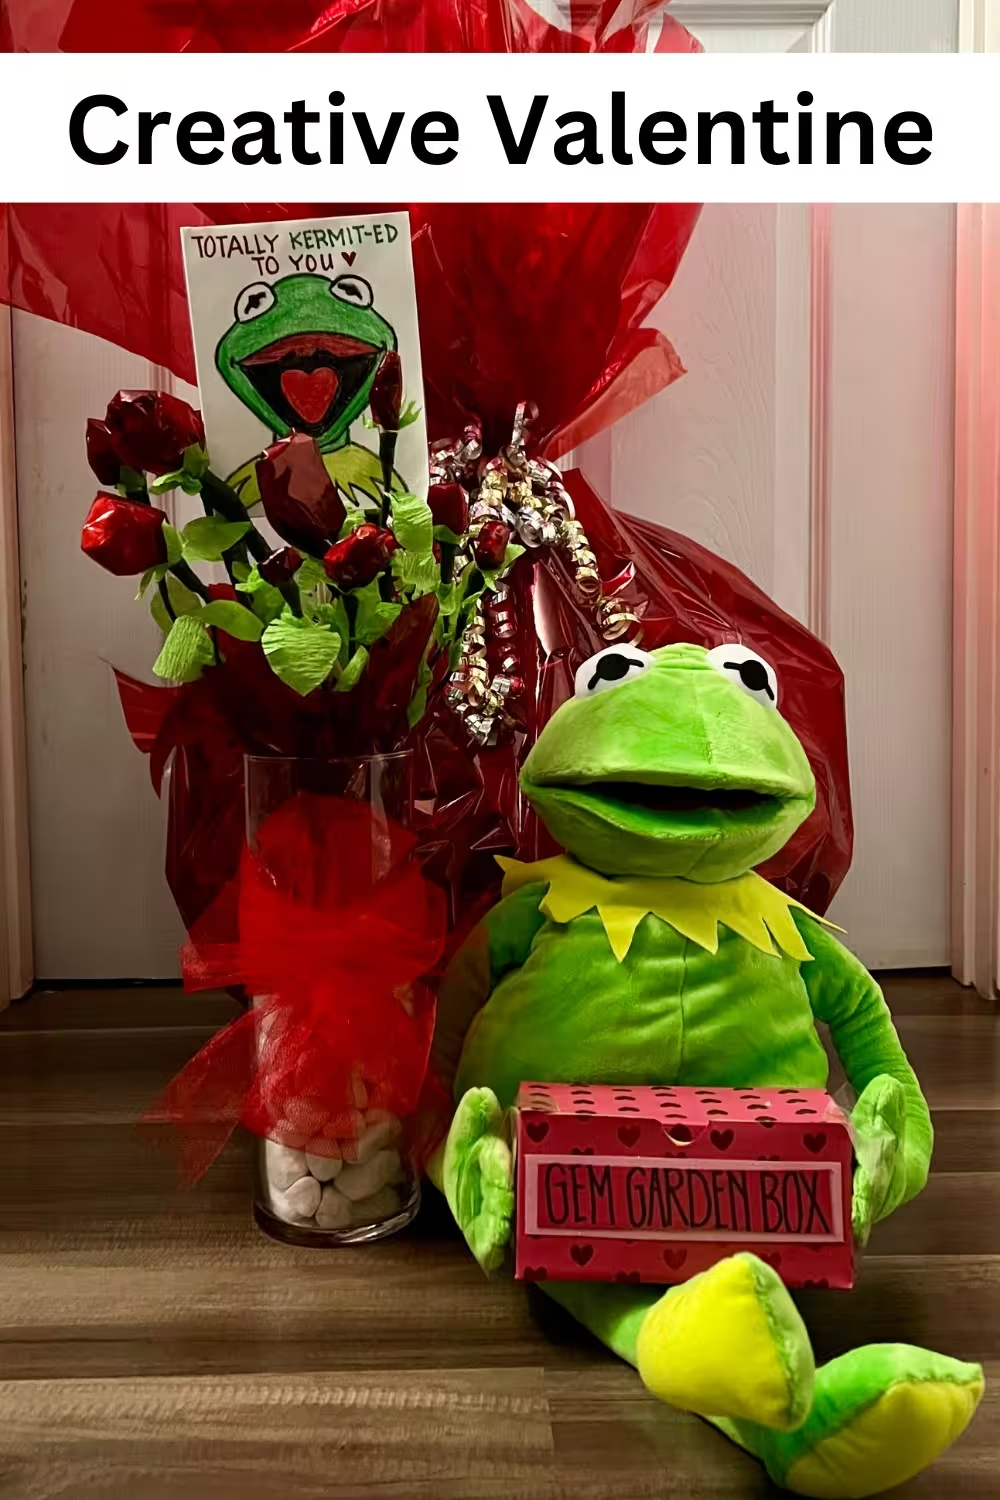
Present the bouquet alone or pair it with chocolates, a handwritten note, or a small stuffed animal. Place the Gem Garden Box beside the vase or tie it to the arrangement with ribbon.
Storage
Keep the bouquet dry and away from high heat, open flames, and prolonged direct sunlight. Dust the cellophane gently with a soft cloth. Do not place the wrapped stems in water.
Make Ahead
Cover and assemble the box first, then make and number the roses in small batches. Store the finished flowers upright in a dry container until the bouquet is ready to arrange.
Safety
Floral wire and wire cutters have sharp edges, and small crystals can be choking hazards. Adults should handle cutting and stem assembly. Keep the finished bouquet away from babies, toddlers, and pets.
More Crafts to Try
Make a sweet companion bouquet with these Hershey Kisses Roses.
Next craft to try: Make a sweet companion bouquet with these Hershey Kisses Roses.