Introducing Mouthwatering Homemade Hamburger Buns!
Are you tired of settling for mediocre buns that simply don’t live up to your juicy burger creations? Look no further! Our homemade hamburger buns are the perfect complement to your grilling masterpieces.
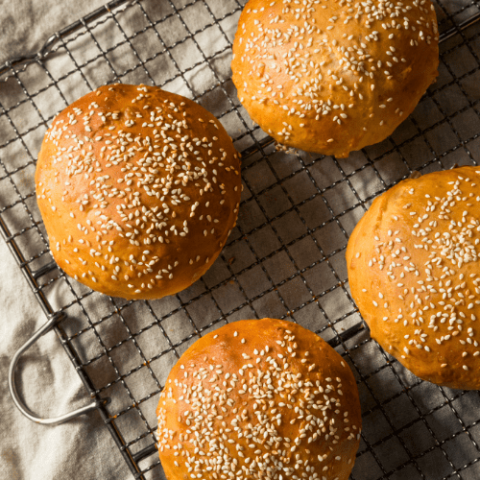
Crafted with love and care in your kitchen, baked to perfection, giving you that irresistible combination of a soft, fluffy interior and a golden, slightly crusty exterior. Each bite will transport you to burger heaven, making your taste buds sing with delight.


Our buns are versatile too! Whether you’re grilling up classic beef burgers, indulging in a veggie patty, or exploring unique flavor combinations, our homemade buns will elevate your creations to the next level. They’re also great for sandwiches, sliders, and even as a tasty accompaniment to soups and stews.
Say goodbye to bland, store-bought buns and experience the difference that homemade goodness makes. With this homemade hamburger bun recipe, you’ll taste the love and passion in every bite. Treat yourself and your loved ones to the ultimate burger experience.
Make a batch of homemade hamburger buns today and let your taste buds thank you. Hurry, as the aroma of freshly baked buns wafts through the air, demand is soaring! Don’t miss out on the chance to elevate your burgers to extraordinary heights. Place your order now and savor the satisfaction of homemade perfection.
Why Make Homemade Hamburger Buns Over Store-Bought Buns?
Why Homemade Hamburger Buns Trump Store-Bought Ones Every Time!
- Freshness: There’s nothing quite like sinking your teeth into a warm, freshly baked bun. When you make your own hamburger buns at home, you have the advantage of enjoying them at their peak of freshness. Say goodbye to the stale, mass-produced buns that have been sitting on the store shelf for who knows how long.
- Quality Ingredients: With homemade hamburger buns, you have complete control over the ingredients. You can choose the finest flour, select organic or locally sourced ingredients, and avoid unnecessary additives or preservatives. By using quality ingredients, you can ensure that your buns are healthier and more flavorful than their store-bought counterparts.
- Customization: Homemade buns allow you to personalize your burger experience. You can experiment with different flavors and textures, adding a touch of garlic, herbs, or even cheese to the dough. Tailor the buns to suit your preferences and create a truly unique burger masterpiece.
- Texture and Taste: Homemade buns have a distinct advantage when it comes to texture and taste. The softness, pillowy interior, and slightly crisp exterior of freshly baked buns elevate the overall burger-eating experience. They provide the perfect balance, allowing the flavors of your fillings to shine while still providing a satisfying bite.
- Pride and Satisfaction: There’s a sense of accomplishment and pride that comes from making something from scratch. When you serve homemade hamburger buns to your family and friends, you can proudly say that you put in the effort to create a truly exceptional meal. The smiles and compliments you receive will be worth every minute spent in the kitchen.
- Unleash Your Creativity: Making your own hamburger buns opens up a world of culinary creativity. You can experiment with different shapes, sizes, and toppings. Whether you prefer sesame seeds, poppy seeds, or a dusting of flour, the possibilities are endless. Let your imagination run wild and take your burger game to new heights!
Don’t settle for ordinary when you can have extraordinary. Embrace the joy of homemade hamburger buns and elevate your burger experience to a whole new level. Give yourself the gift of freshness, quality, customization, and culinary pride. Start making your own buns today and savor the difference!

My favorite hamburger bun
When I watched my grandmother make this recipe, I was skeptical. Her bread usually had a long rise time, but this one takes just ten minutes. She told me to “be patient and let the buns rise.” The result was possibly the best hamburger bun I have tasted.
Hamburger Buns Made Easy
This recipe starts like most bread recipes. You mix yeast with warm water, add some sugar, and add some oil. It’s the same bread dough concept; feed the yeast the sugar, and it starts creating gas. The foamy brew means the yeast is working. Add some flour and start kneading–it’s my favorite part. Shape into 12 pieces, roll into a ball, and place on a greased baking sheet. Put your feet up for ten minutes and let the bread dough rise. Give them an egg wash if you like; you can sprinkle them with sesame seeds or leave them naked. Slide into a preheated oven and bake.
Ingredients
Prep Time: 20 minutes
Rise Time: 1 hour 5 minutes
Baking Time: 10-12 minutes Yields: 12 buns
Ingredients:
- 1 cup (240 ml) milk
- 1/2 cup (120 ml) water
- 1/4 cup (56.7 grams) butter
- 4 1/2 cups (562.5 grams) all-purpose flour
- 1 (0.25 ounce) package instant yeast
- 2 tablespoons (25 grams) white sugar
- 1 1/2 teaspoons (7.5 grams) salt
- 1 egg
How to Make Homemade Hamburger Buns
-
- Preheat the oven to 400 degrees Fahrenheit (200 degrees Celsius). Grease a baking sheet or line it with parchment paper.
- In a small saucepan, heat the milk, water, and butter until very warm, about 120 degrees Fahrenheit (50 degrees Celsius).
- In a large bowl, mix 1 3/4 cups of flour, instant yeast, sugar, and salt.
- Pour the warm milk mixture into the flour mixture, and then mix in the egg.
- Gradually stir in the remaining flour, 1/2 cup at a time, kneading well after each addition.
- Turn the dough out onto a lightly floured surface and knead until smooth and elastic, about 8 minutes.
- Divide the dough into 12 equal pieces. Shape each piece into a smooth ball and flatten slightly. Place the buns on the prepared baking sheet.
- Cover the buns and let them rise for 30 to 35 minutes, until they have doubled in size.
- Optional: Brush the buns with egg wash for a shiny finish.
- Bake the buns on the center rack of the preheated oven for 10 to 12 minutes, or until they turn golden brown.
- Remove the buns from the oven and let them cool on a wire rack.
For Hot Dog Buns:
Shape each piece into a 6×4 inch rectangle. Starting with the longer side, roll up tightly, and pinch edges and ends to seal. Let rise for about 20 to 25 minutes. Bake as above. These buns are pretty big. I usually make 16 instead of 12.


TIPS:
To ensure the best homemade hamburger buns, consider the following tips:
- Measure Accurately: Baking is a precise science, so it’s crucial to measure your ingredients accurately. Use a kitchen scale or measuring cups and spoons to ensure you add the right amount of flour, liquids, yeast, and other ingredients specified in the recipe. This will help maintain the proper balance of flavors and textures in your buns.
- Knead the Dough Well: Properly kneading the dough helps develop gluten, which gives the buns their structure and elasticity. Knead the dough until it becomes smooth, elastic, and springs back when gently pressed. This process typically takes around 8-10 minutes by hand or 4-5 minutes with a stand mixer.
- Allow Sufficient Rise Time: Yeast needs time to work its magic and leaven the dough. Follow the recommended rise times in your recipe and ensure the dough doubles in size during the first rise. Be patient and avoid rushing the process, as adequate rising time contributes to the light and fluffy texture of the buns.
- Proper Proofing: When shaping the buns, make sure to give them enough space on the baking sheet to expand during the second proofing or rising. Allow them to rise until they’ve noticeably puffed up and become slightly airy to the touch. This step ensures that the buns maintain their shape and texture during baking.
- Bake at the Right Temperature: Preheat your oven to the temperature specified in the recipe and ensure it reaches the desired temperature before placing the buns inside. Baking at the correct temperature helps the buns rise properly, develop a golden crust, and cook evenly.
- Test for Doneness: To determine if the buns are fully baked, gently tap the bottom of one bun with your finger. If it sounds hollow, it’s a good indication that they are done. Alternatively, use an instant-read thermometer to check that the internal temperature of the buns reaches around 190°F (88°C).
- Cool and Store Properly: Allow the baked buns to cool completely on a wire rack before storing or serving. This helps them retain their structure and prevents them from becoming soggy. Follow the storage tips mentioned earlier to ensure your homemade hamburger buns stay fresh and delicious.
By following these tips, you’ll be well on your way to achieving the best homemade hamburger buns that are flavorful, tender, and satisfying. Enjoy the process and savor the delicious results!
Gourmet Additions:
Elevate Your Homemade Hamburger Buns with Gourmet Additions!
- Seeds and Nuts: Give your buns a delightful crunch and added flavor by incorporating various seeds and nuts. Sprinkle sesame seeds, poppy seeds, or toasted sesame seeds on top of your buns before baking. You can also add chopped walnuts, pecans, or sunflower seeds to the dough for a unique twist.
- Herbs and Spices: Infuse your buns with aromatic herbs and spices to elevate their taste. Consider adding minced garlic, dried oregano, rosemary, thyme, or even a hint of smoked paprika to the dough. These additions will impart a fragrant and savory note to your buns.
- Cheese Lover’s Delight: If you’re a cheese enthusiast, take your homemade buns to the next level by incorporating grated or crumbled cheese into the dough. Cheddar, Parmesan, Gruyère, or blue cheese can add a rich and savory element. You can also sprinkle a little extra cheese on top of the buns before baking for a golden and cheesy crust.
- Sweet and Savory Contrasts: Create a delightful balance of flavors by adding a touch of sweetness to your buns. Brush the tops with melted butter and a sprinkle of sugar or honey for a subtly sweet glaze. Alternatively, you can experiment with a touch of cinnamon, nutmeg, or a hint of maple syrup in the dough for a unique sweet-savory fusion.
- Herb Butter Brush: After your buns come out of the oven, take them to gourmet territory by brushing them with herb-infused butter. Melt butter and mix in chopped fresh herbs like parsley, basil, or chives. Brush the tops of the buns with this fragrant butter mixture for an enticing aroma and an extra layer of flavor.
- Balsamic Glaze or Reduction: Drizzle a balsamic glaze or reduction over the top of your burger buns for a sophisticated tangy-sweet twist. The richness and complexity of balsamic vinegar will add depth to your burger experience.
Remember, the key is to experiment and tailor the gourmet additions to your personal taste preferences. Get creative, have fun, and let your homemade hamburger buns become the canvas for extraordinary flavors that will take your burger creations to new heights!
How Do You Store Homemade Hamburger Buns?
To ensure your homemade hamburger buns stay fresh and delicious, follow these storage tips:
- Cool Completely: Allow your homemade hamburger buns to cool completely before storing them. If you store them while still warm, condensation may form inside the packaging, making the buns soggy.
- Wrap or Seal: Once the buns have cooled, individually wrap each bun tightly in plastic wrap or place them in a resealable plastic bag. This helps retain moisture and prevents them from drying out.
- Store at Room Temperature: Homemade hamburger buns are best stored at room temperature, away from direct sunlight and heat sources. Avoid refrigerating the buns, as it can accelerate staling.
- Consume Within a Few Days: For optimal freshness and flavor, consume the buns within 2-3 days. Over time, homemade buns may start to lose their softness and texture.
- Freeze for Longer Storage: If you need to store the buns for a longer period, freezing is a great option. Wrap each bun individually in plastic wrap, then place them in a freezer-safe bag or airtight container. Frozen buns can last for up to 2-3 months. To thaw, simply leave them at room temperature or gently warm them in an oven or microwave.
- Refreshing Stale Buns: If your homemade buns have become slightly stale, you can refresh them by lightly toasting or warming them in the oven. This will help restore some of the freshness and make them enjoyable again.
Remember, homemade hamburger buns are best enjoyed when they’re at their freshest. So, if possible, try to bake them just before you’re ready to serve your burgers for the ultimate taste and texture experience.
FAQs for this Recipe:
Here are some frequently asked questions (FAQs) about the homemade hamburger bun recipe:
- Can I use a bread machine to make the dough? Yes, you can use a bread machine to make the dough. Simply add the ingredients to the bread machine according to the manufacturer’s instructions for making dough, and let it knead and rise the dough for you. Once the dough is ready, proceed with shaping and baking the buns as instructed in the recipe.
- Can I use a different type of flour? While the recipe calls for all-purpose flour, you can experiment with different types of flour if you prefer. Whole wheat flour, bread flour, or a combination of flours can be used. Keep in mind that using different types of flour may yield slightly different results in terms of texture and flavor.
- Can I substitute active dry yeast for instant yeast? Yes, you can substitute active dry yeast for instant yeast in this recipe. However, you will need to activate the active dry yeast before using it. To do so, dissolve the yeast and sugar in the warm milk and water mixture and let it sit for about 5-10 minutes until it becomes frothy. Then proceed with the recipe as directed.
- Can I make the dough in advance and refrigerate it overnight? Yes, you can prepare the dough in advance and refrigerate it overnight for convenience. After kneading the dough until smooth and elastic, place it in a greased bowl, cover it tightly with plastic wrap or a damp cloth, and refrigerate it. The next day, remove the dough from the refrigerator, let it come to room temperature, and proceed with shaping and baking the buns.
- Can I freeze the baked hamburger buns? Yes, you can freeze the baked hamburger buns. Allow them to cool completely, then place them in airtight freezer bags or containers. They can be stored in the freezer for up to 3 months. To thaw, simply remove the desired number of buns from the freezer and let them thaw at room temperature or warm them up in a toaster or oven.
- Can I make smaller buns for sliders? Absolutely! If you want smaller buns for sliders, you can divide the dough into smaller pieces and adjust the baking time accordingly. Keep an eye on the buns while baking to ensure they don’t overcook or burn.
- Can I add sesame seeds or other toppings to the buns? Yes, you can add sesame seeds or other toppings to the buns for added flavor and texture. After shaping the dough into balls, you can brush the tops with beaten egg and sprinkle sesame seeds or any other desired toppings before baking.
- Can I make hot dog buns with this recipe? Yes, you can make hot dog buns using this recipe. Follow the instructions for shaping the dough into rectangles, rolling them up tightly, and pinching the edges and ends to seal. Let them rise and bake as directed in the recipe. Note that the baking time may vary slightly depending on the size and thickness of the hot dog buns.
Remember to adjust the recipe quantities and baking time if you decide to make more or fewer buns. Enjoy your homemade hamburger or hot dog buns!
Final Thoughts:
In this article, we discussed the merits of homemade hamburger buns over store-bought ones. We highlighted several reasons why making your own buns is worthwhile, including the freshness and quality of ingredients, customization options, superior texture and taste, the sense of pride and satisfaction in homemade creations, and the opportunity to unleash your culinary creativity. We also provided storage tips, emphasizing the importance of allowing the buns to cool completely before wrapping them tightly in plastic wrap or placing them in resealable bags. Storing them at room temperature and consuming them within a few days ensures optimal freshness. Freezing the buns is also an option for longer storage.
Furthermore, we explored gourmet additions to elevate homemade hamburger buns. Suggestions included incorporating seeds and nuts for added crunch, using herbs and spices to infuse aromatic flavors, incorporating grated or crumbled cheese, adding a touch of sweetness, brushing the buns with herb-infused butter, and drizzling balsamic glaze or reduction for a tangy-sweet twist. We encouraged experimentation and personalization to create unique flavors.
Lastly, we provided tips for achieving the best homemade hamburger buns. These tips included measuring ingredients accurately, kneading the dough well, allowing sufficient rise time, proper proofing, baking at the correct temperature, testing for doneness, and ensuring proper cooling and storage.
By following these guidelines, you’ll be equipped to make delicious, homemade hamburger buns that surpass store-bought options in freshness, flavor, and customization. Enjoy the satisfaction of creating your own gourmet buns and delight in the culinary experience they bring to your burgers!
Homemade Hamburger Buns
Create irresistible homemade hamburger buns with this easy recipe. Soft, fluffy, and golden brown, they're perfect for your next BBQ!
Ingredients
- 1 cup (240 ml) milk
- 1/2 cup (120 ml) water
- 1/4 cup (56.7 grams) butter
- 4 1/2 cups (562.5 grams) all-purpose flour
- 1 (0.25 ounce) package instant yeast
- 2 tablespoons (25 grams) white sugar
- 1 1/2 teaspoons (7.5 grams) salt
- 1 egg
Instructions
- Preheat oven to 400-degrees.
- Grease the baking sheet or line it with parchment paper.
- Heat milk, water, and butter in a small saucepan until very warm, 120 degrees F (50 degrees C).
- Mix 1 3/4 cup flour, yeast, sugar, and salt in a large bowl.
- Add the yeast and milk mixture into the flour mixture, and then mix in the egg.
- Gently stir in the remaining flour, 1/2 cup at a time, kneading well after each addition.
- When the dough has pulled together, turn it out onto a lightly floured surface, and knead until smooth and elastic, about 8 minutes.
- Divide dough into 12 equal pieces.
- Shape into smooth balls, and place on a greased baking sheet. Flatten slightly.
- Cover, and let rise for 30 to 35 minutes.
- Optional: Brush with egg wash.
- Bake on the center rack of the preheated oven for 10 to 12 minutes, or until golden brown.
Nutrition Information:
Yield: 12 Serving Size: 1Amount Per Serving: Calories: 180Total Fat: 1gSaturated Fat: 0gTrans Fat: 0gUnsaturated Fat: 0gCholesterol: 16mgSodium: 7mgCarbohydrates: 37gFiber: 1gSugar: 1gProtein: 5g
The Nutritional Information may not be accurate. This website provides approximate nutrition information for convenience and as a courtesy only. Nutrition data is gathered primarily from the USDA Food Composition Database, whenever available, or otherwise other online calculators.