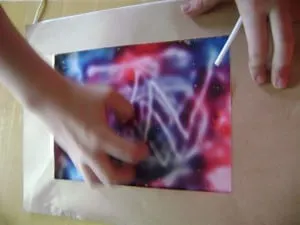
My kiddos are creative which means we go through paper like there’s no tomorrow. Here’s a project that will have your kiddos creating, without paper, without mess, just endless fun!
Here’s what you’ll need:
- Clear, top-loading report cover
- Finger Paint
- Water
- Clear packaging tape
- Construction paper or craft foam (optional)
Directions:
Open the top-loading report cover and add 1/8 tsp. of at least two different finger paint colors. We used three.
Add 1/8 tsp. of water to the top-loading report for all but one color. (i.e. if you use two colors, use 1/8 tsp. water. If you use three colors, use (2) 1/8 (or 1/4 tsp) water).
With as little air as possible inside, seal top loading report cover with clear packaging tape to keep all the fun inside.
Have child mix paint and water by pressing on the report cover until it is all well blended.
Add a frame to the report cover using craft foam or construction paper.
Kiddos use their fingers to draw designs into the paint, without mess. For added fun, secure or place magic writer over different colors of paper to make the design they draw that color.


