This Pop Top Can Party Favor Craft is easy and a ton of fun to make and give.
What is a Pop Top Can Party Favor?
Basically, the Pop Top Can Party Favor craft involves taking an empty tin can with a pop-top and re-purposing it into a gift container or party favor.
As the crafter, you will fill the empty can with gifts, candy, or favors and then reseal it, decorate it, and gift it.
As the recipient, it’s a fun gift that is intriguing and will leave them in awe wondering how you got the stuff inside. In short, a pop-top can party favor is fun!
What Do You Do with Them?
Here’s where the fun really begins. You can do so much with this pop-top can craft!
Use them as party favors:
Make a pop-top can party favor for each guest and set it on the table for them.
You can have everyone open it at a specific time during the party, or take one home.
You can use them as a game where one can has the “super” prize (like a gift card) and the others have candy.
Use them as party favors/decorations:
Use these party favors as decorations.
We once hosted an Alanis Morrissette album launch party and made pop-top can party favors with the outside as the label to add some fun.
Use the pop-top can as a balloon anchor and tie a helium balloon to the pop-top.


Use them as a unique gift container:
You can use any size can, the process remains the same for creating them.
Fill a can with body lotions, candles, gift cards, a photo, a note about a memory with a token from that memory, homemade goodies, jewelry (hello pop-prosal!).
My kiddos love using them as “Valentines” for their classroom and friends.
They also make really fun stocking stuffers.
Simply increase the size of the can for some clever wrapping options.
Fun for baby showers, Valentine’s Day, birthdays and bridal showers.


It will have the recipient wondering how you got it all in there, as the pop the top and see the contents.

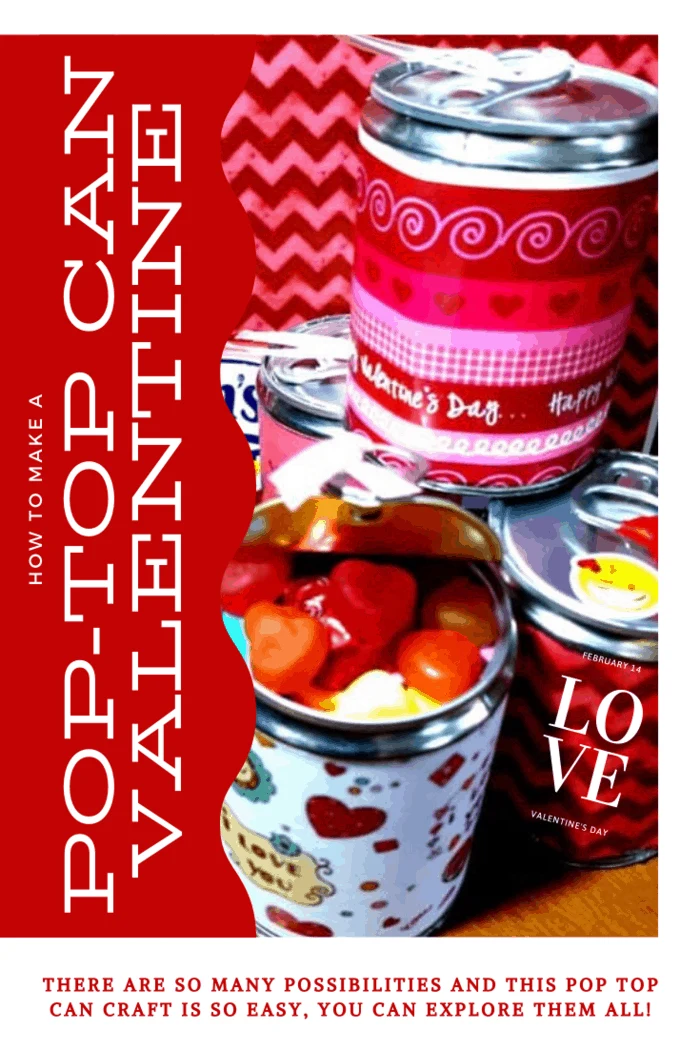
How to Make a Pop-Top Can
Pop Top Can Party Favor Supplies
Small pop-top can (I like the Del Monte individual Fruit sized best)
Patterned paper
Ribbon
Elmer’s glue
Craft glue or glue gun
Scissors
Can opener (One that doesn’t Crimp–safety opener*)
Fillers (shred, candy, small toys, gift card, etc.)
Something with some weight to it…like a book.
*Note: It is not recommended you use a regular can opener for this craft as it is frustrating. You can buy a safety can opener at Walmart, Target or Amazon.
Instructions
Using your can opener, open the bottom of the can-the non-pop-top end.
Use a safety can opener (this type of can opener removes the lid without cutting the metal–instead it breaks the seal of the lid and removes the lid with the lip around it still intact).
Remove Label. Clean the can out thoroughly and then let the can dry.
Trace label onto the backside of patterned paper

Cut out the patterned paper piece and apply glue to the backside of the print.


Glue the paper to the can


Place candies or filler items inside can.
Remember to put the items in the can upside down so that when the recipient opens the can right side up, the gifts will be as they are supposed to be.
Depending on how you want the gifts to come out of the can, you may want to tuck a little piece of tissue paper in the bottom and/or the top.


Fill can the rest of the way with shredded paper or Easter Grass


Place a line of glue around the edge of the bottom you removed with the safety opener.
Place lid on top of can and press–you may want to put a heavy object on top to secure until completely dry.


Once the lid is secure, decorate outside of the can.
We tied a ribbon to the top of the pop-top.


To open, simply pull up on the ribbon or the pop-top as you would normally open the can.


The result is a fun, creatively concealed treat!


This craft is brought to you by Welch’s Fruit Snacks, America’s Favorite Fruit Snack Brand!

Pop Top Party Favor Craft: Pop the Top to Reveal the Fun!
This pop top can craft is a clever way to fit. It looks complicated, but it is so easy and fun to make and give. Fill with candy and more!
Materials
- Small pop-top can (I like the Del Monte individual Fruit sized best)
- Patterned paper
- Ribbon
- Elmer's glue
- Craft glue or glue gun
- Scissors
- Can opener (One that doesn't Crimp--safety opener*)
- Fillers (shred, candy, small toys, gift card, etc.)
- Something with some weight to it...like a book.
Instructions
- Using your can opener, open the bottom of the can-the non-pop-top end.
- Use a safety can opener (this type of can opener removes the lid without cutting the metal–instead, it breaks the lid's seal and removes the lid with the lip around it still intact).
- Remove Label. Clean the can out thoroughly and then let the can dry.
- Trace the label onto the backside of the patterned paper
- Cut out the patterned paper piece and apply glue to the backside of the print.
- Glue the paper to the can and place candies or filler items inside can.
- Remember to put the items in the can upside down so that when the recipient opens the can right side up, the gifts will be as they are supposed to be.
- Depending on how you want the gifts to come out of the can, you may want to tuck a little piece of tissue paper in the bottom and/or the top.
- Fill the can the rest of the way with shredded paper or Easter Grass
- Place a glue line around the edge of the bottom you removed with the safety opener.
- Place lid on top of can and press--you may want to put a heavy object on top to secure until completely dry.
- Once the lid is secure, decorate the outside of the can.
- We tied a ribbon to the top of the pop-top.
- To open, simply pull up the ribbon or the pop-top as you would normally open the can.
- The result is a fun, creatively concealed treat!
Notes
*Note: It is not recommended you use a regular can opener for this craft, as it is frustrating. You can buy a safety can opener at Walmart, Target or Amazon.